aelf Playground
1. Introduction
aelf Playground is a sandbox for new developers who want to experience smart contract development with aelf without installing any tools on their local computer.
2. Setting up
No setup is needed. Simply visit aelf Playground in your browser.
3. Using aelf Playground
Create a New Project on aelf-playground
-
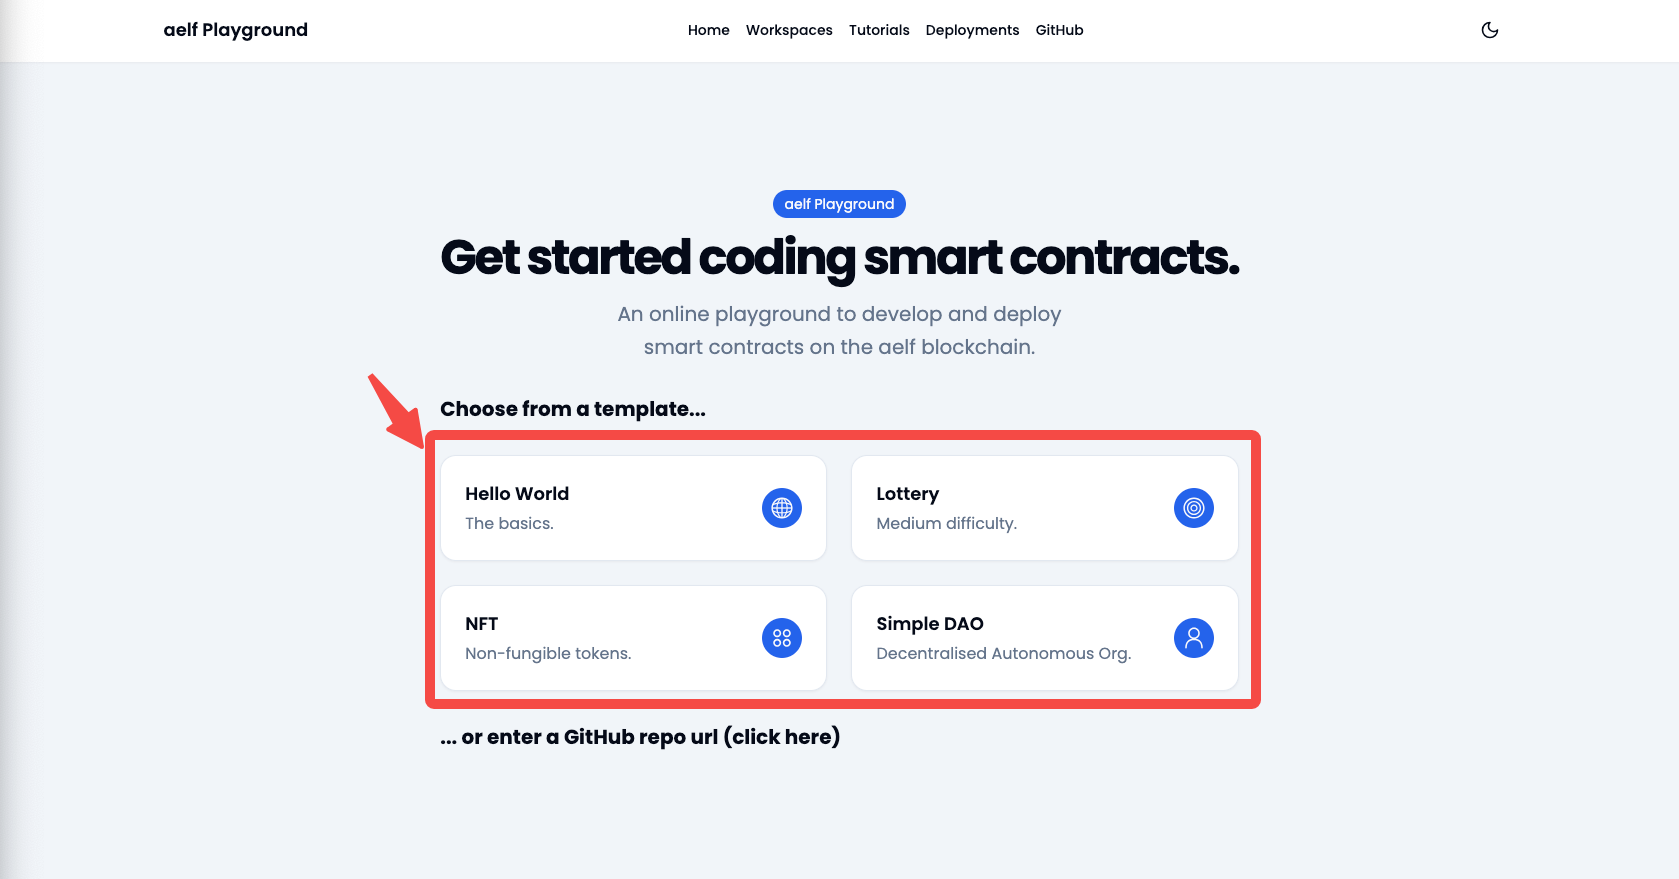
Click on one of the templates:
-
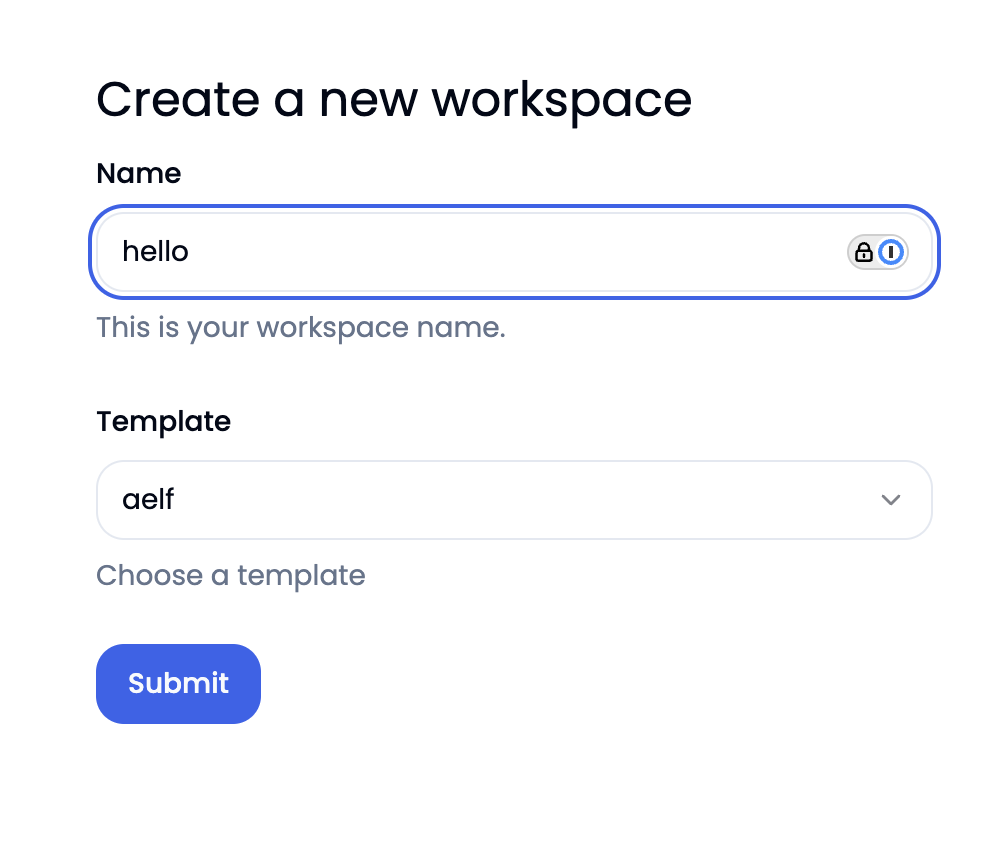
Enter a project name and click Submit.
-
After a short while, the workspace will load:
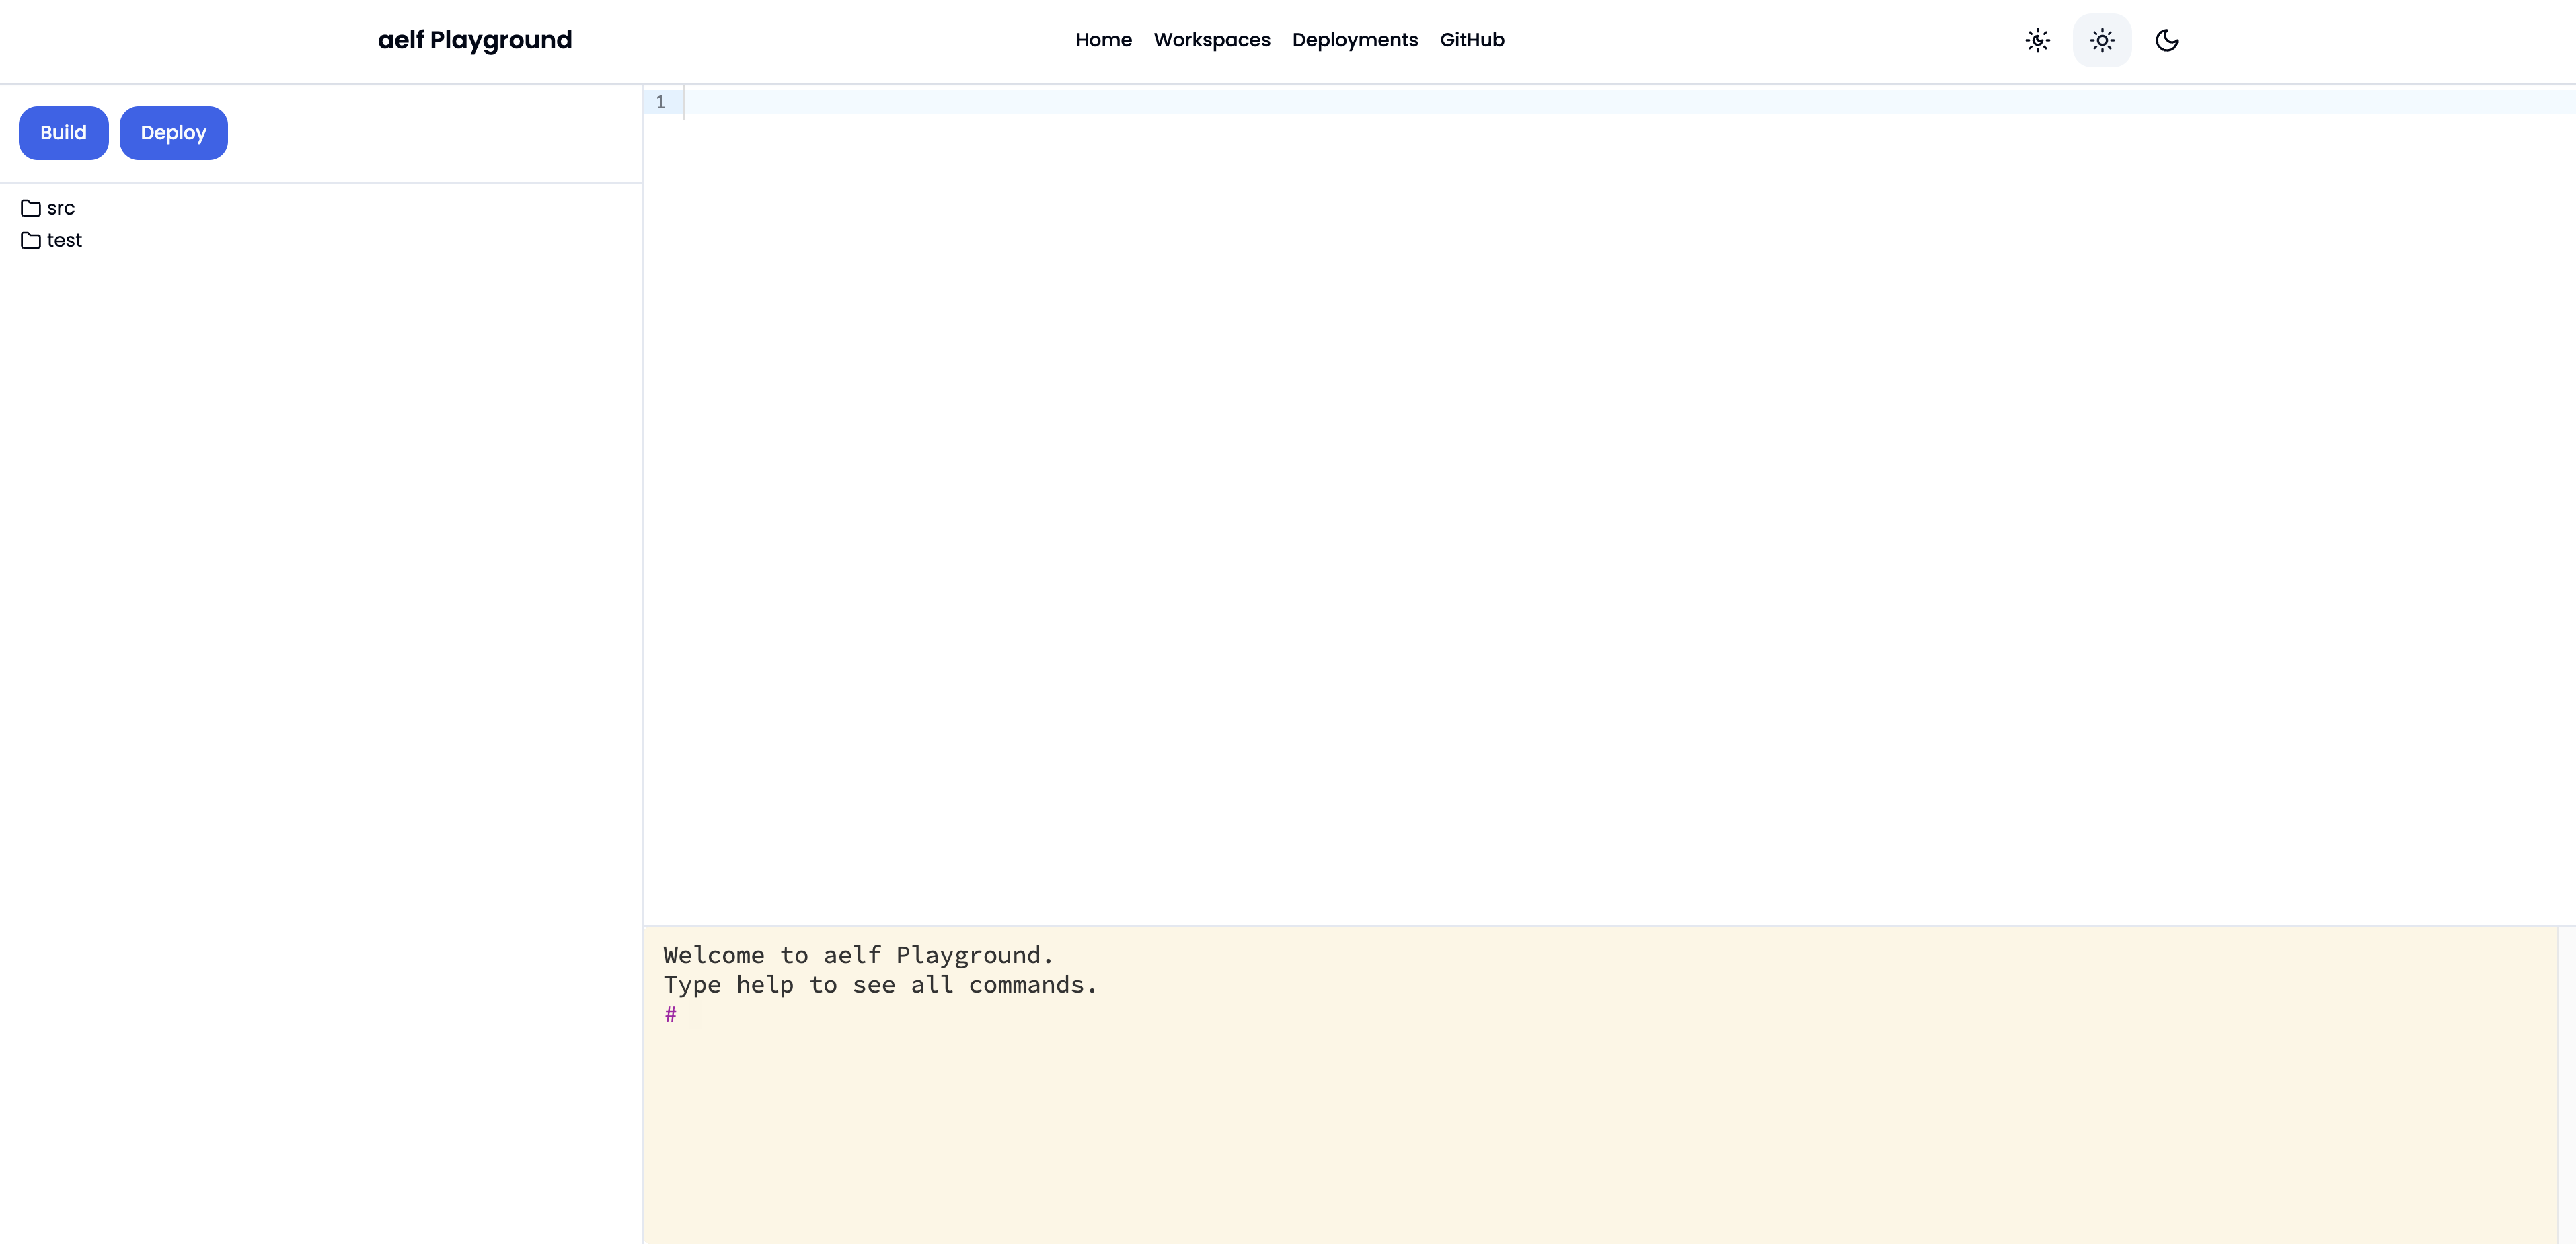
The interaction with the workspace project code inside src and test folders will be demonstated in the next steps. The next steps will cover writing and building the smart contract.
-
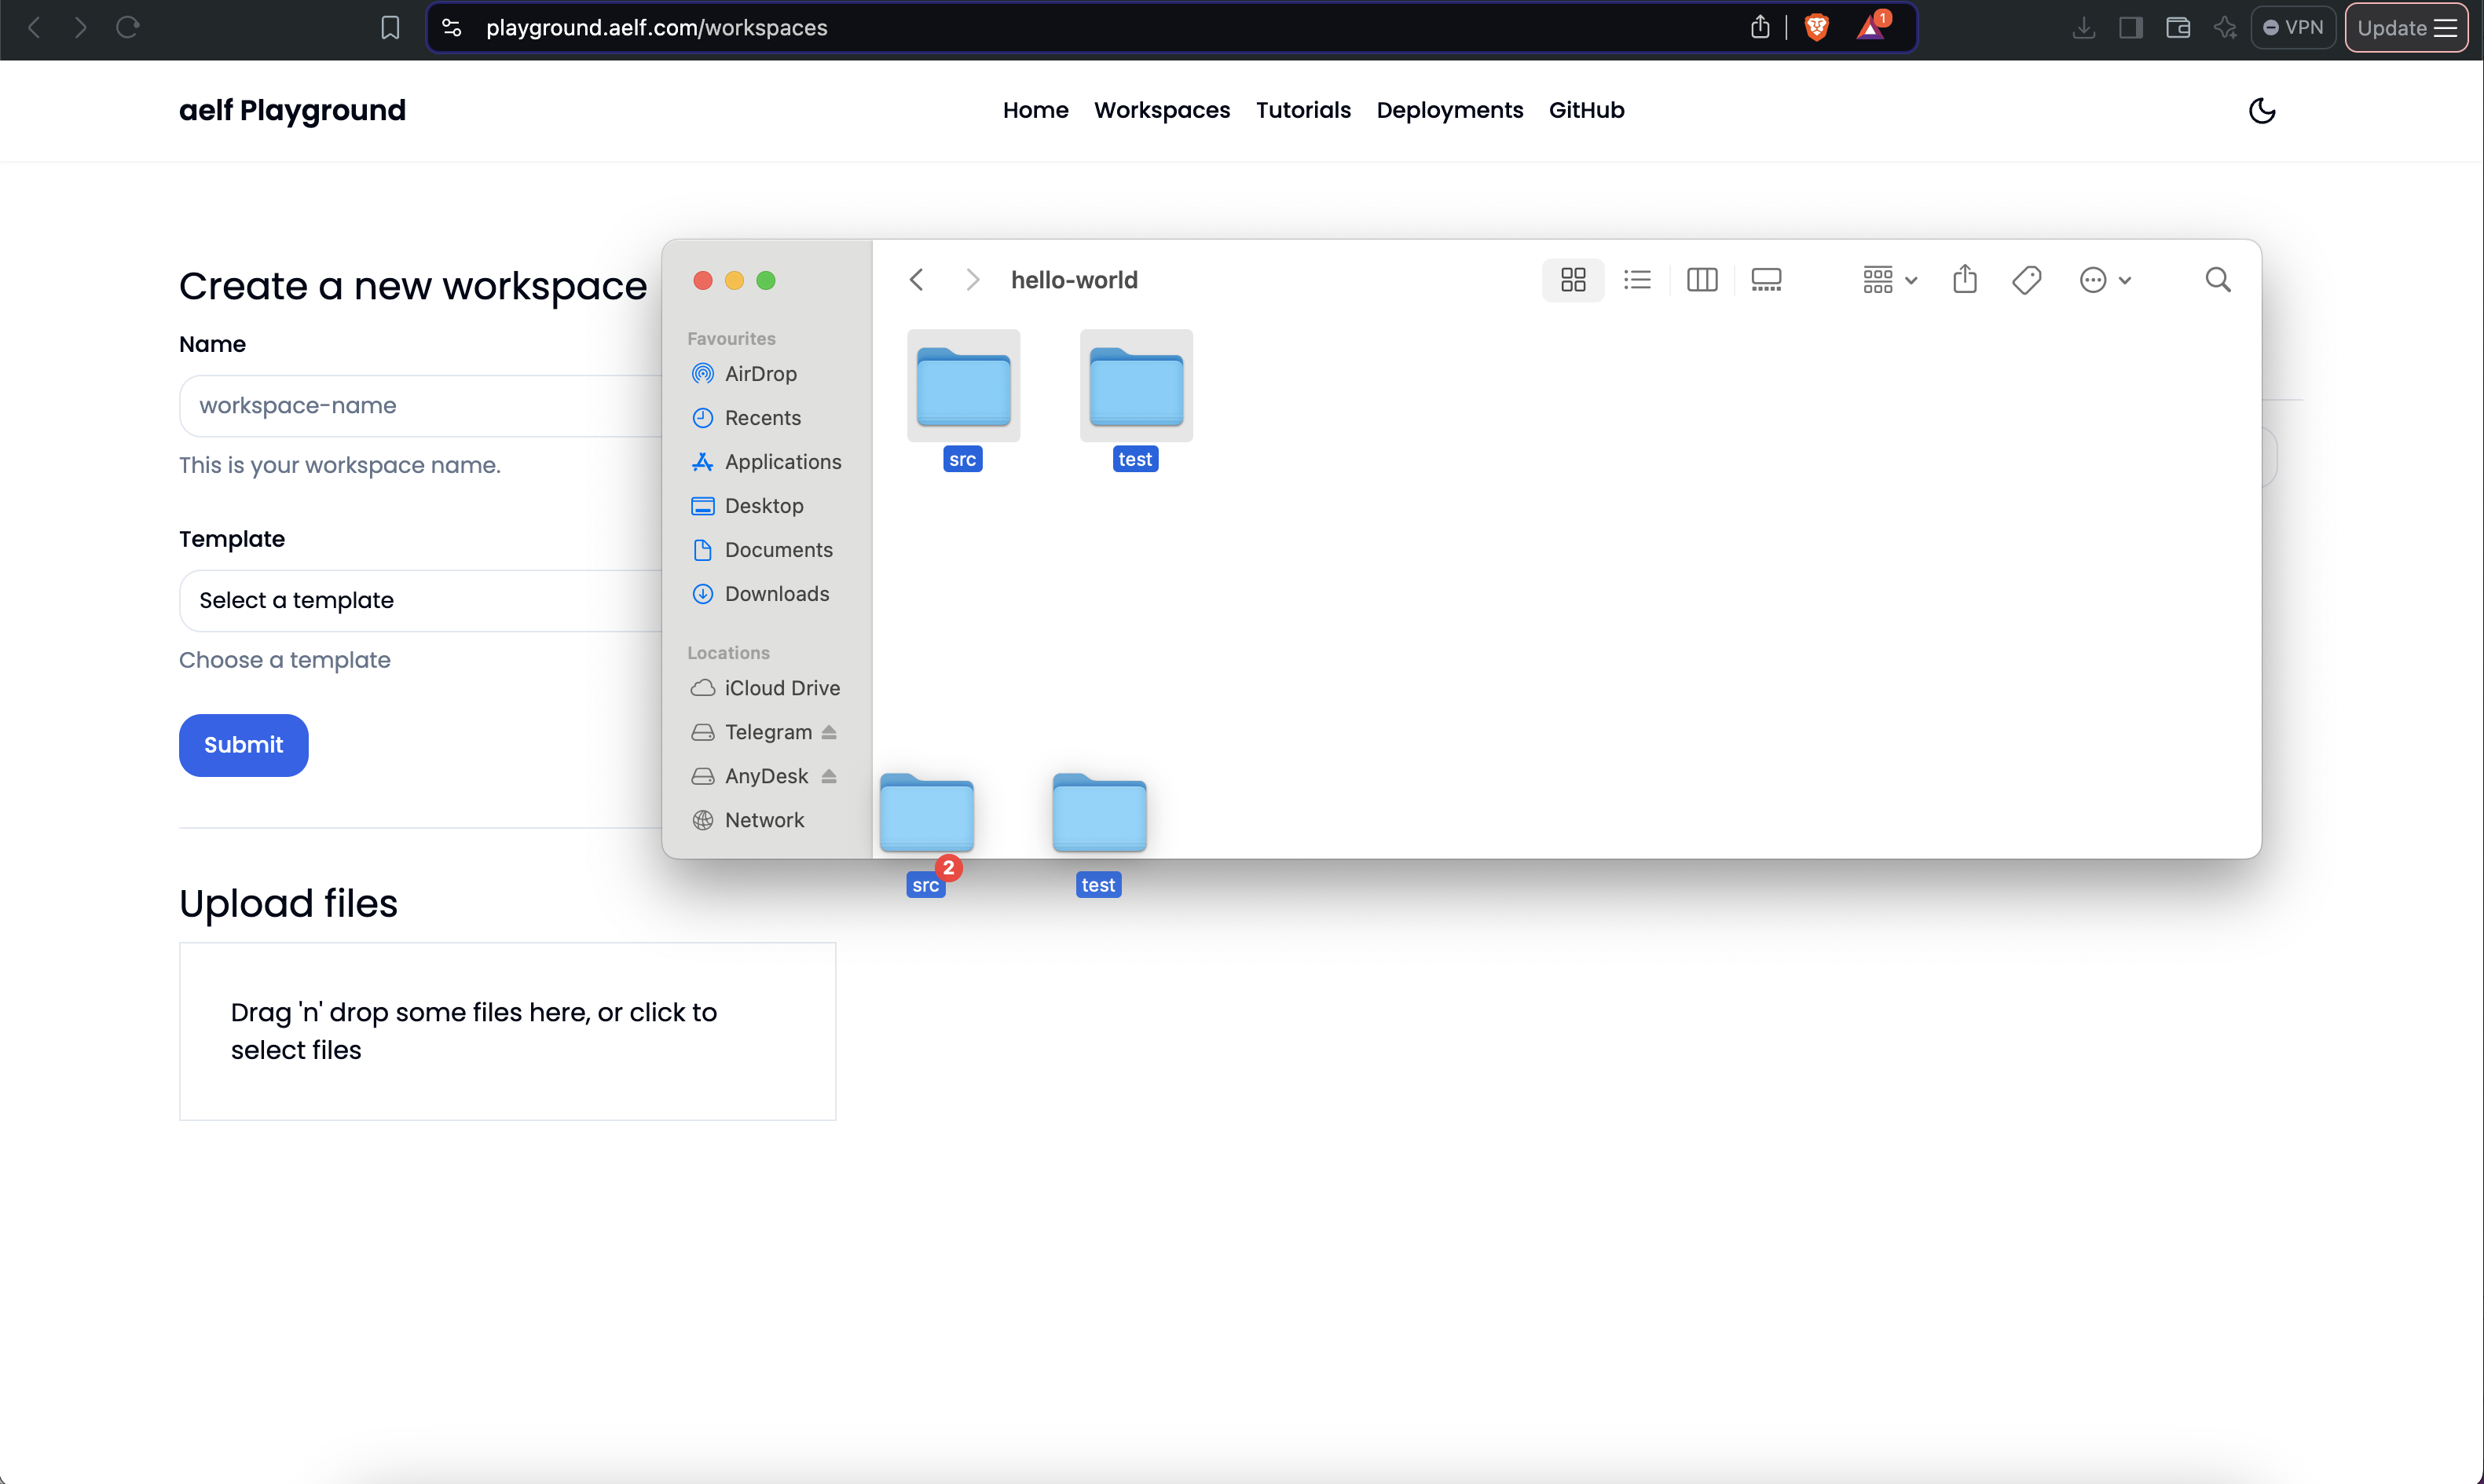
An existing template can also be used. Use the drag and drop feature to upload the local files. Upload files button can also be used select files from the local system.
-
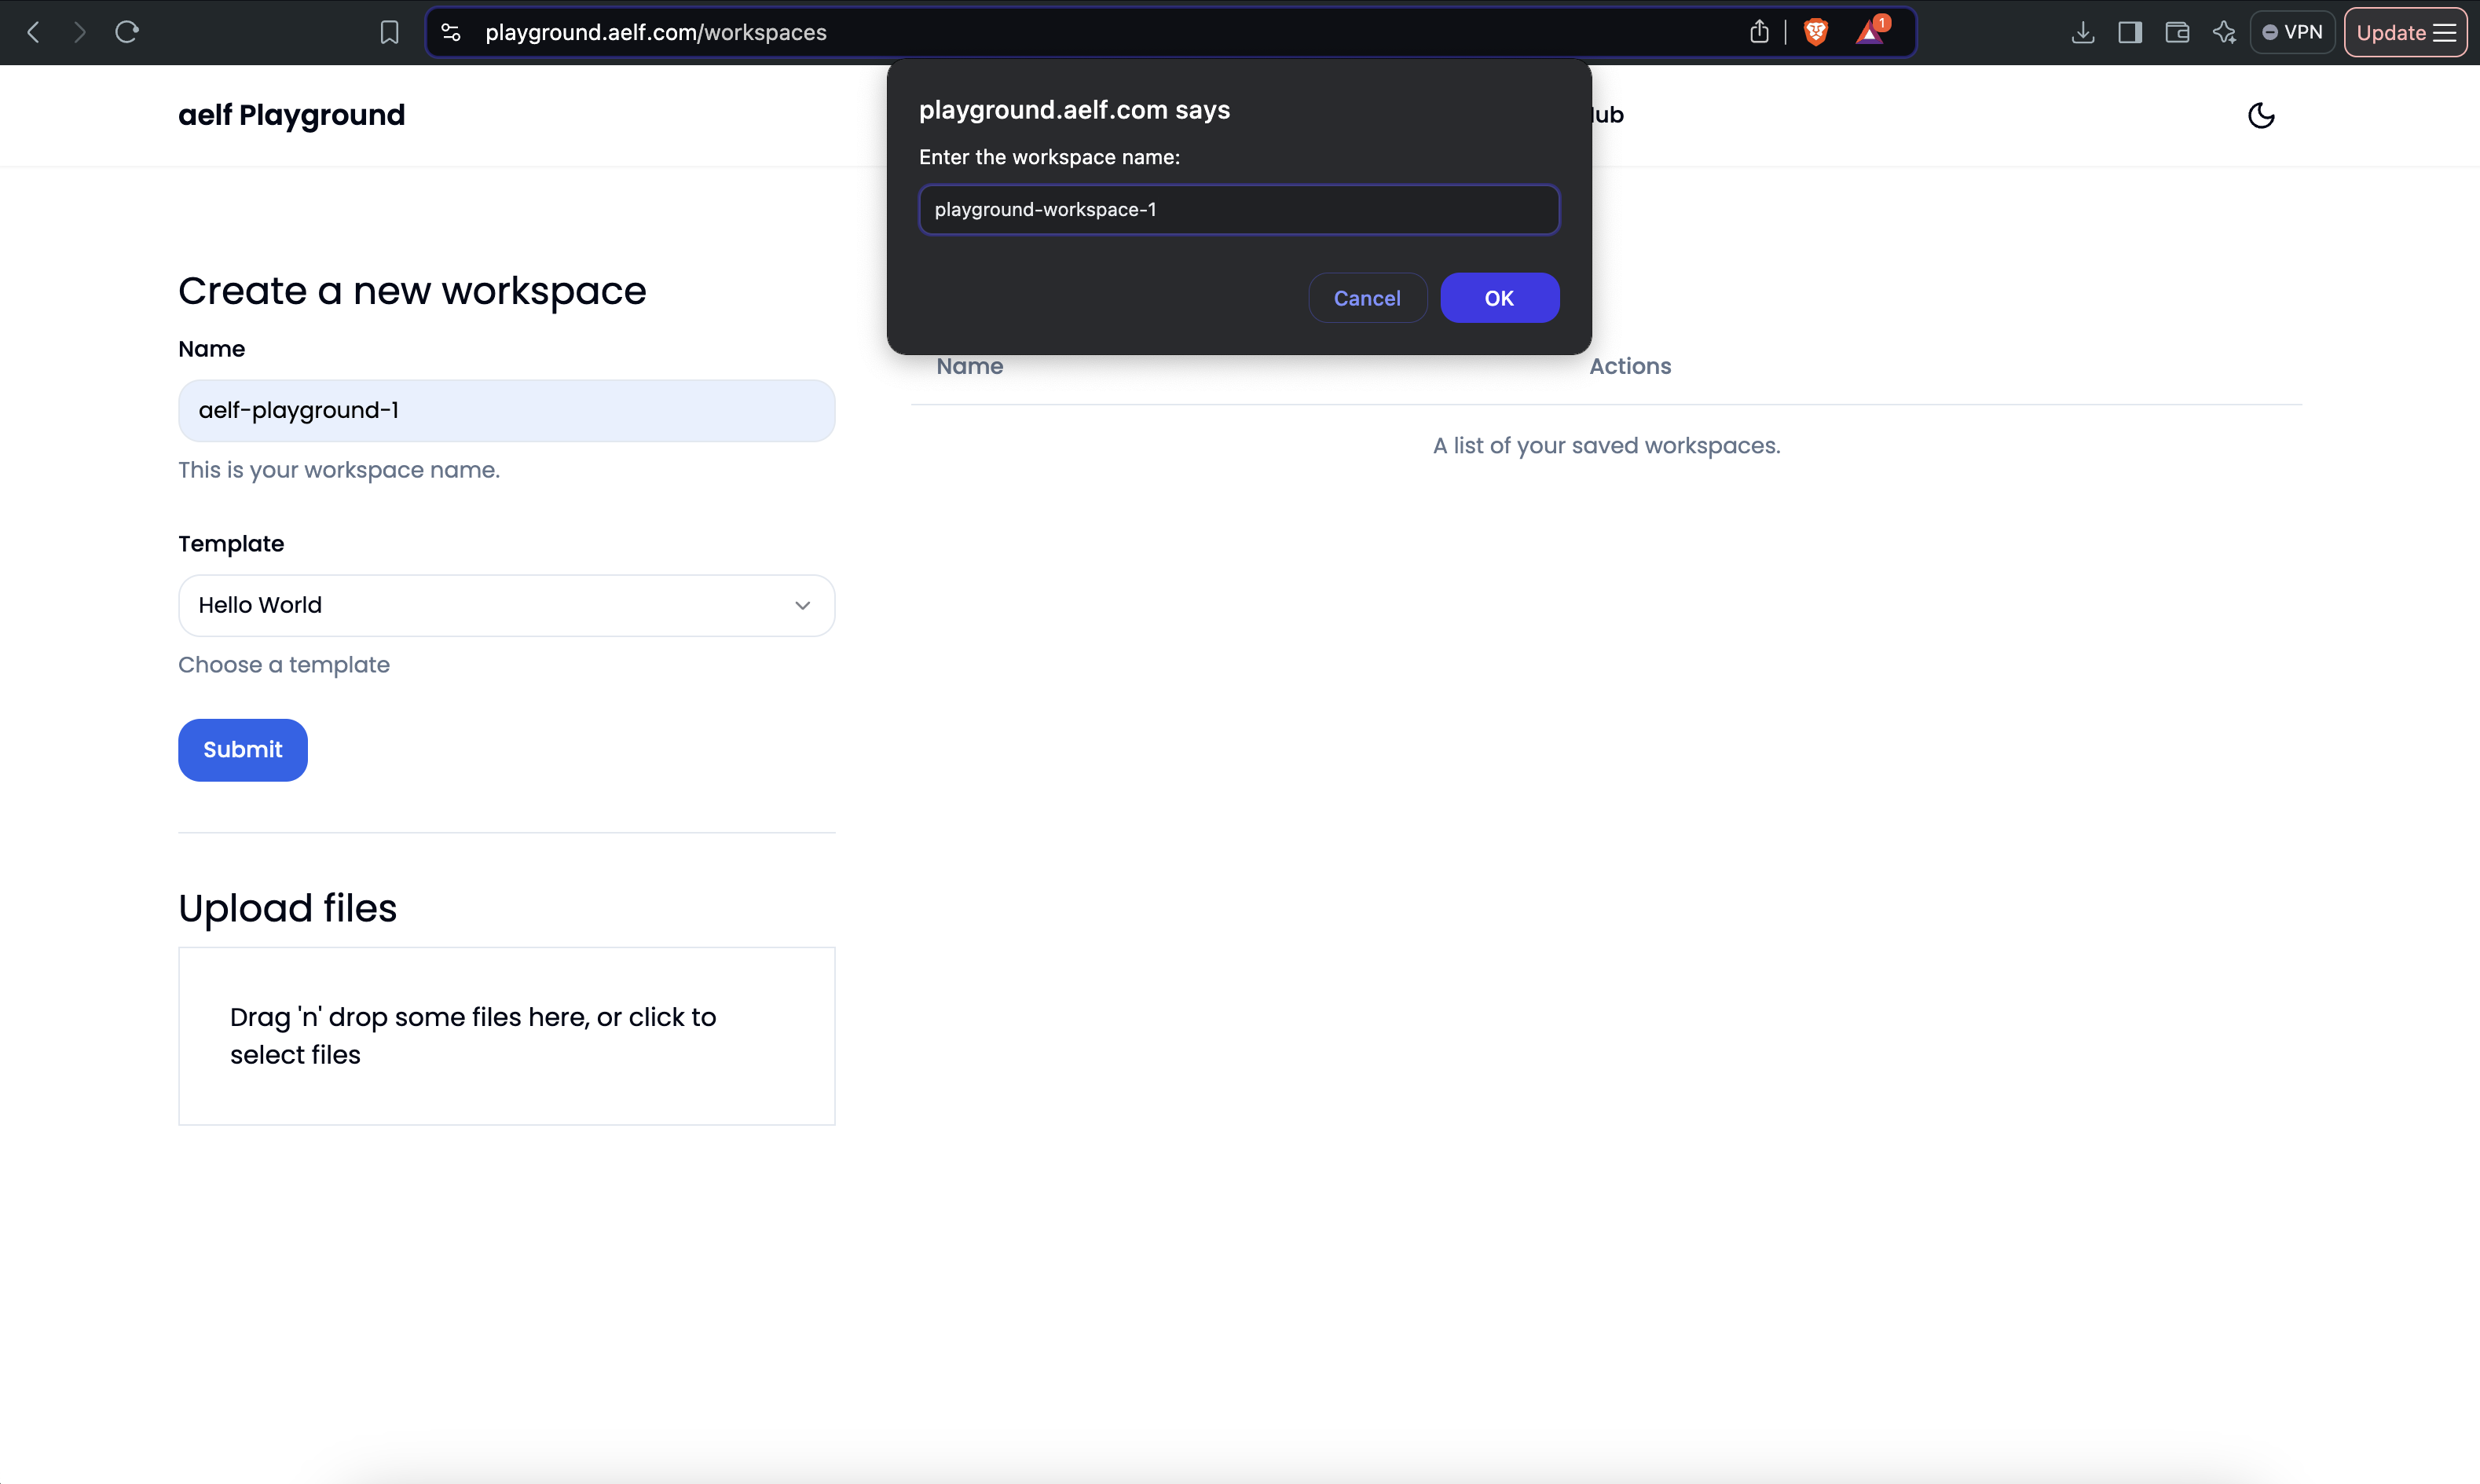
Enter the workspace name.
-
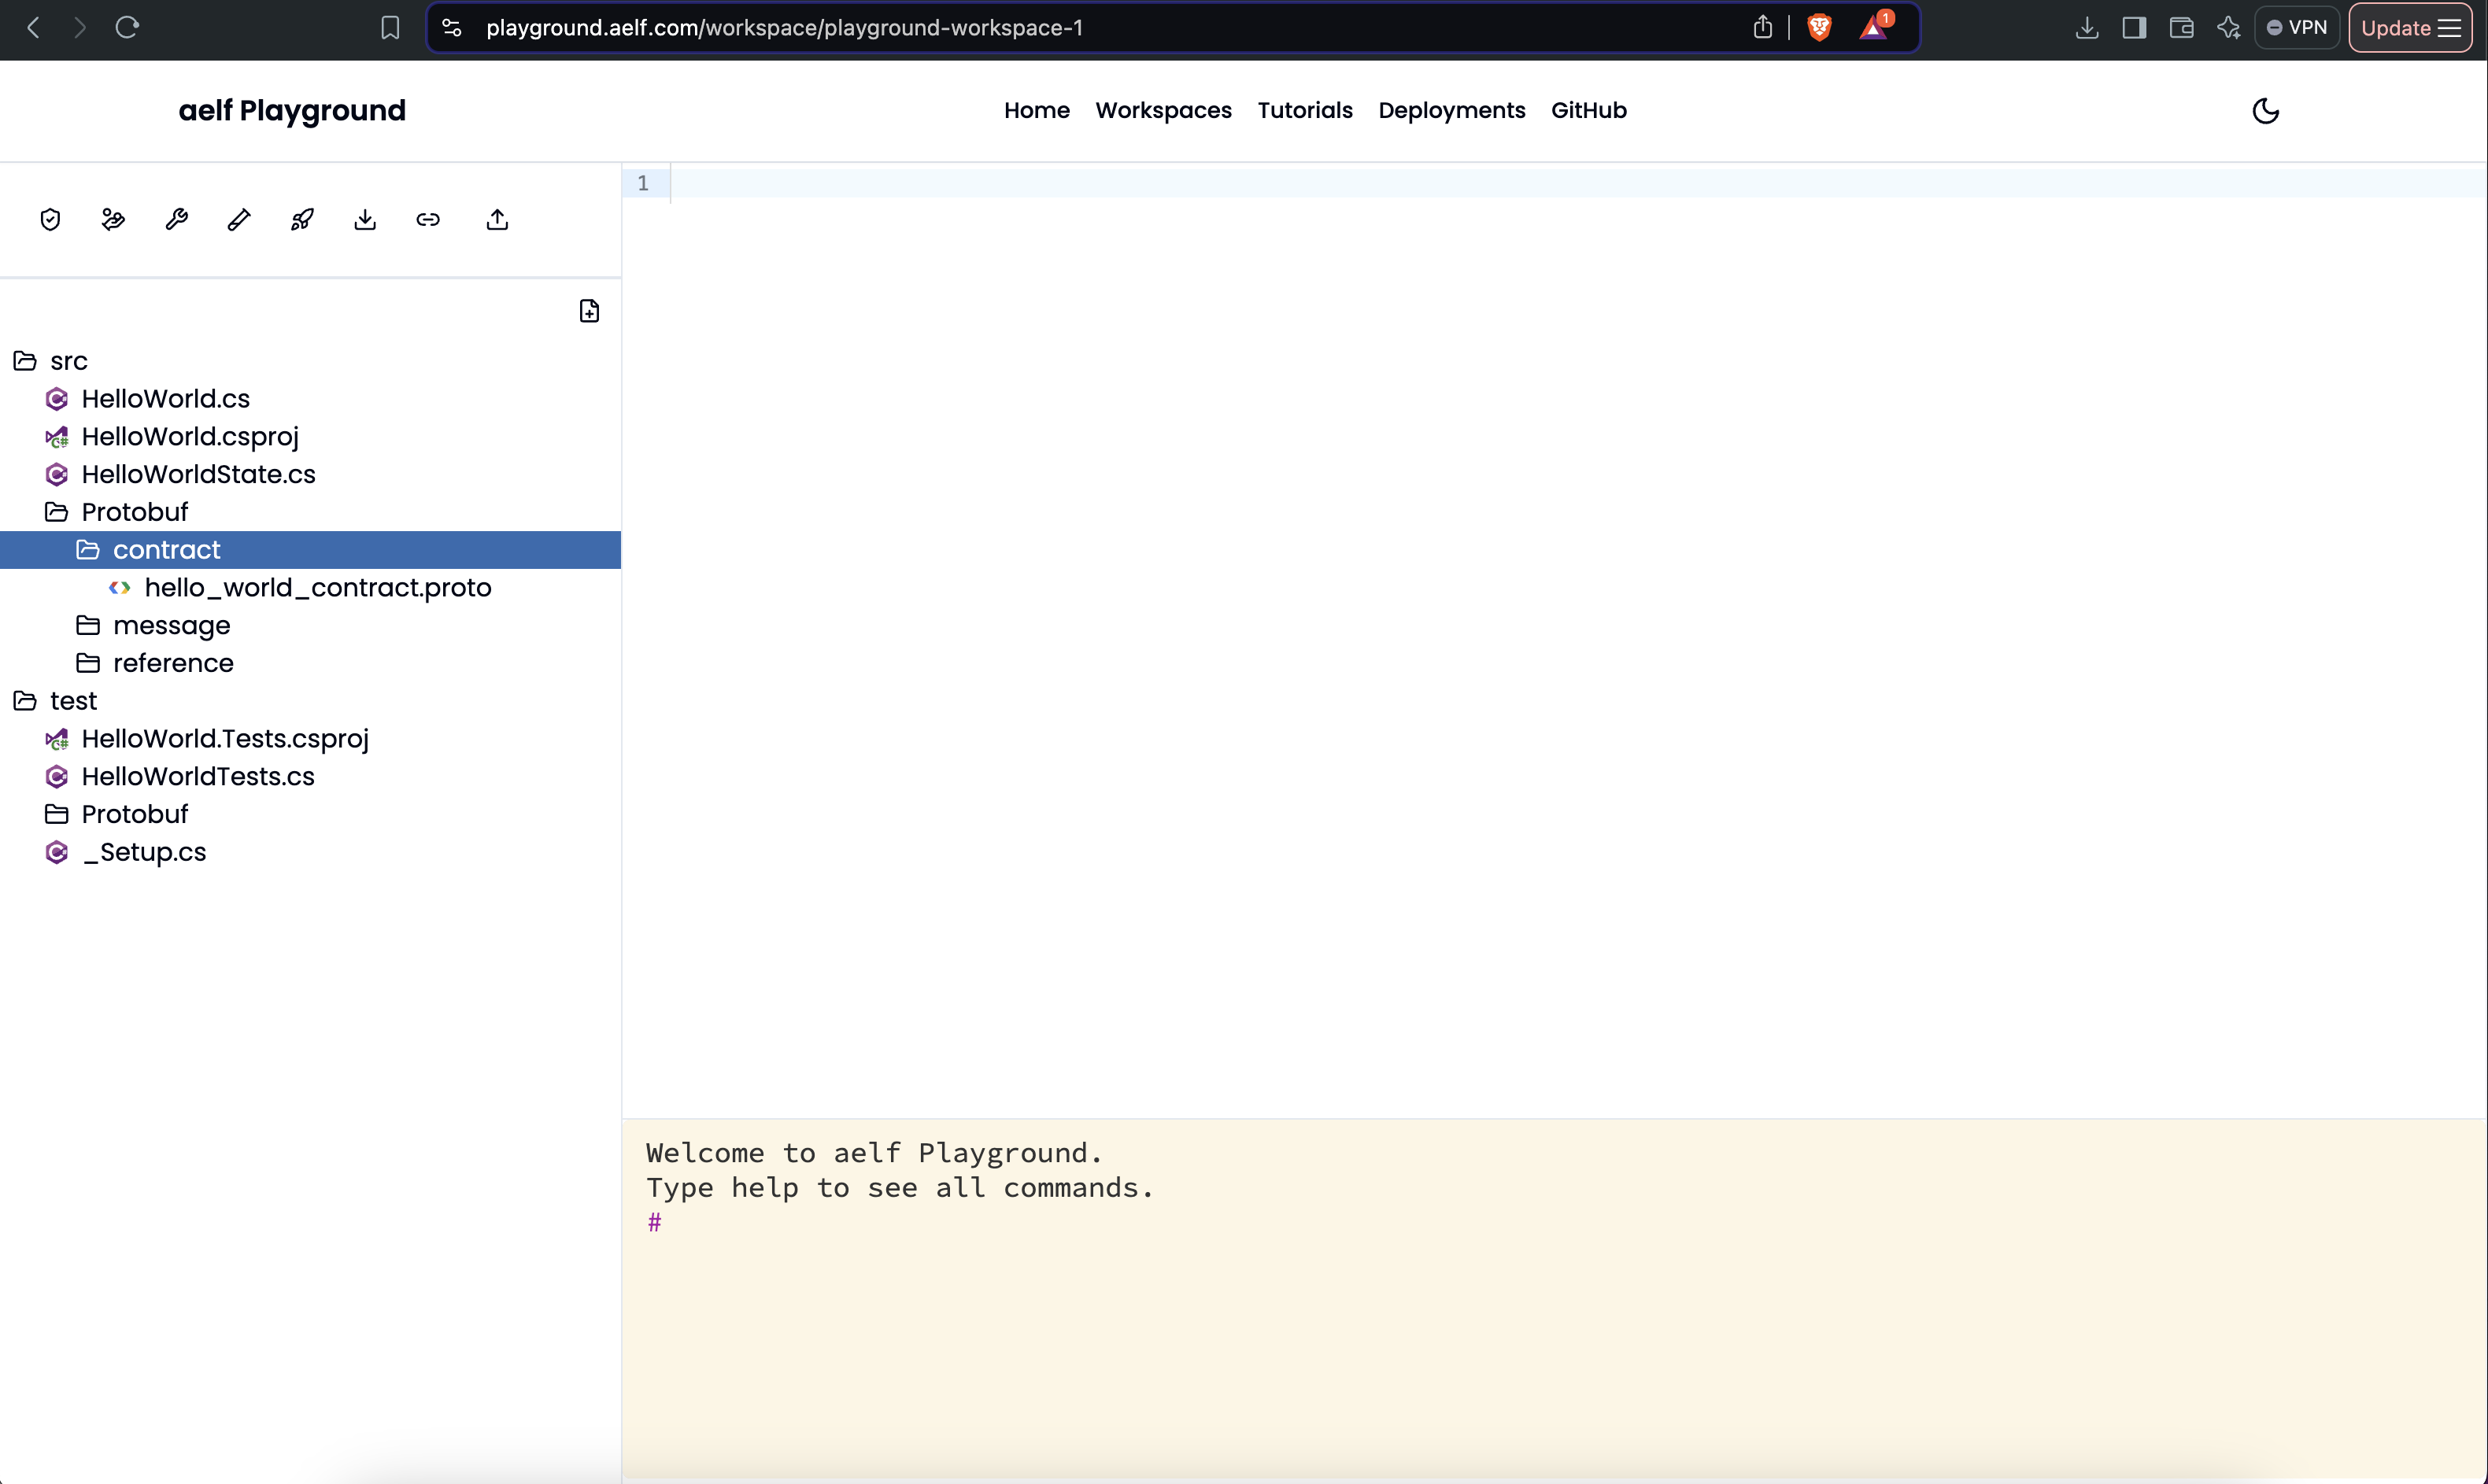
The new workspace will have src and test folders with the following file tree structure.
-
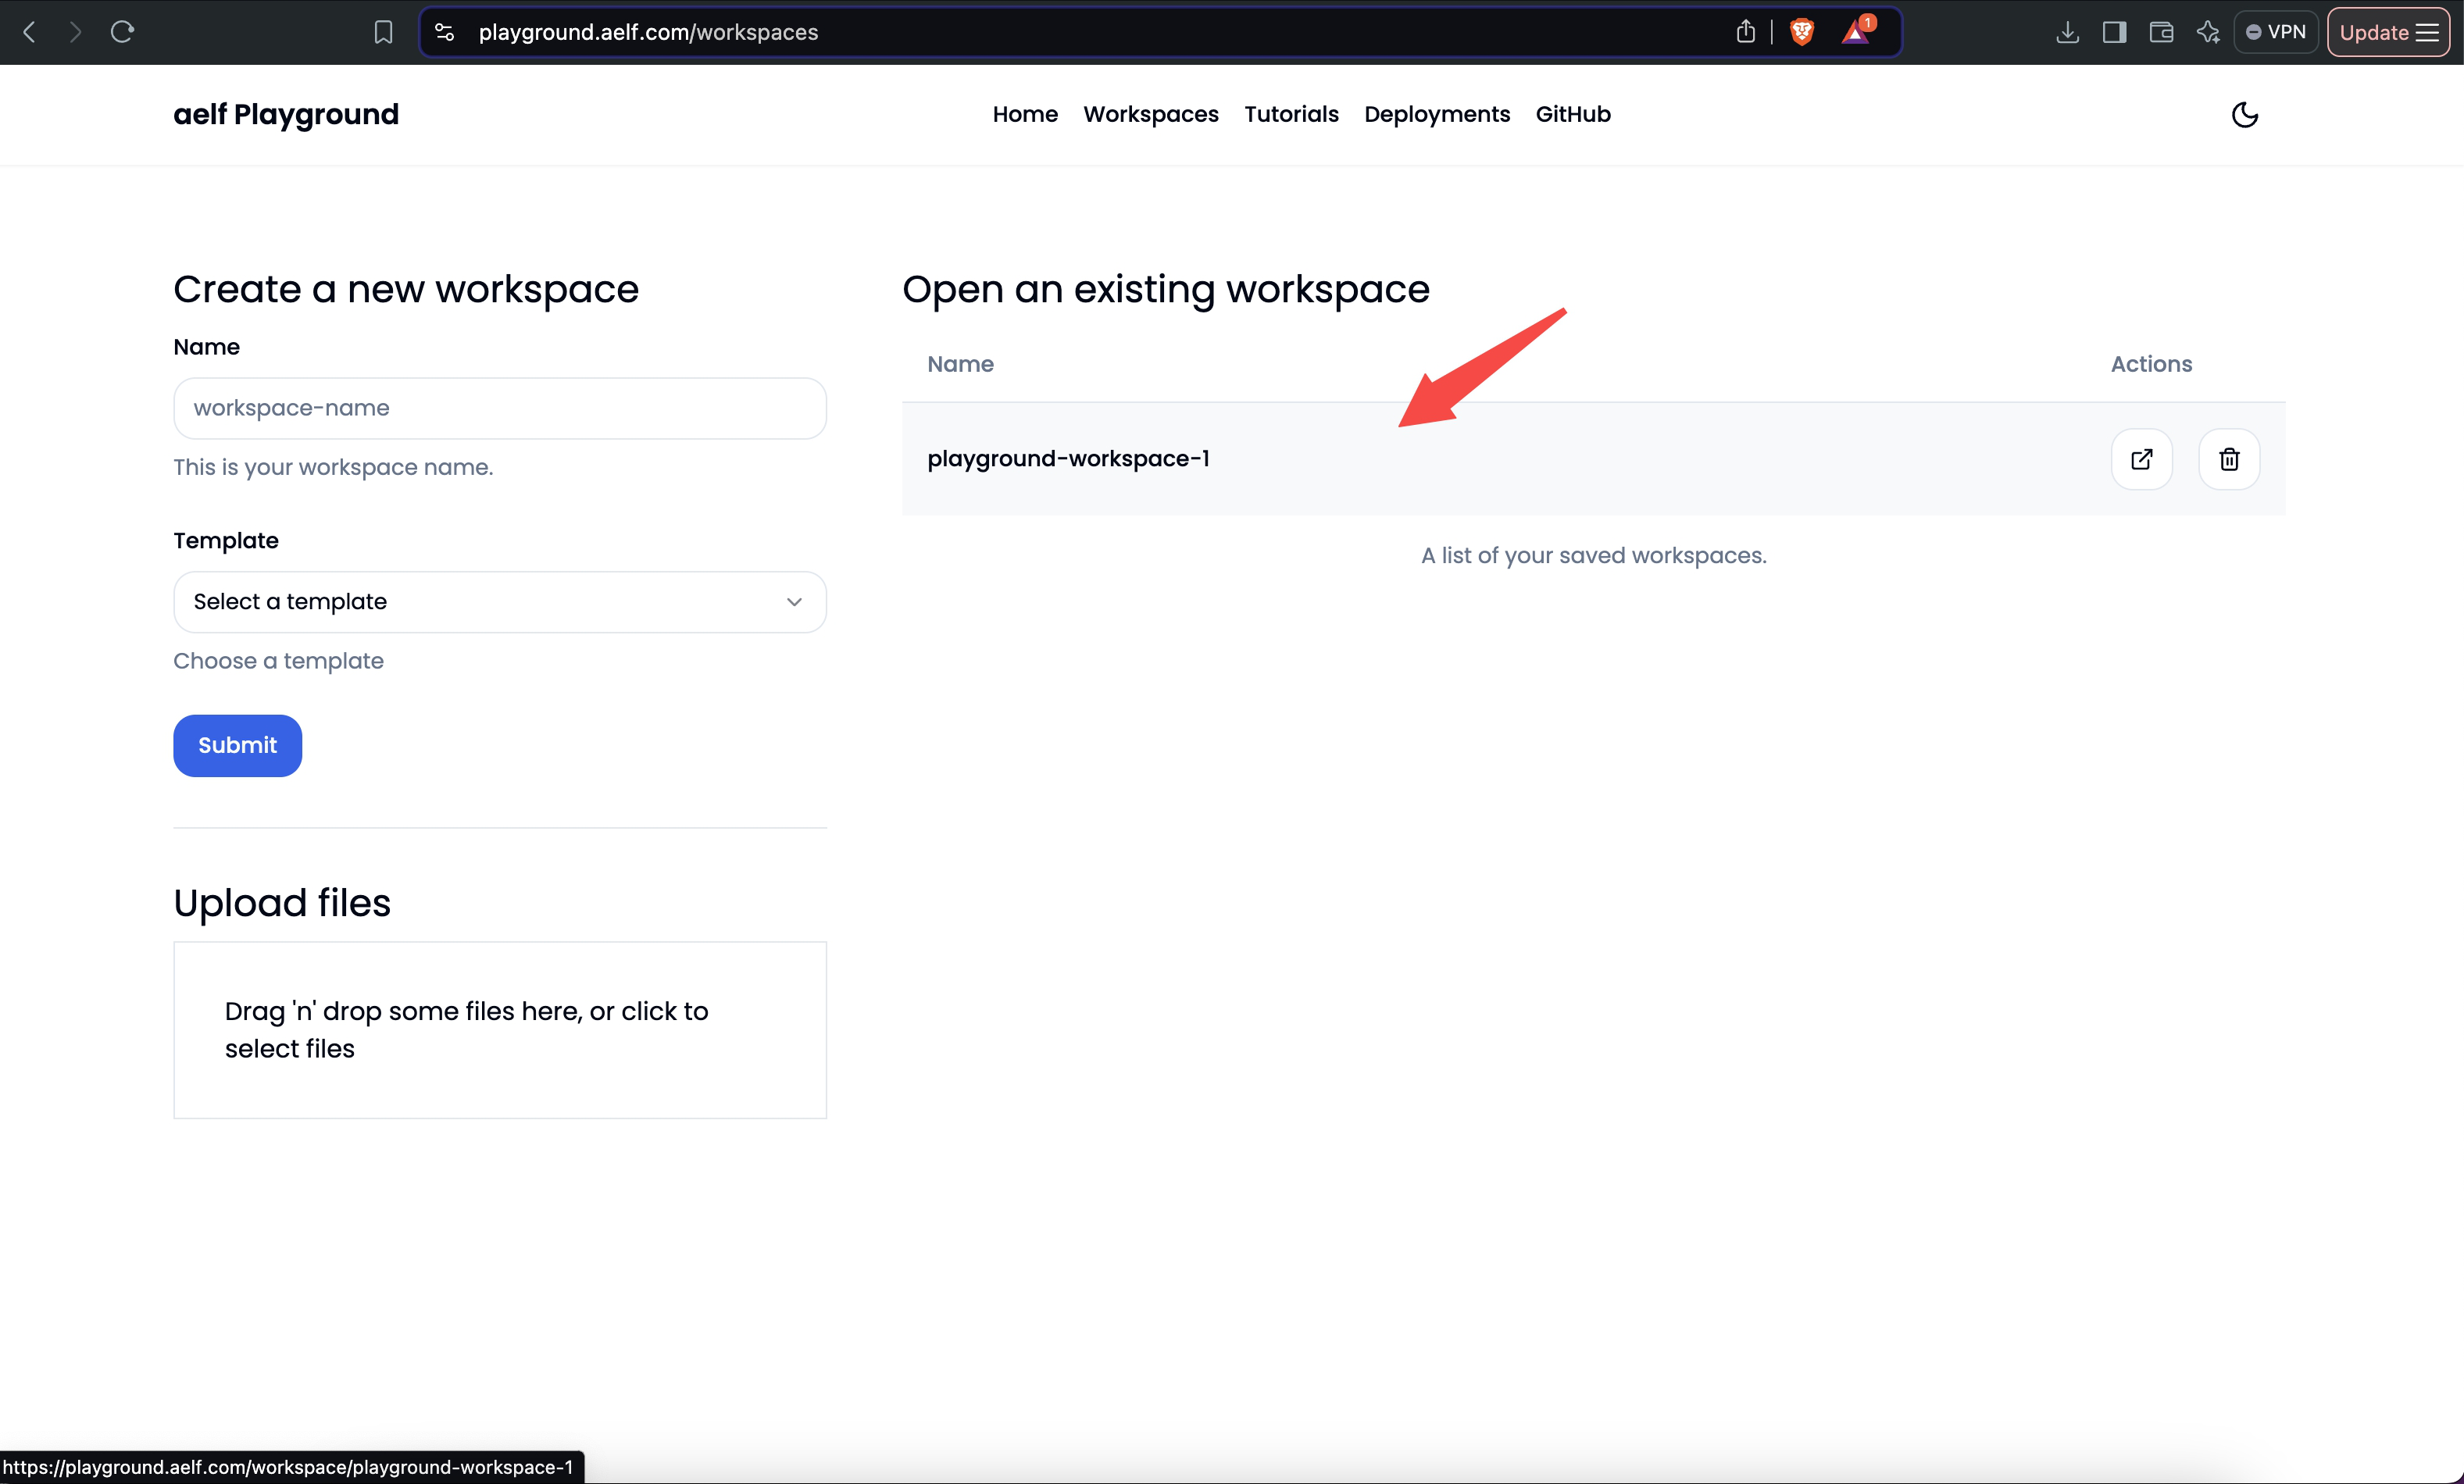
Alternatively, the existing workspace can also be chosen
-
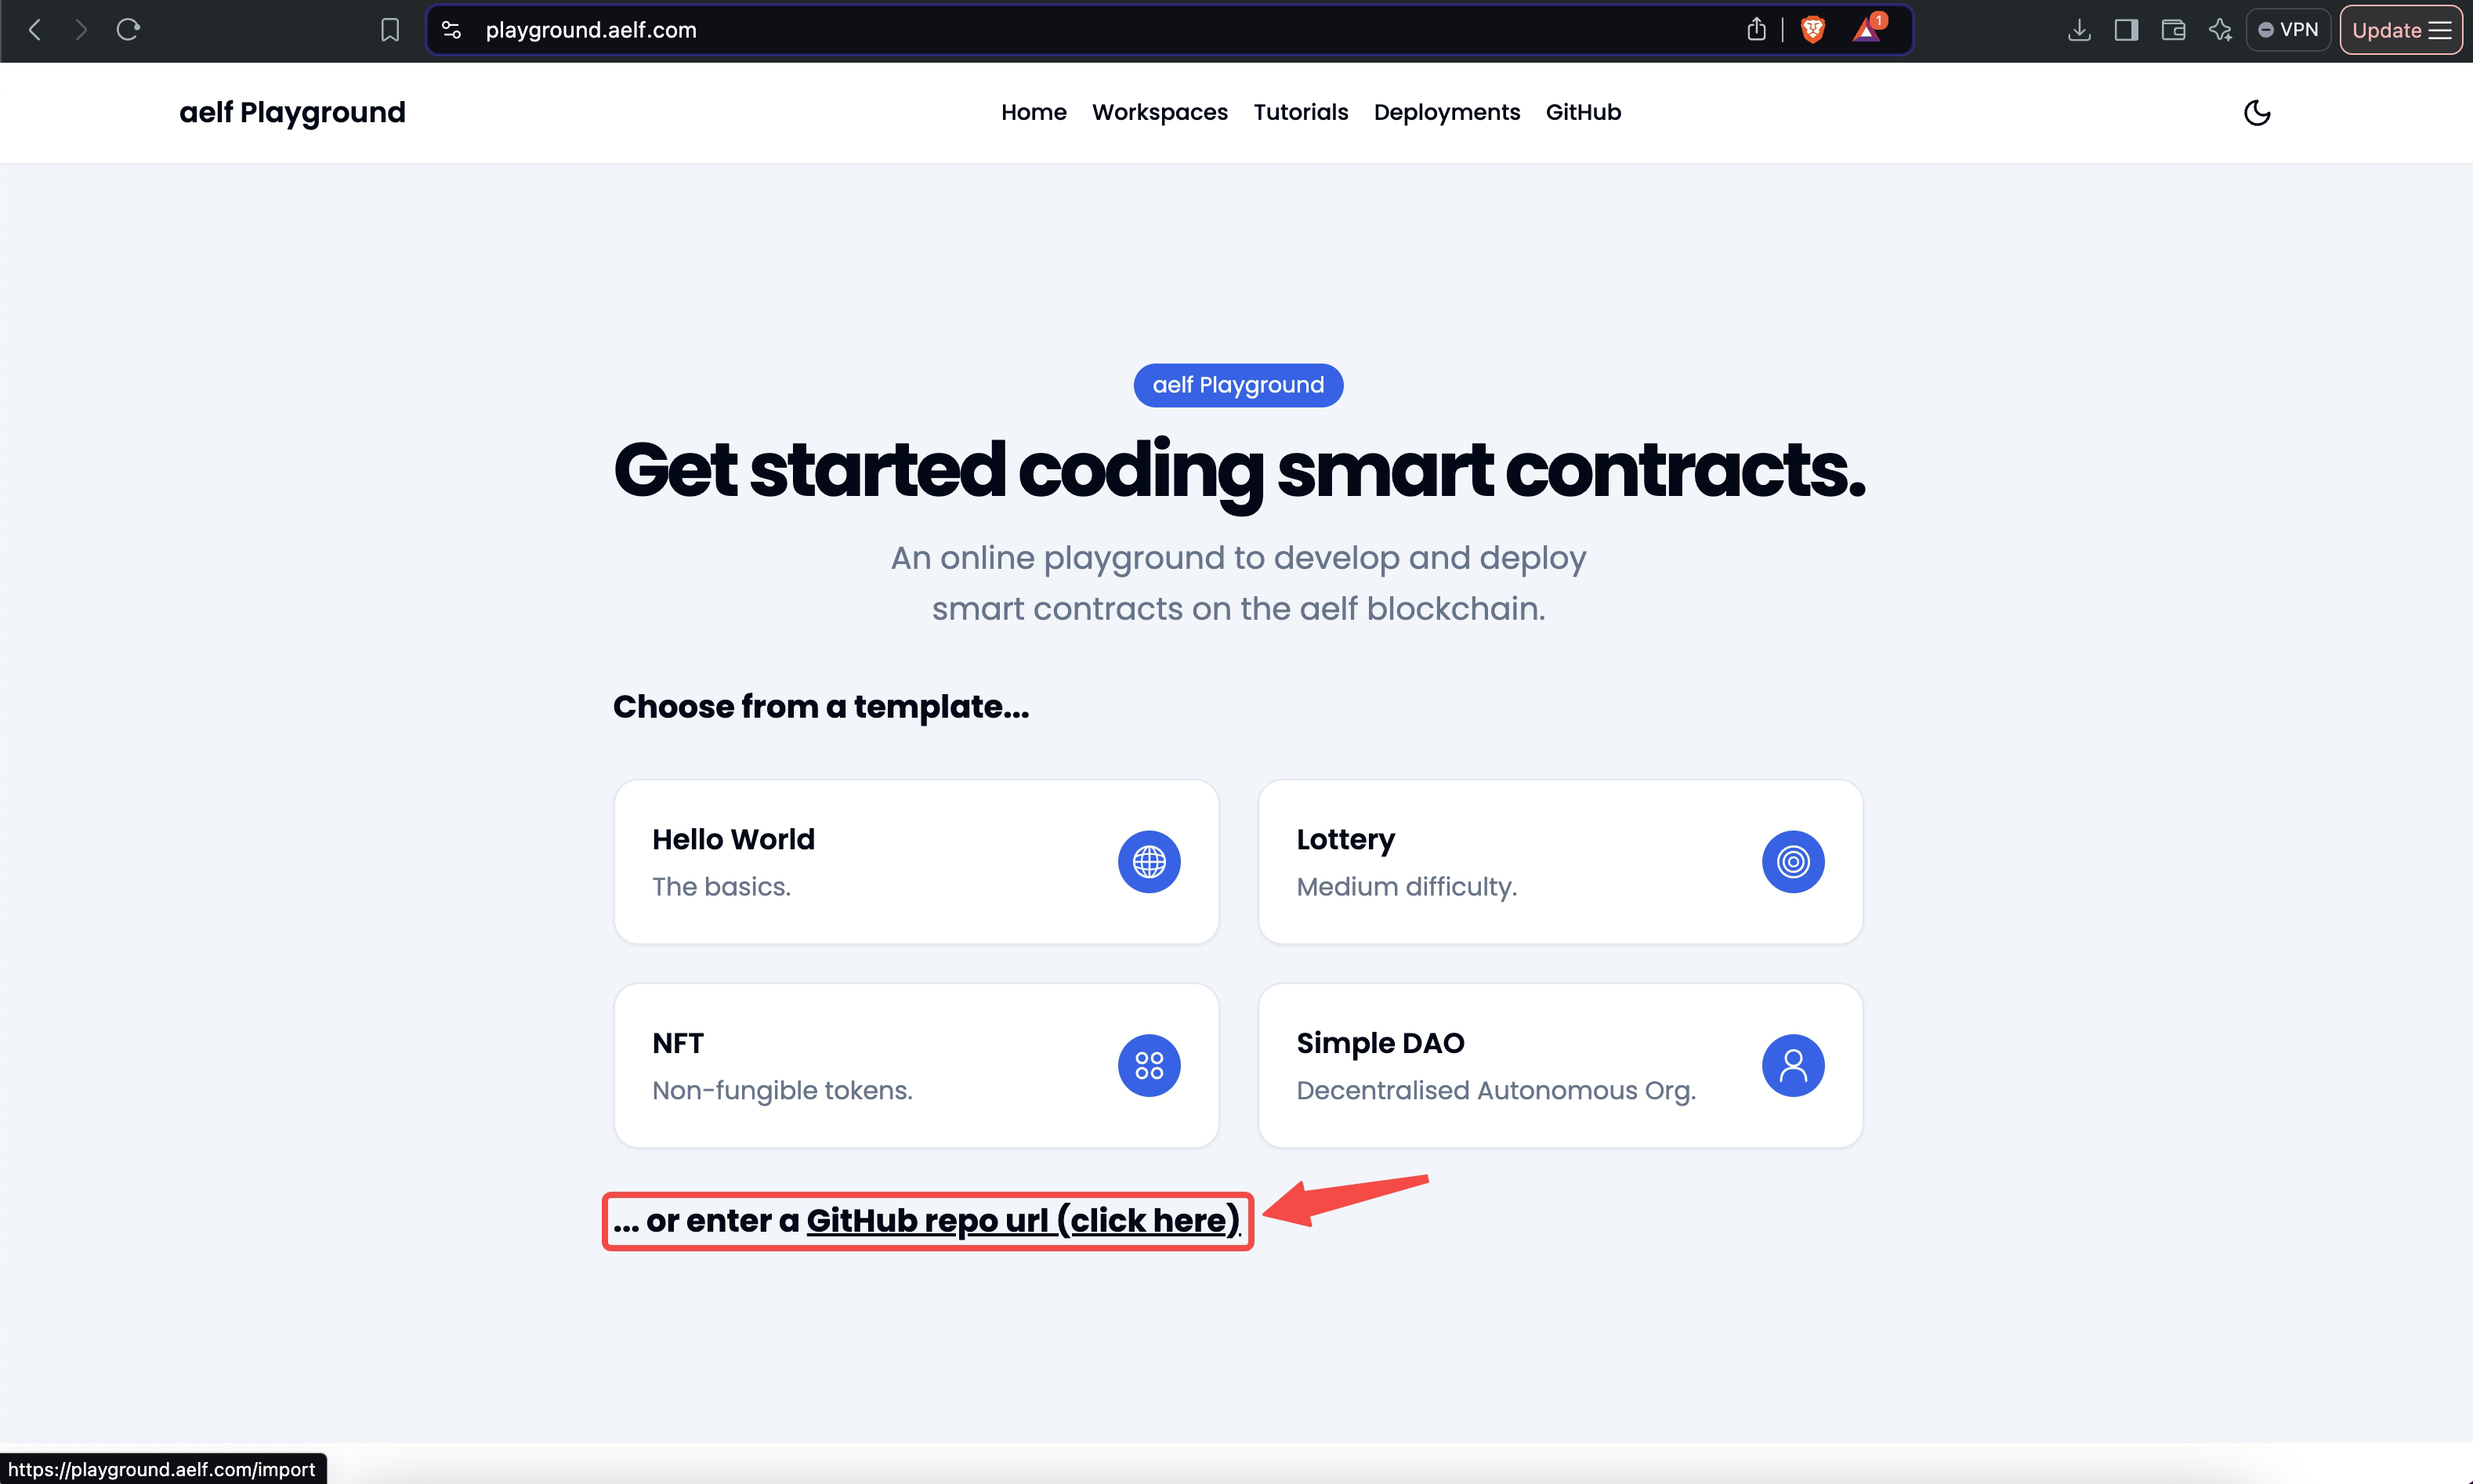
Also, you can choose to import the project directly from the github.
- Click on
enter a GitHub repo url. - Enter the github URL.
- Choose the required
.csprojfile. - Enter the workspace name and click Submit.
- Click on
Features of the aelf-playground
Now as the workspace setup is done and project is setup inside aelf's playground. The user can now edit the smart contract logic according to the user needs. The changes will majorly takes place inside the below files:
- src/Protobuf/contract/
contract_proto_file_name.proto file - src/
ContractName.cs - src/
ContractNameState.cs
Once all the changes are done in the above files and all other required files (whereever nacessary). Then below operations can be performed on the selected workspace project:
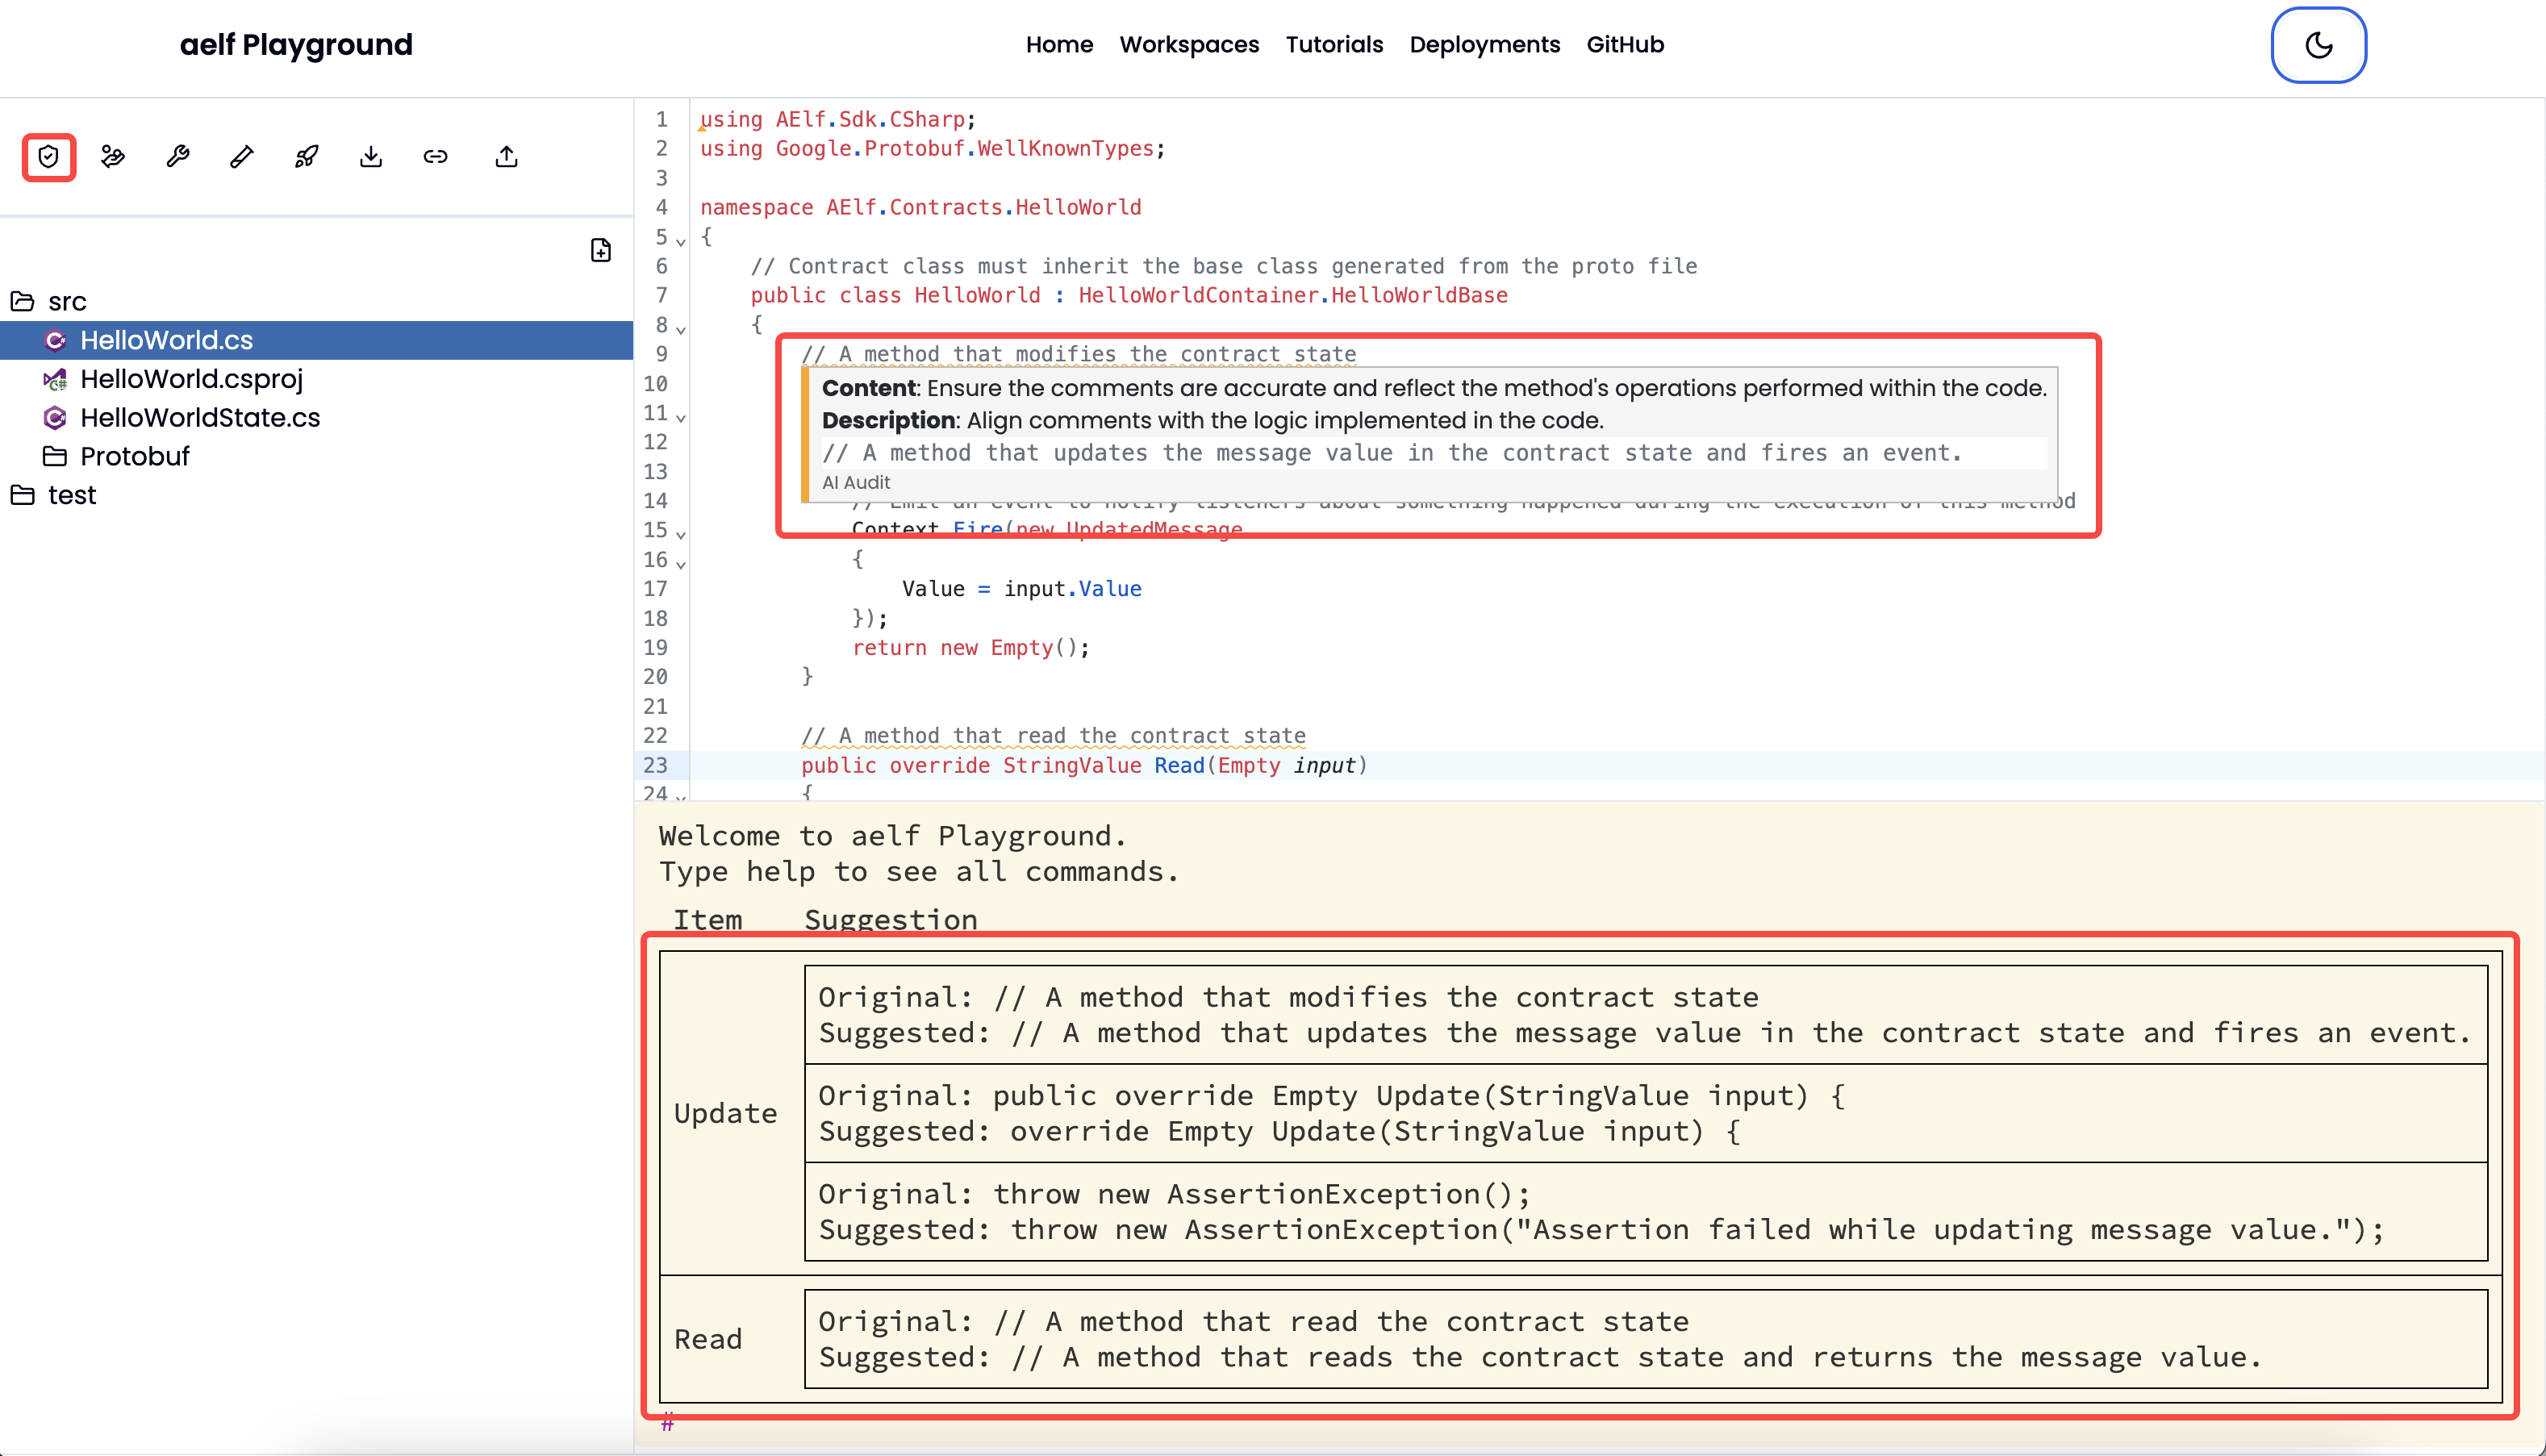
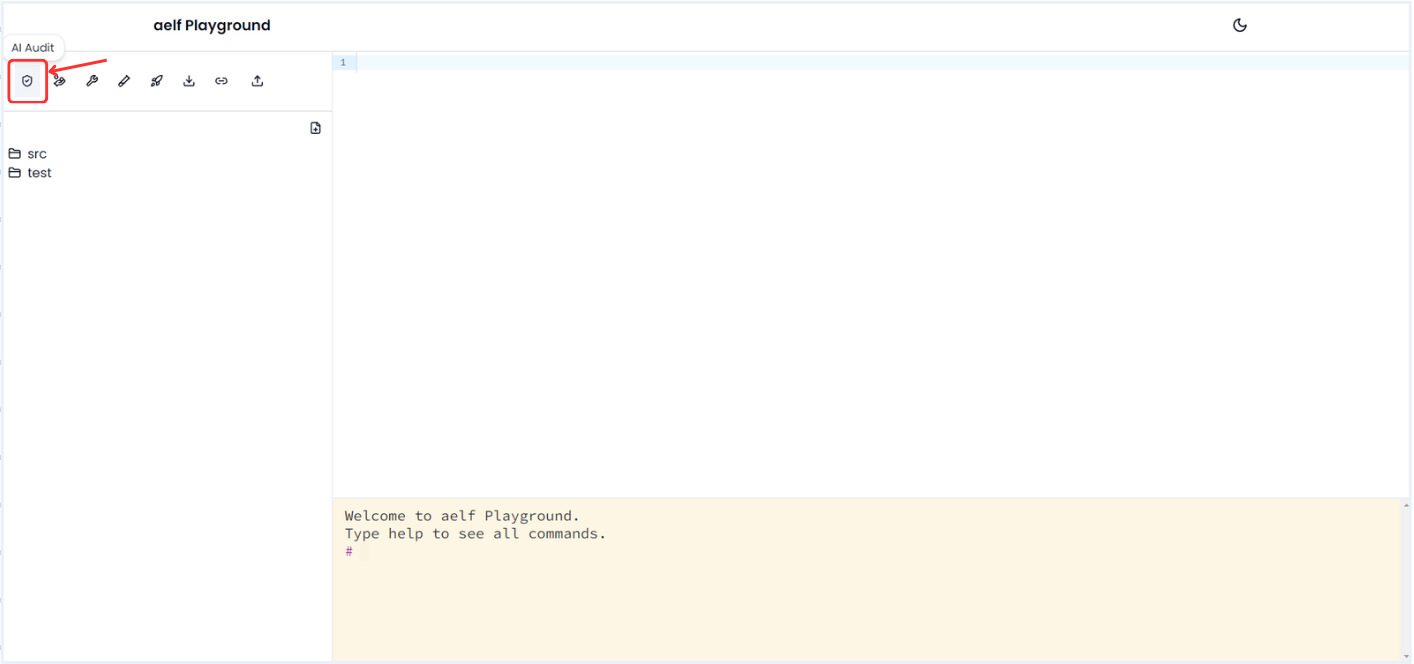
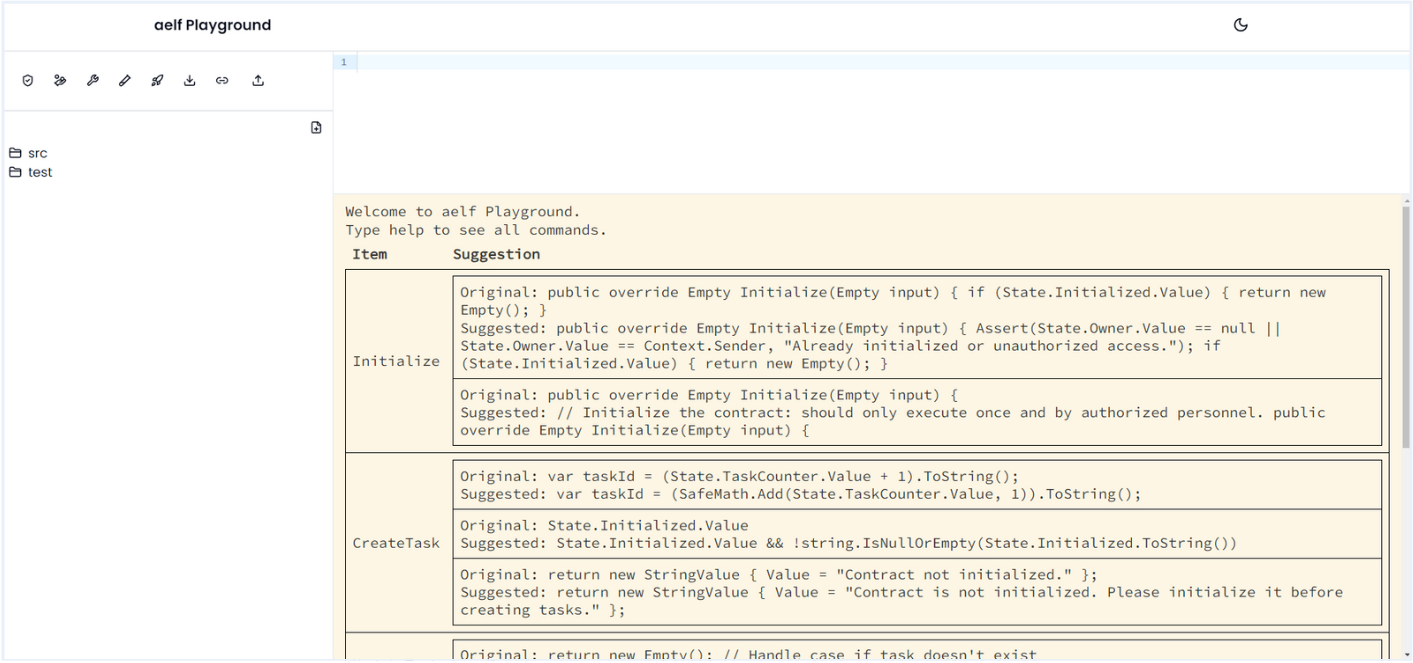
- AI Audit: Complete the AI audit of the written smart contract. Result similar to below image will be visible once the AI audit completes. The interpretation of the AI audit results will be shown when you hover over the smart contract code once the audit finishes.
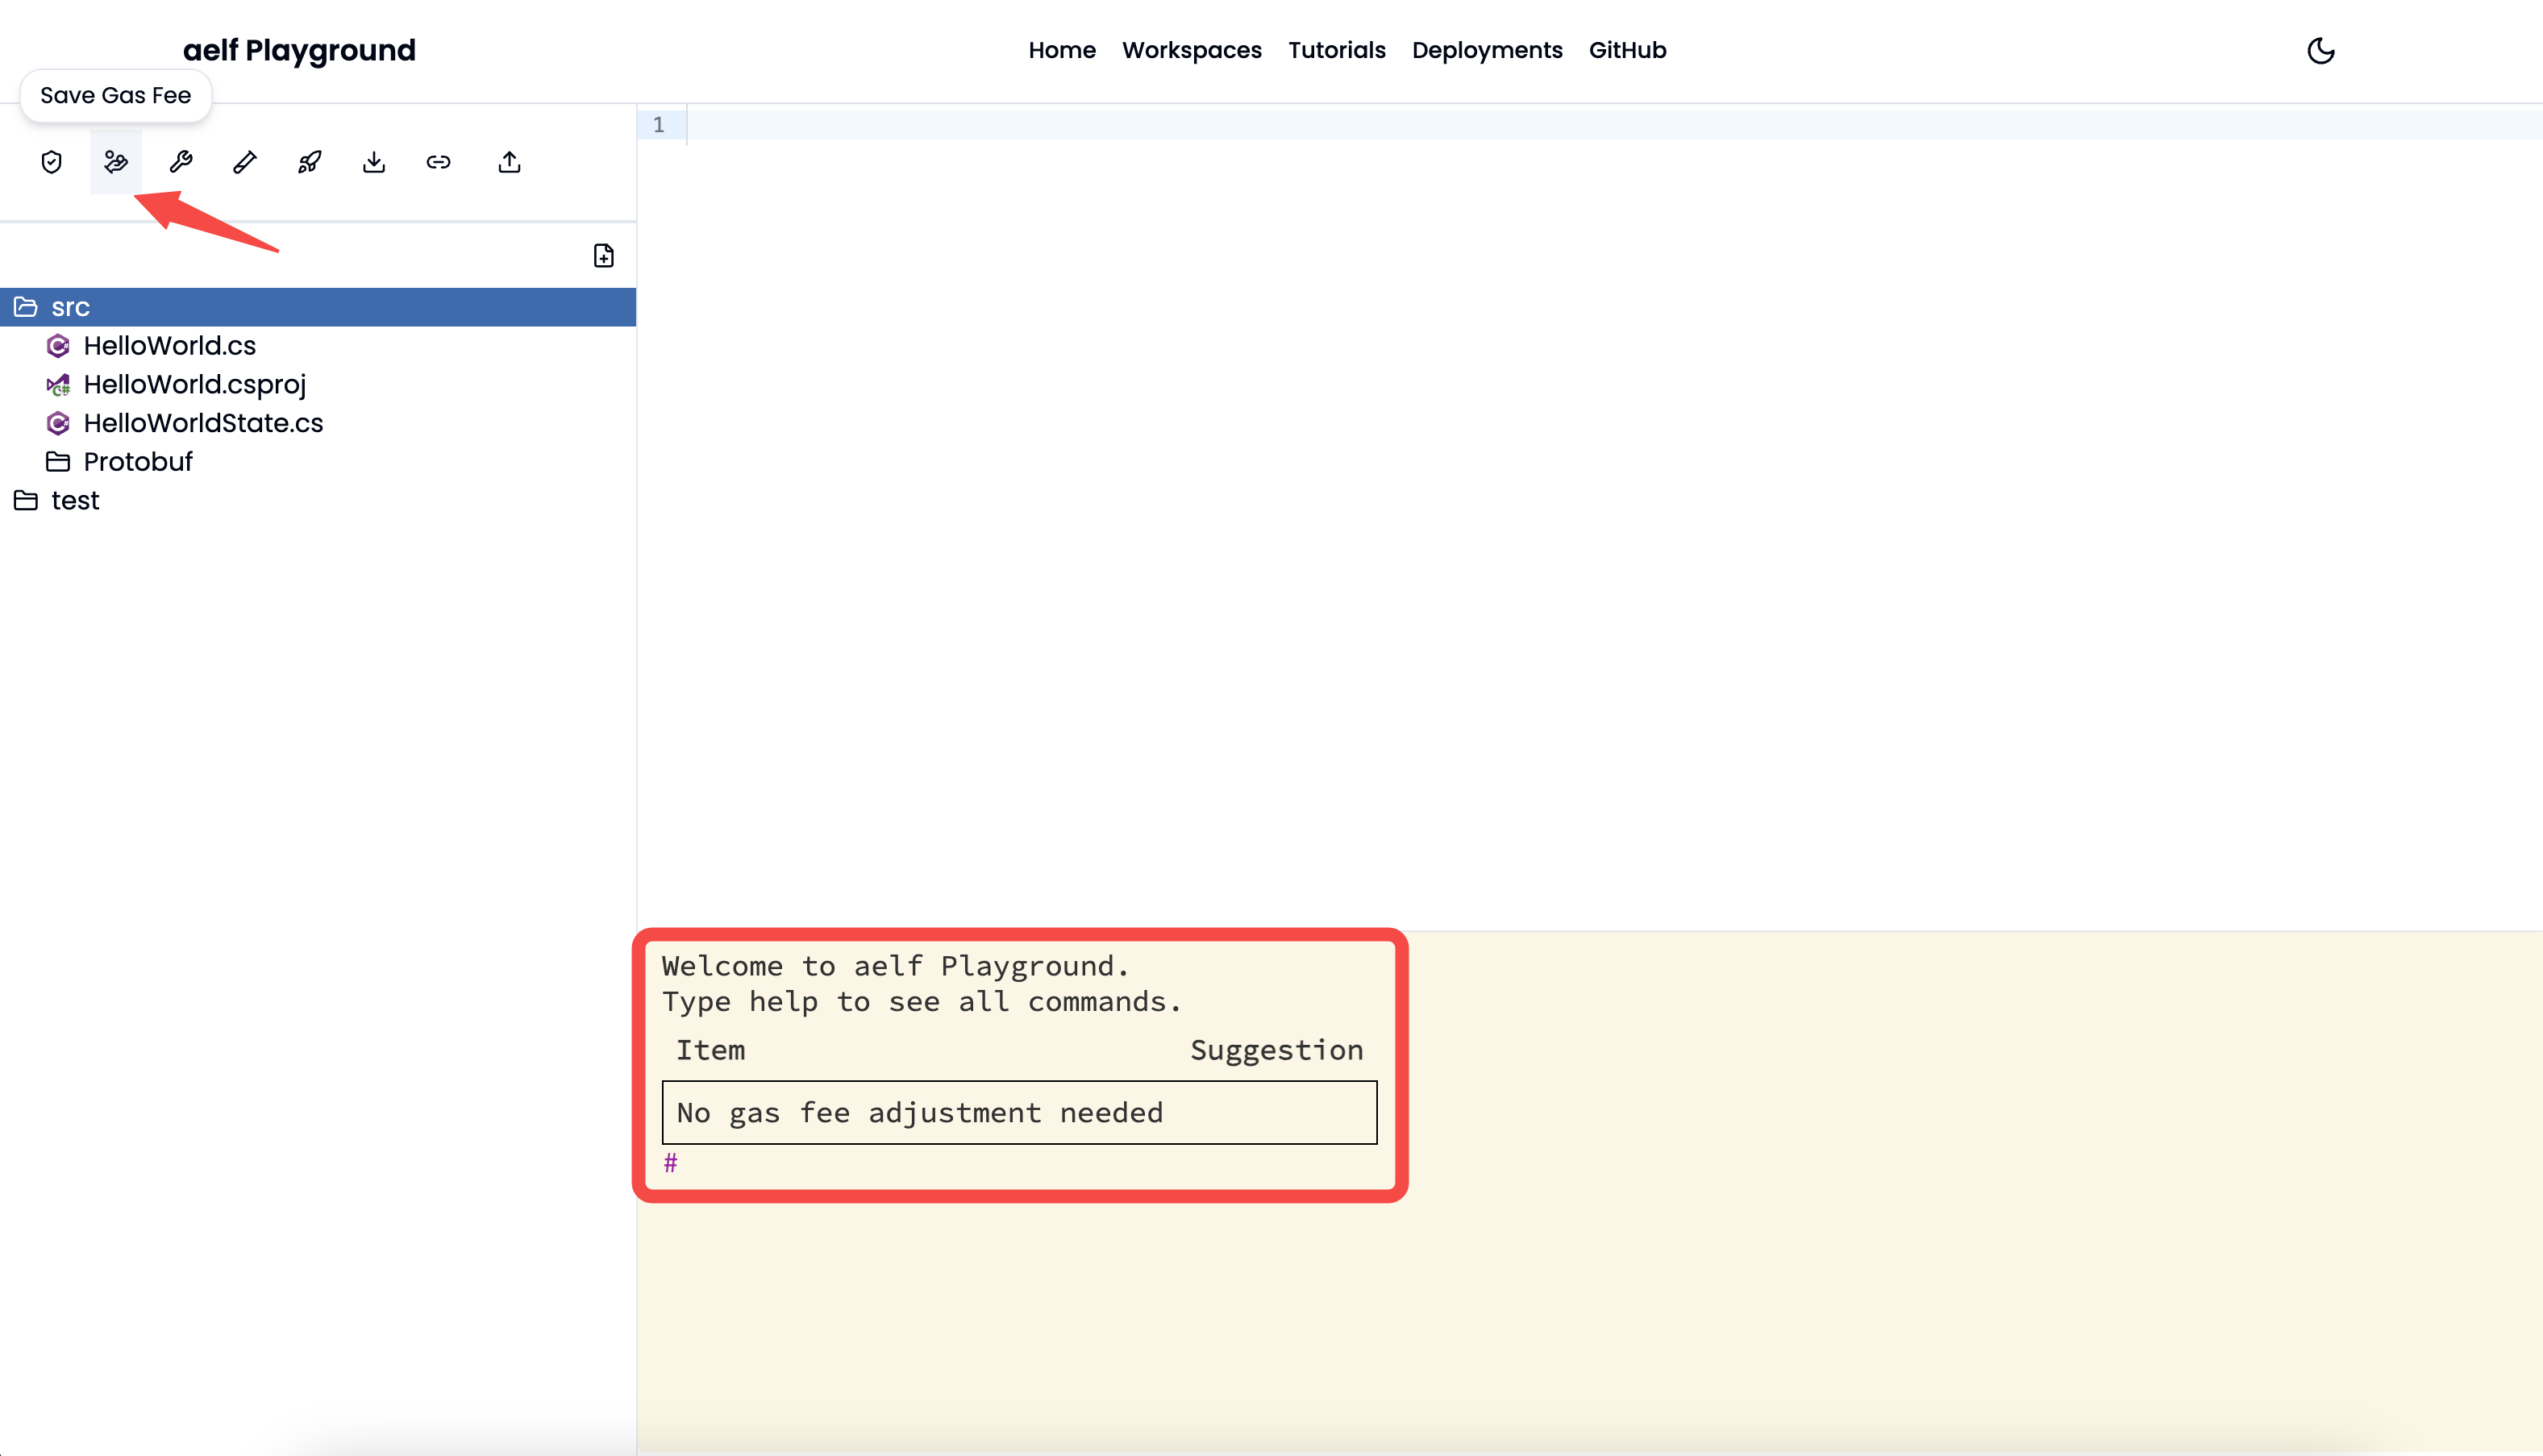
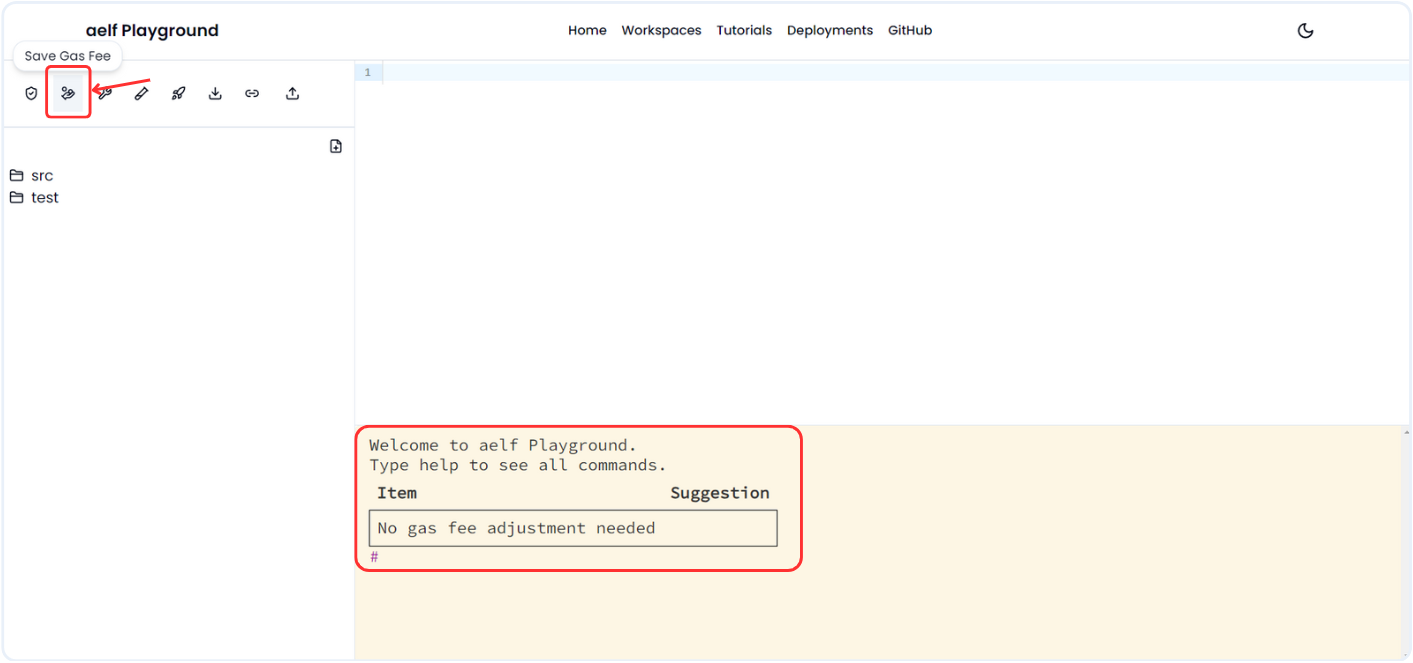
- Save Gas Fee: Optimise the smart contract to save gas fee. It will suggest to make changes to the smart contract if the smart contract is not optimised. If the smart contract is already optimed then result like below will appear.
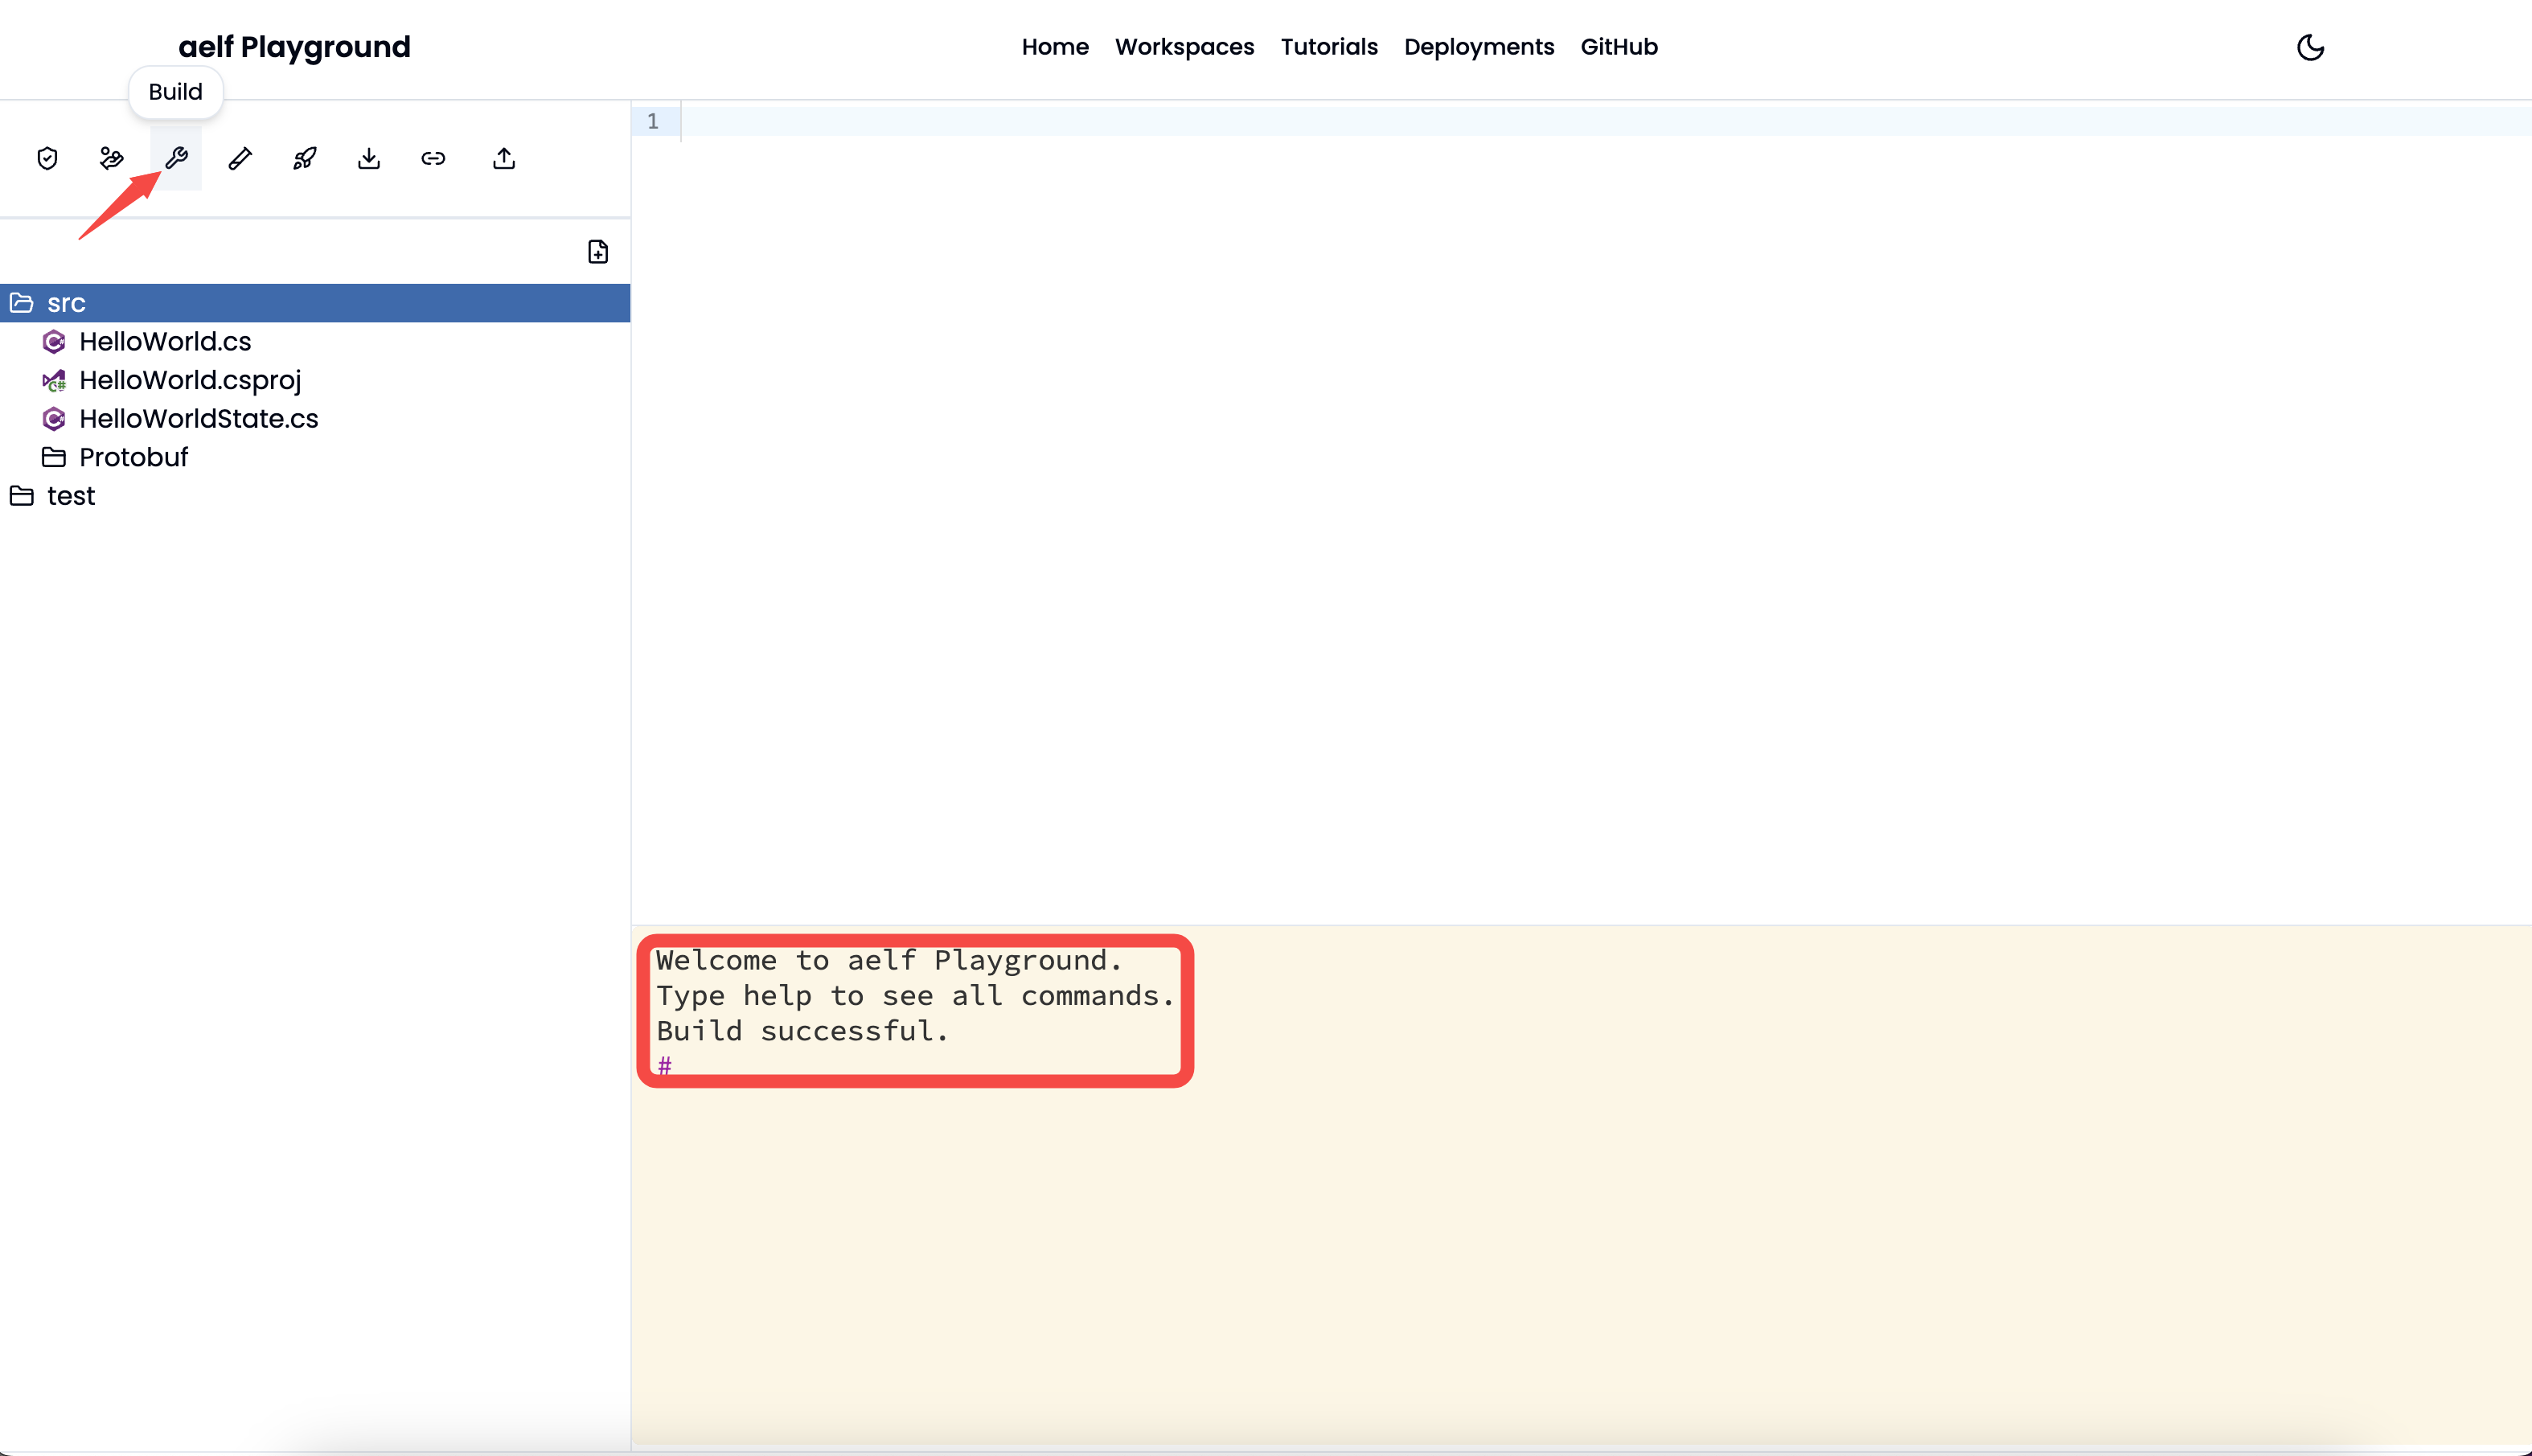
- Build: Build the smart contract code. It will show
buildingstatus when the user clicks theBuildbutton and will output below result including whether build was successful or failed once the build process ends.
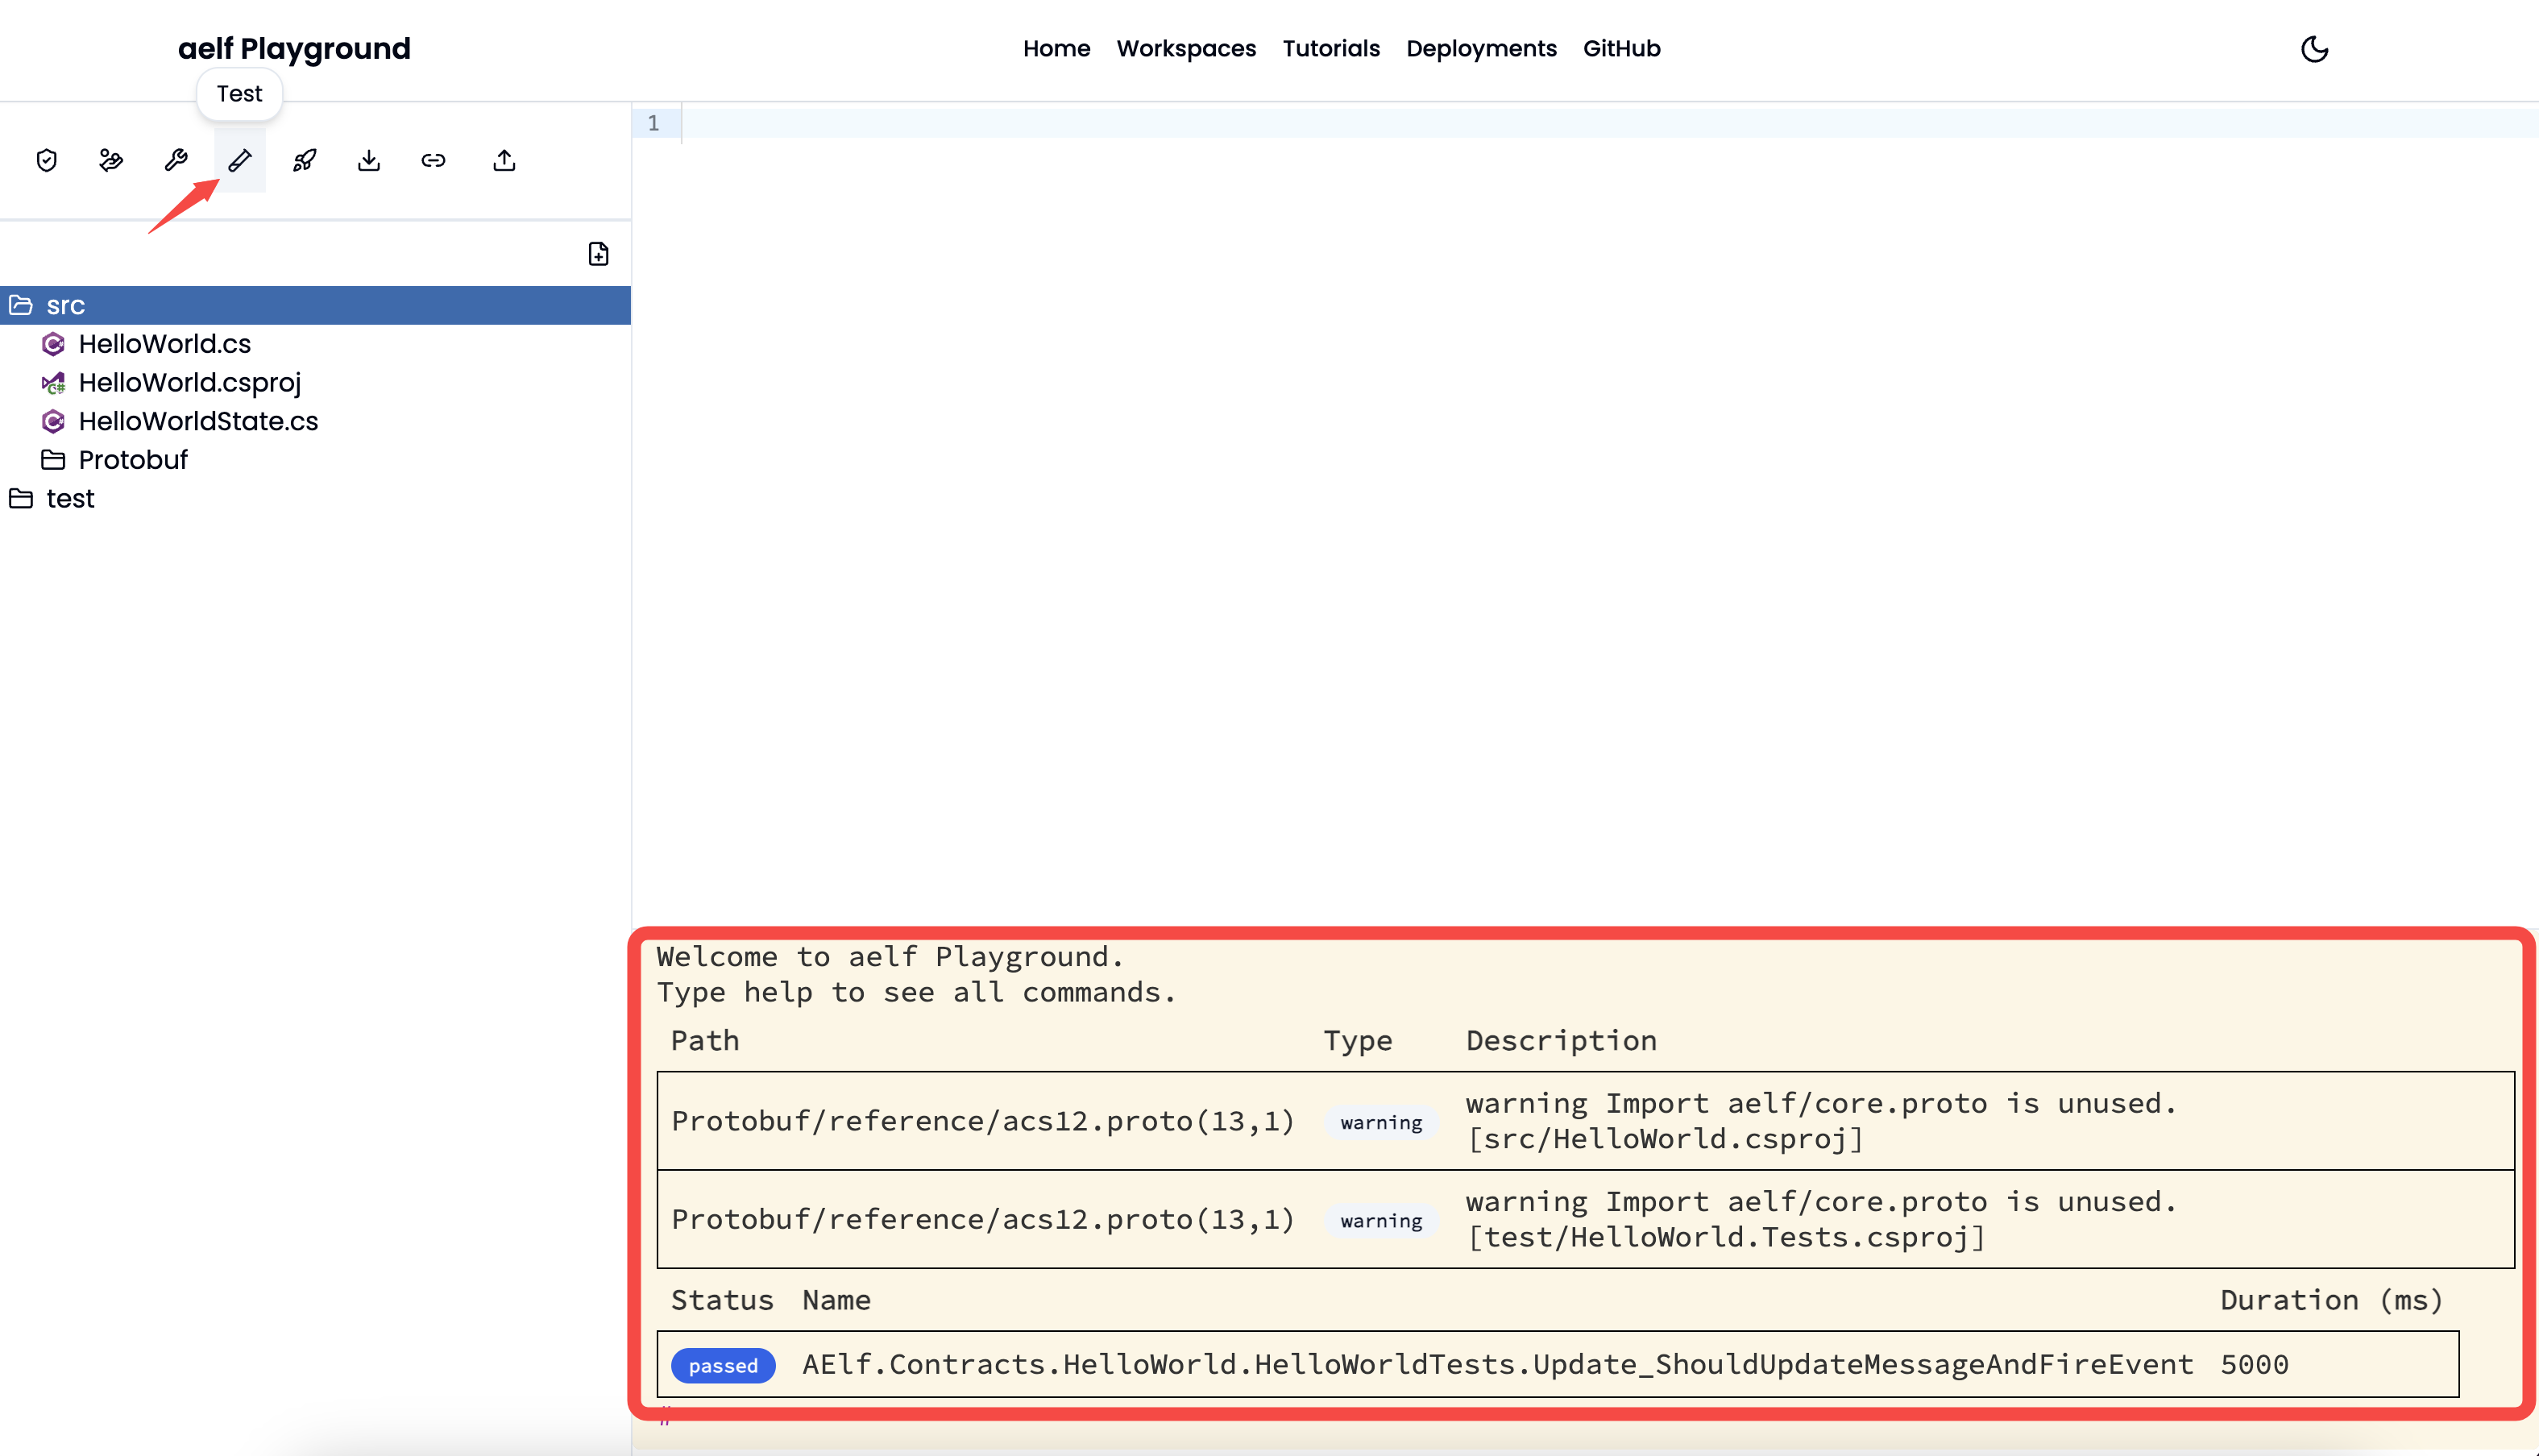
- Test: Test the smart contract code. It will show
Running Testsstatus when the user clicks theTestbutton and will output below result including how many tests have passed and failed once the test process ends.
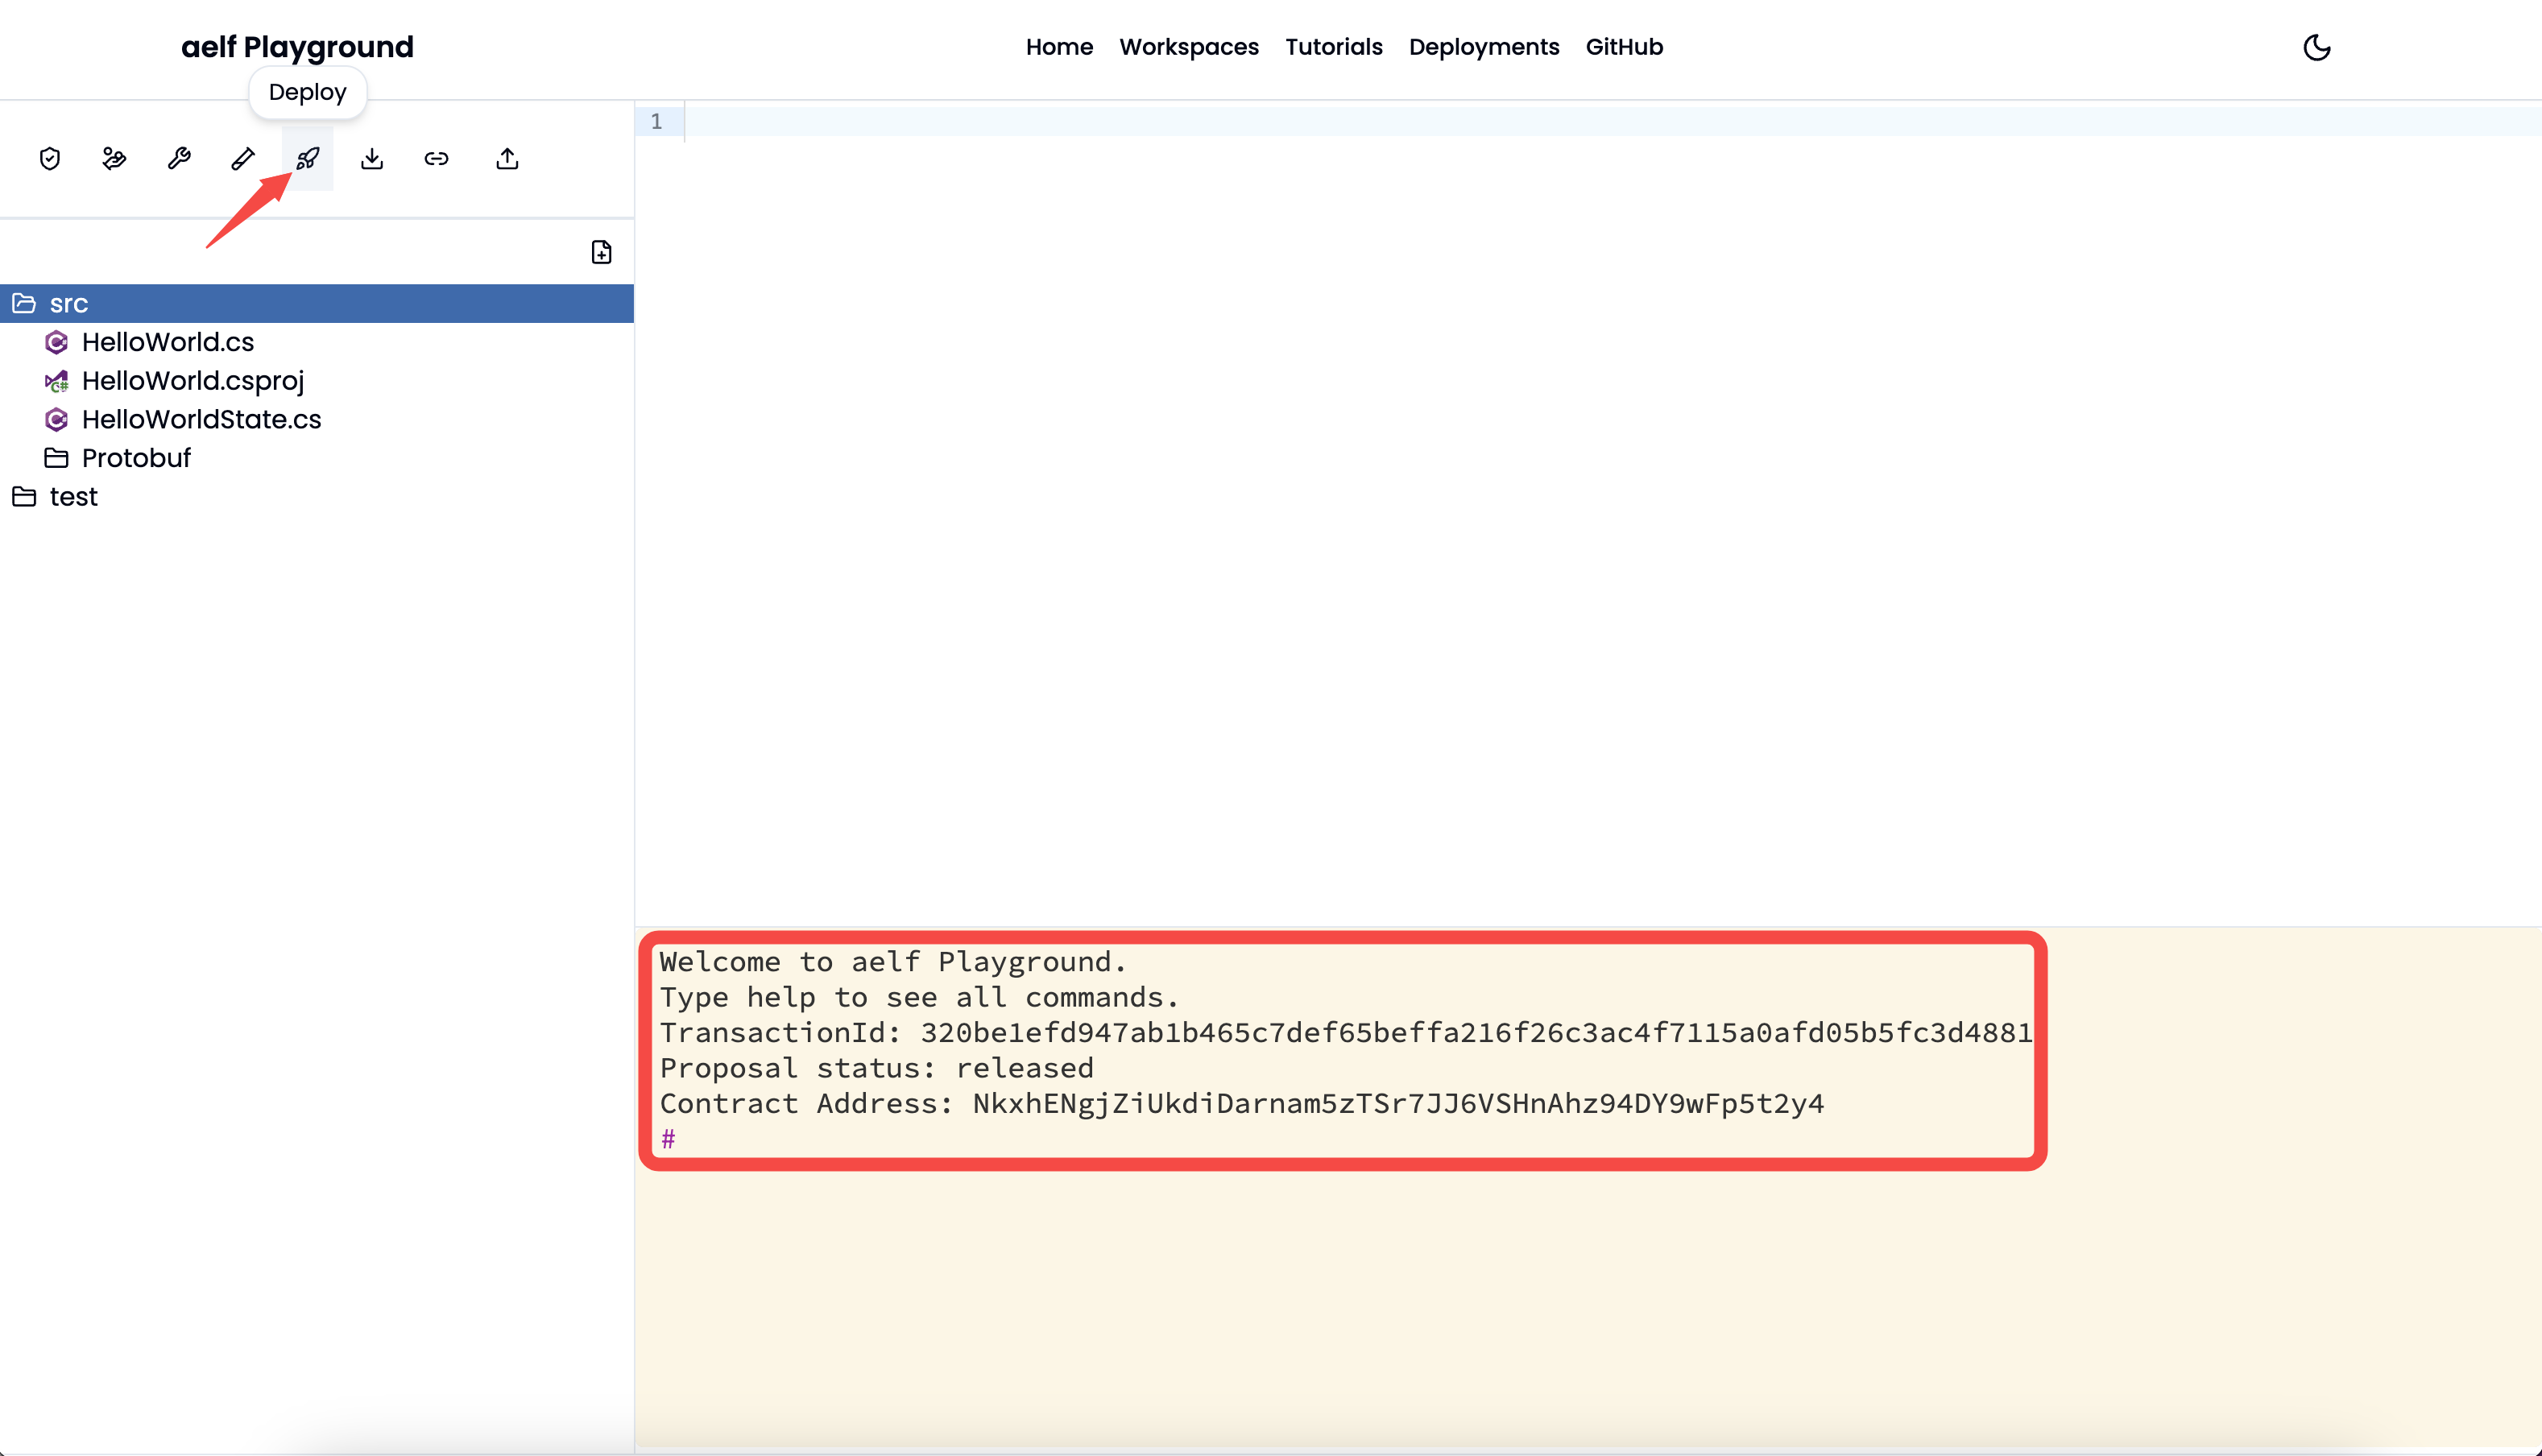
- Deploy: Deploy the smart contract code on the aelf blockchain. It will show
Deployingstatus when the user clicks theDeploybutton and will output below result includingtransactionId,proposal statusandcontract addressonce the build process ends. You can verify the contract address by visiting aelf testnet explorer.
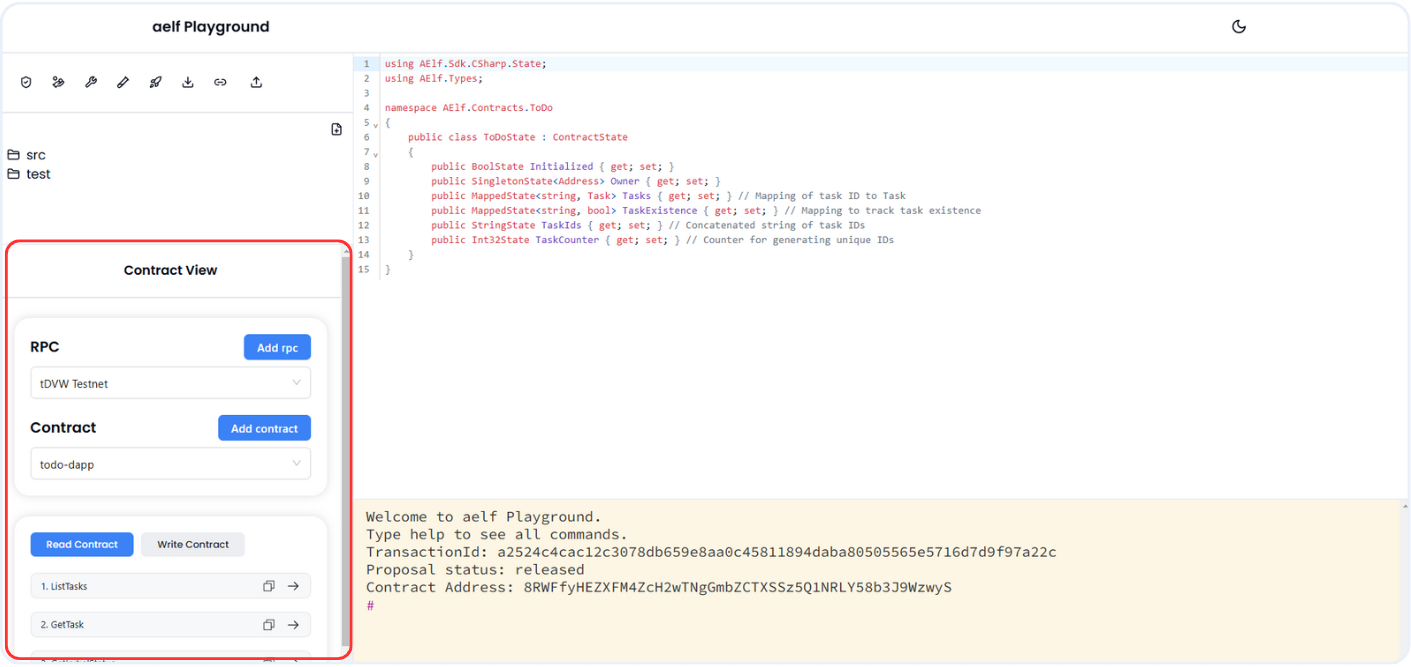
- Contract Viewer: The Contract Viewer in the Playground automatically appears after a smart contract is deployed, allowing users to test and interact with the contract immediately. This feature displays all available contract functions, both read and write, enabling users to execute them directly within the Playground. It provides a streamlined way to explore and perform actions on the contract without additional setup, making contract testing and function execution more accessible.
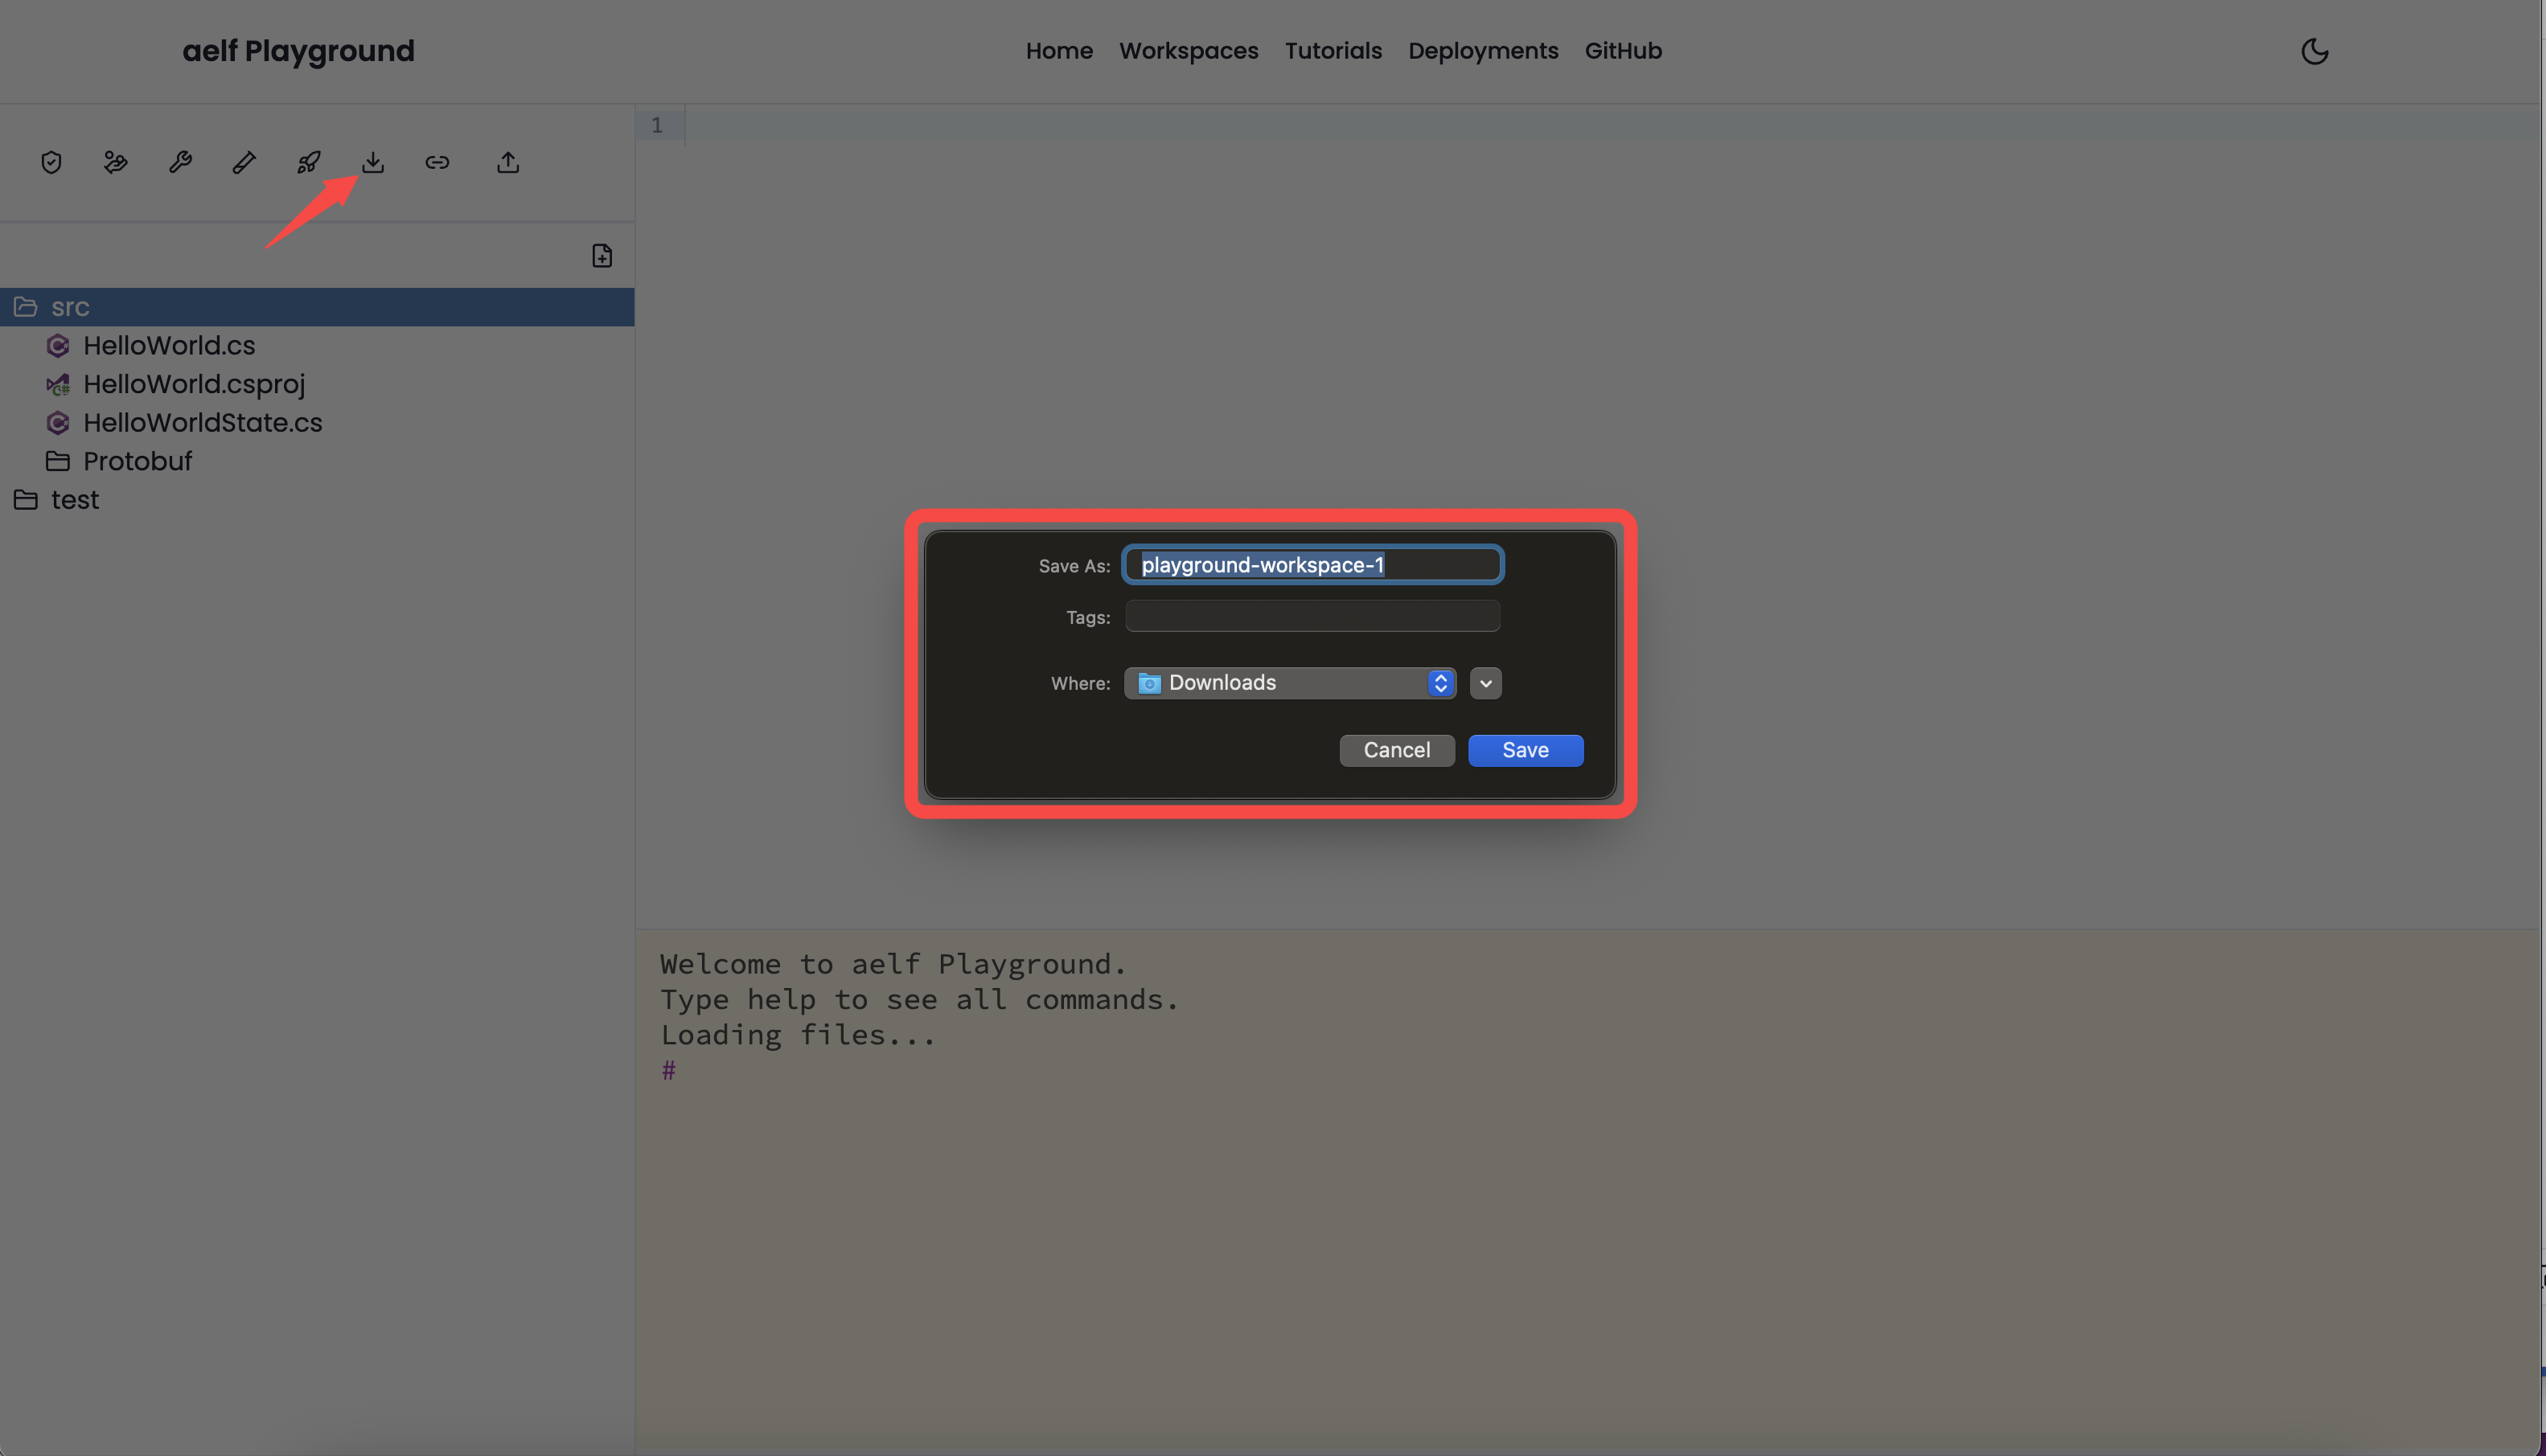
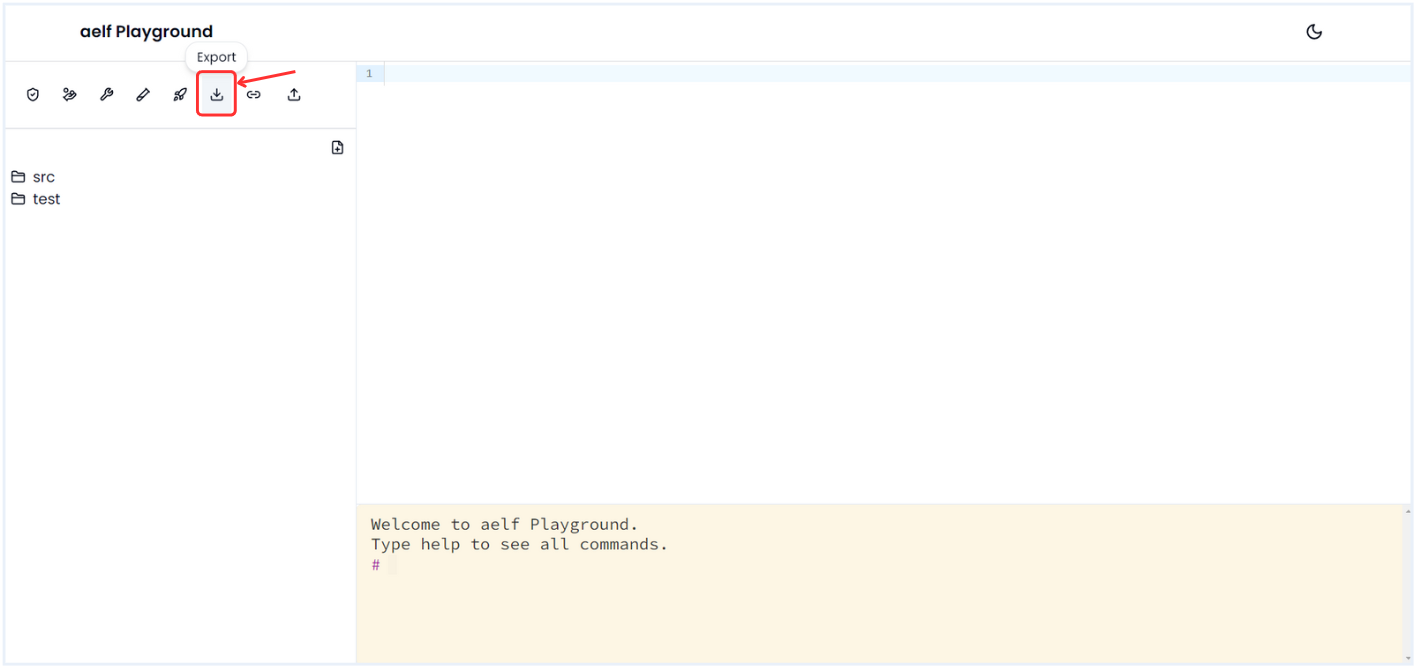
- Export: Export the project in a local directory. It will open an alert to save the workspace in the local directory. Users can rename the local directory.
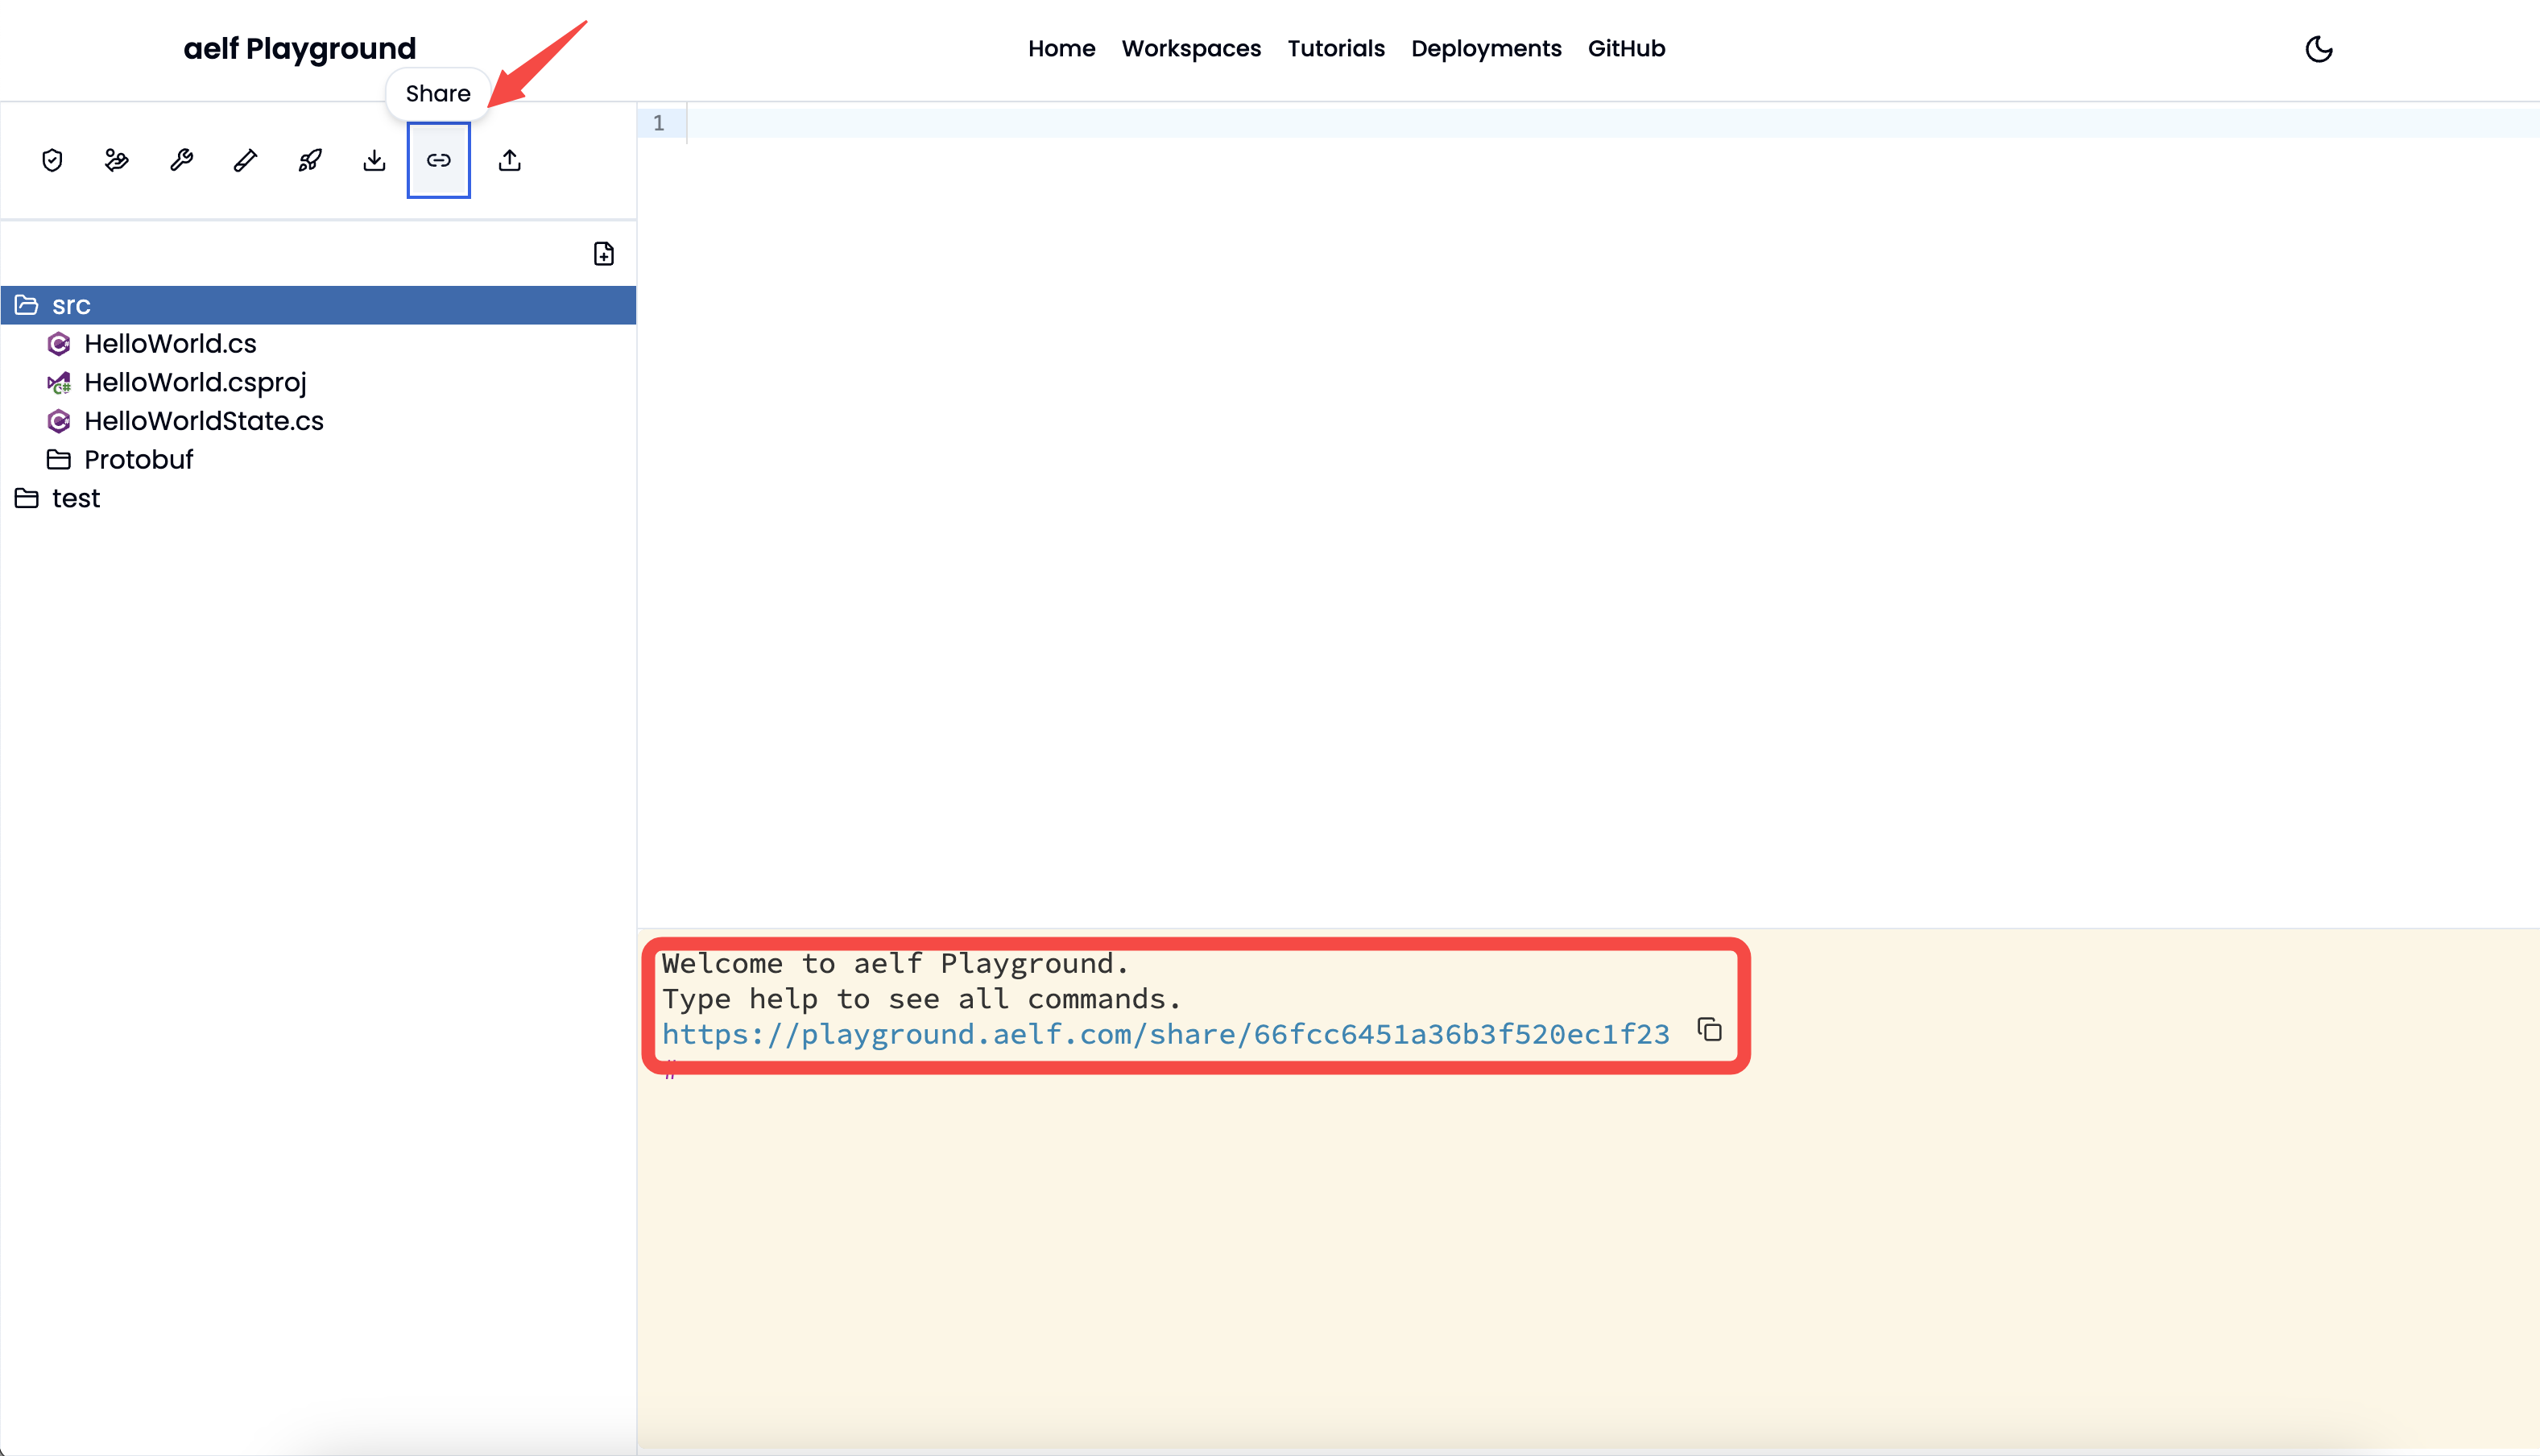
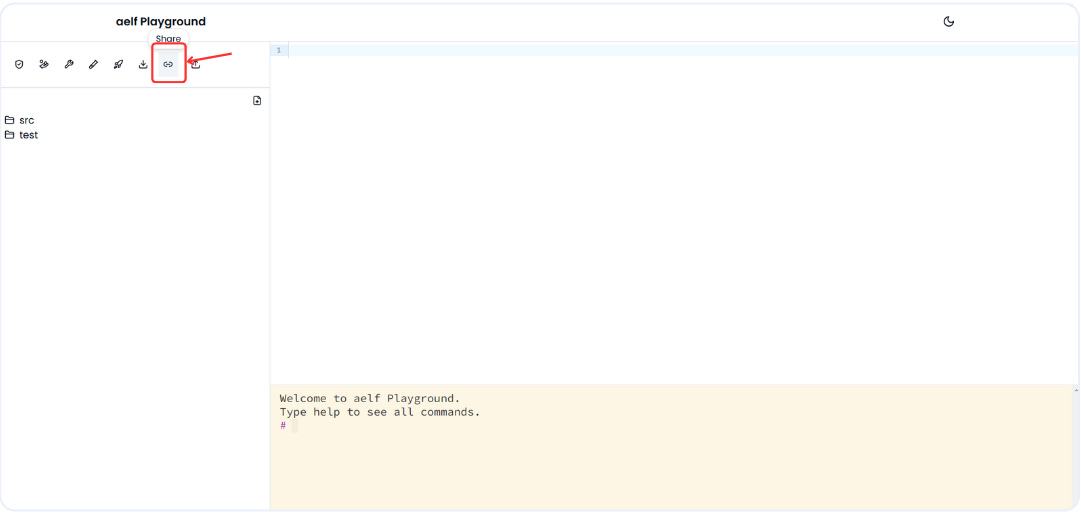
- Share: Share the project with a sharable link. It will show
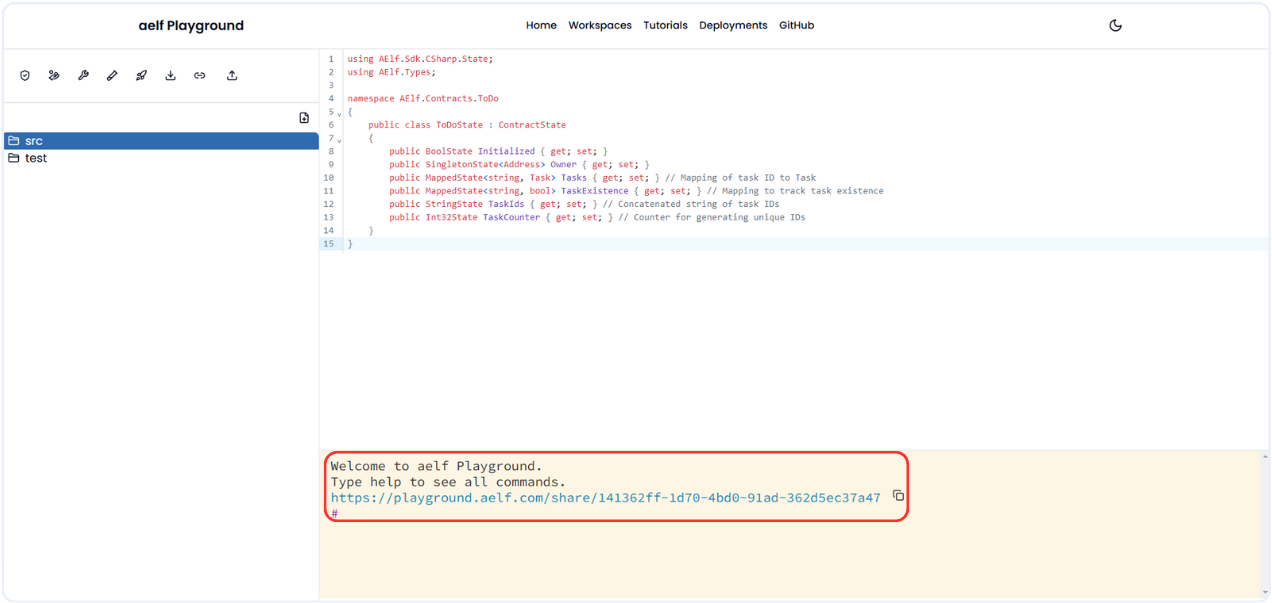
Generating share linkstatus when the user clicks theSharebutton and will output below result including the sharable link.
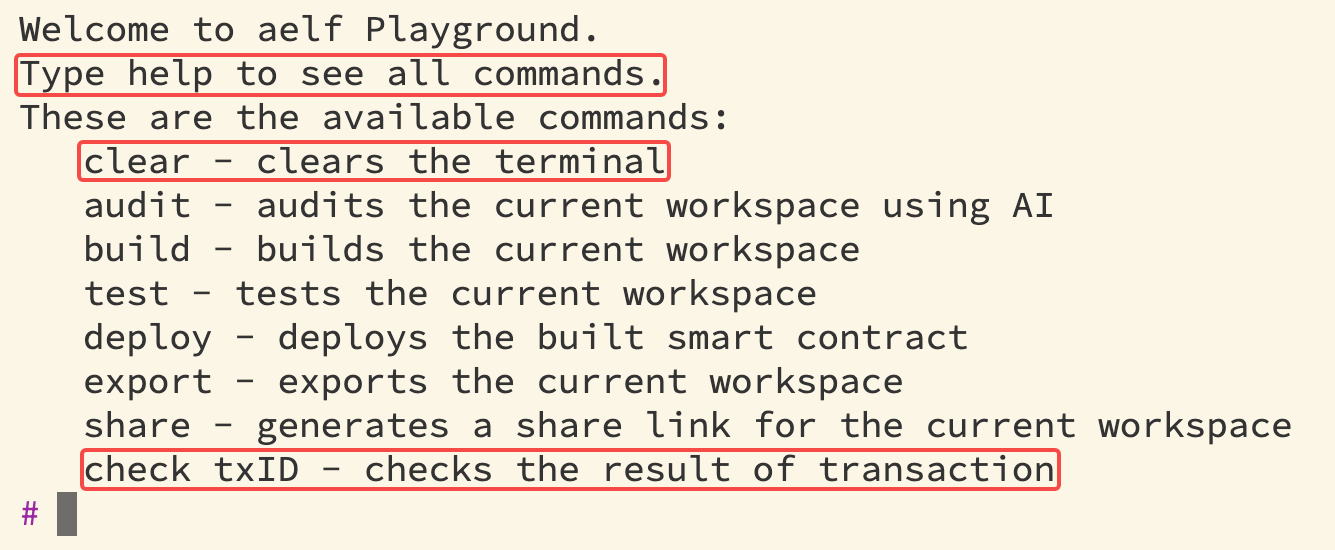
- Command Line Options: Command line additionally provides options to check txID and clear terminal including above options. Use the help command to see all the options inside terminal.
check txIDhelps in checking the transaction details.
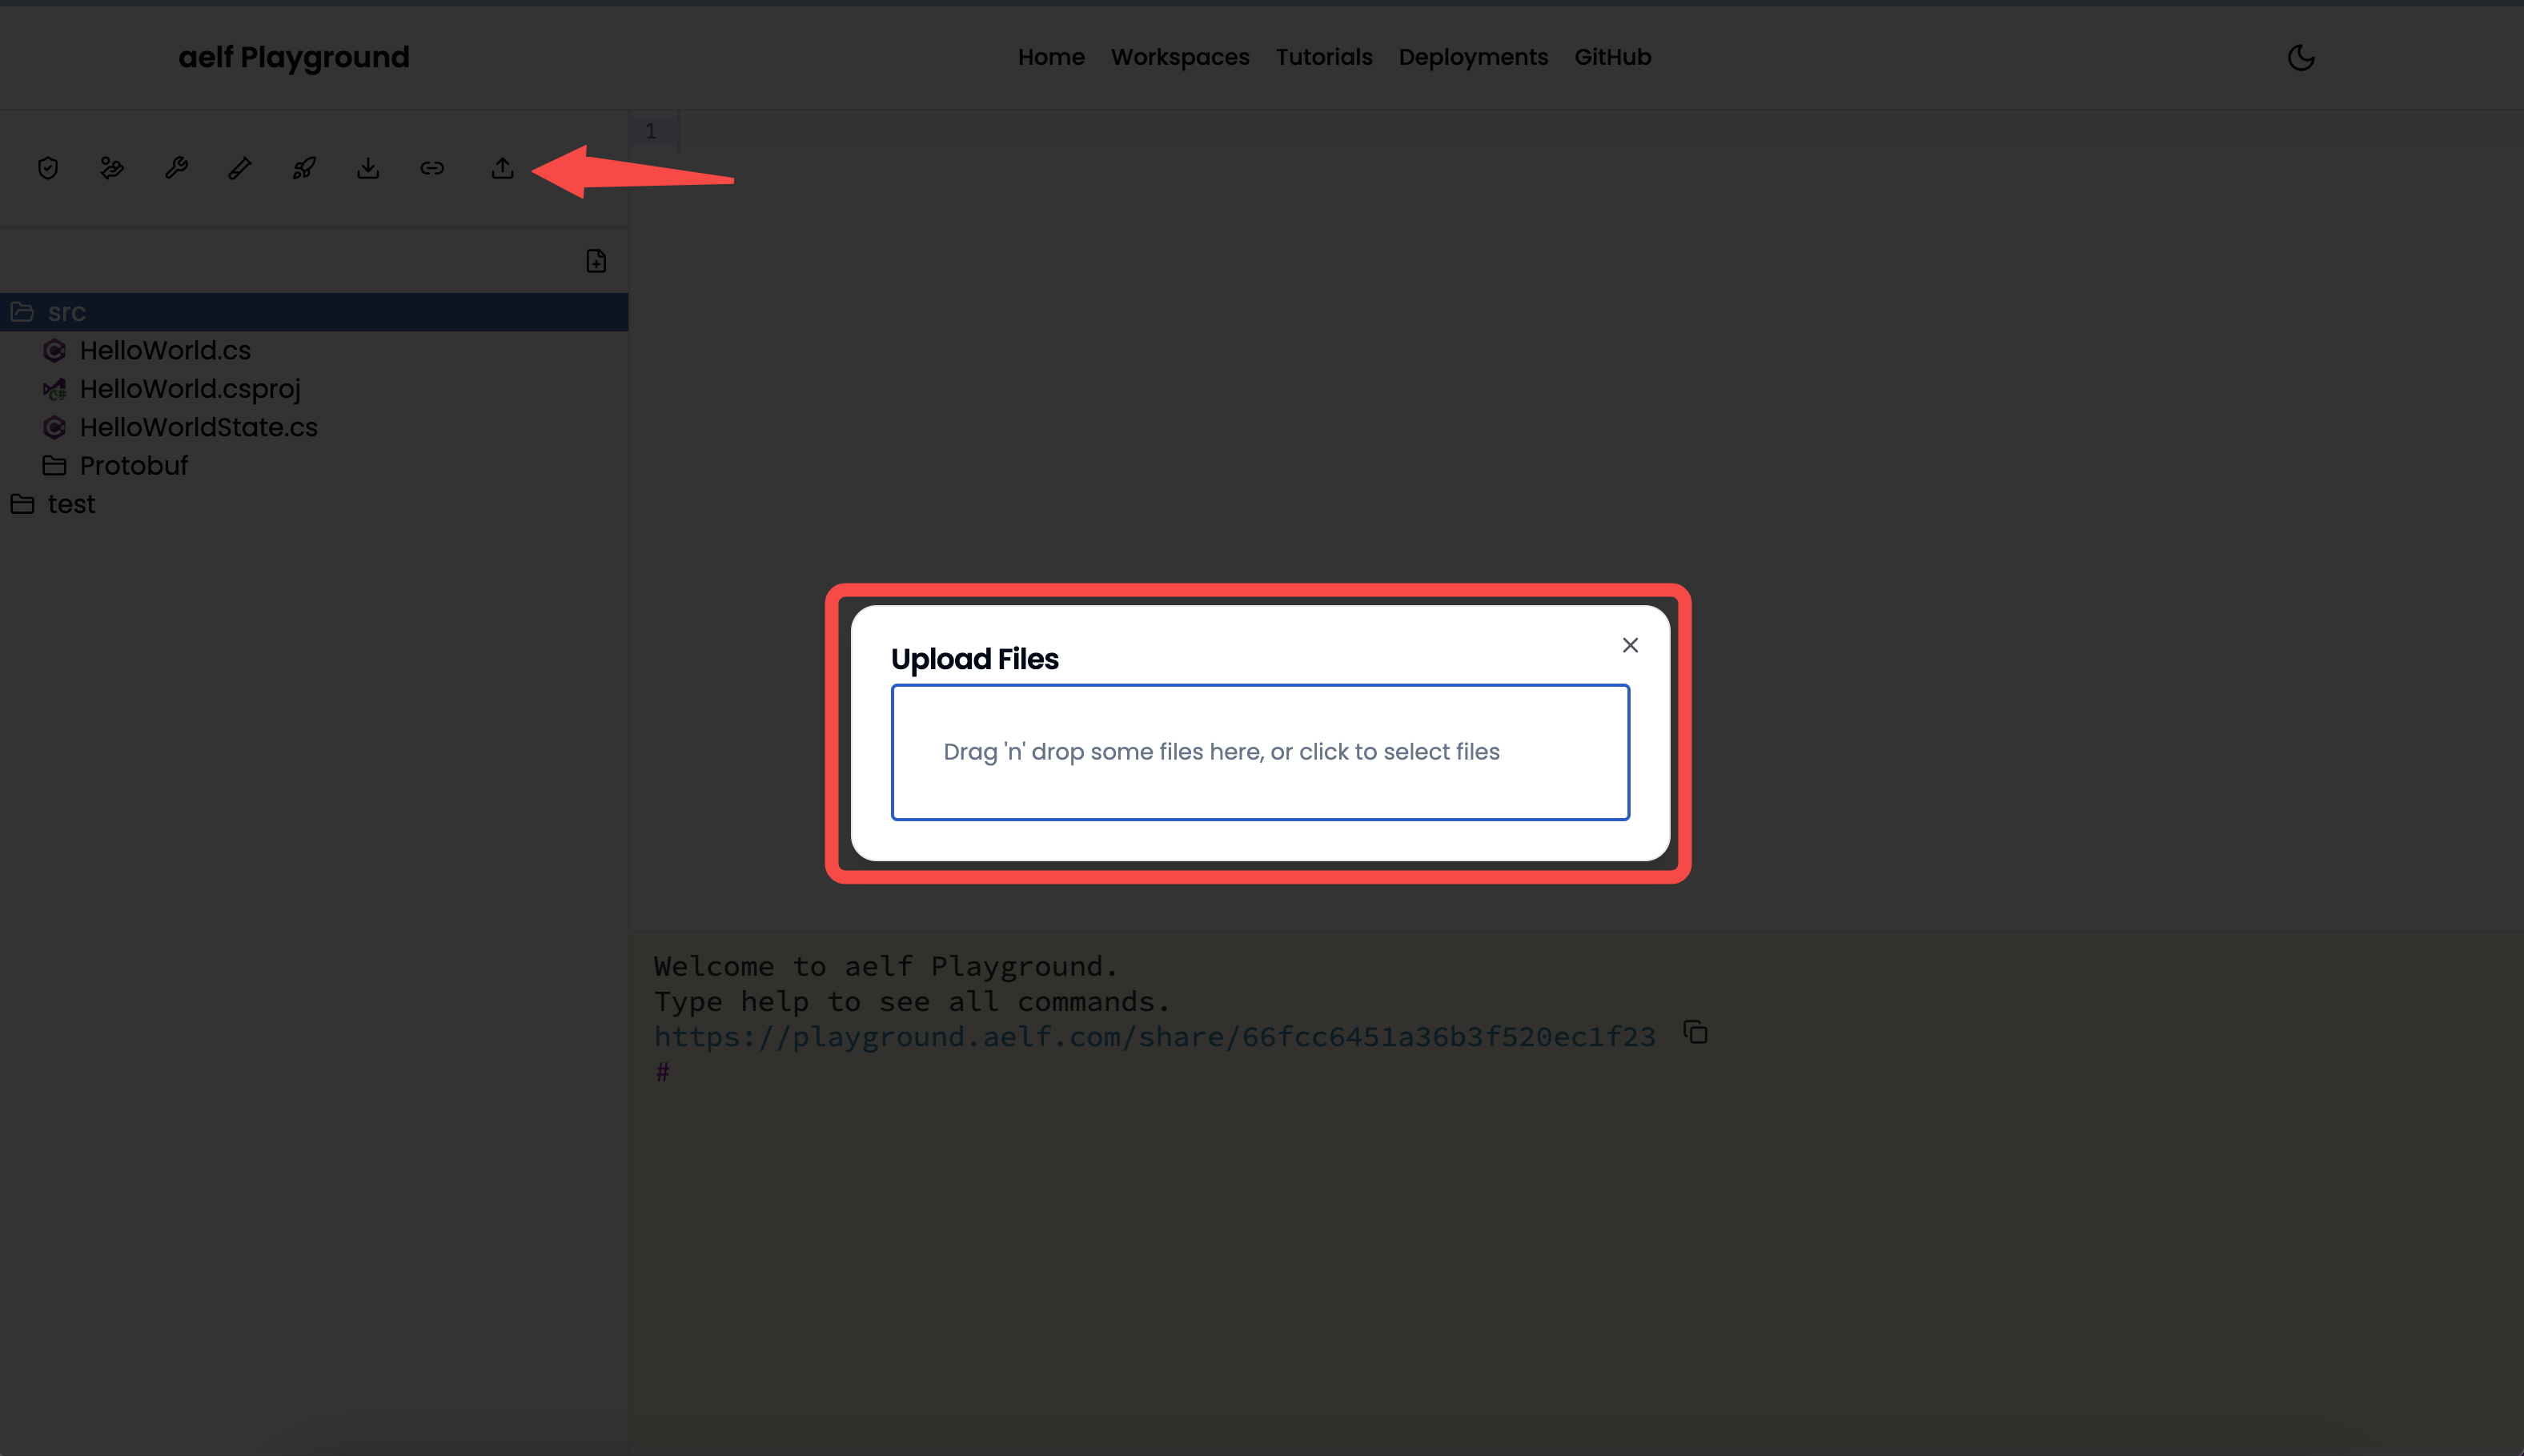
- Upload Files: Upload more files to the project when necessary. It will show a
drag and drop filessection to drop files from the local directory.
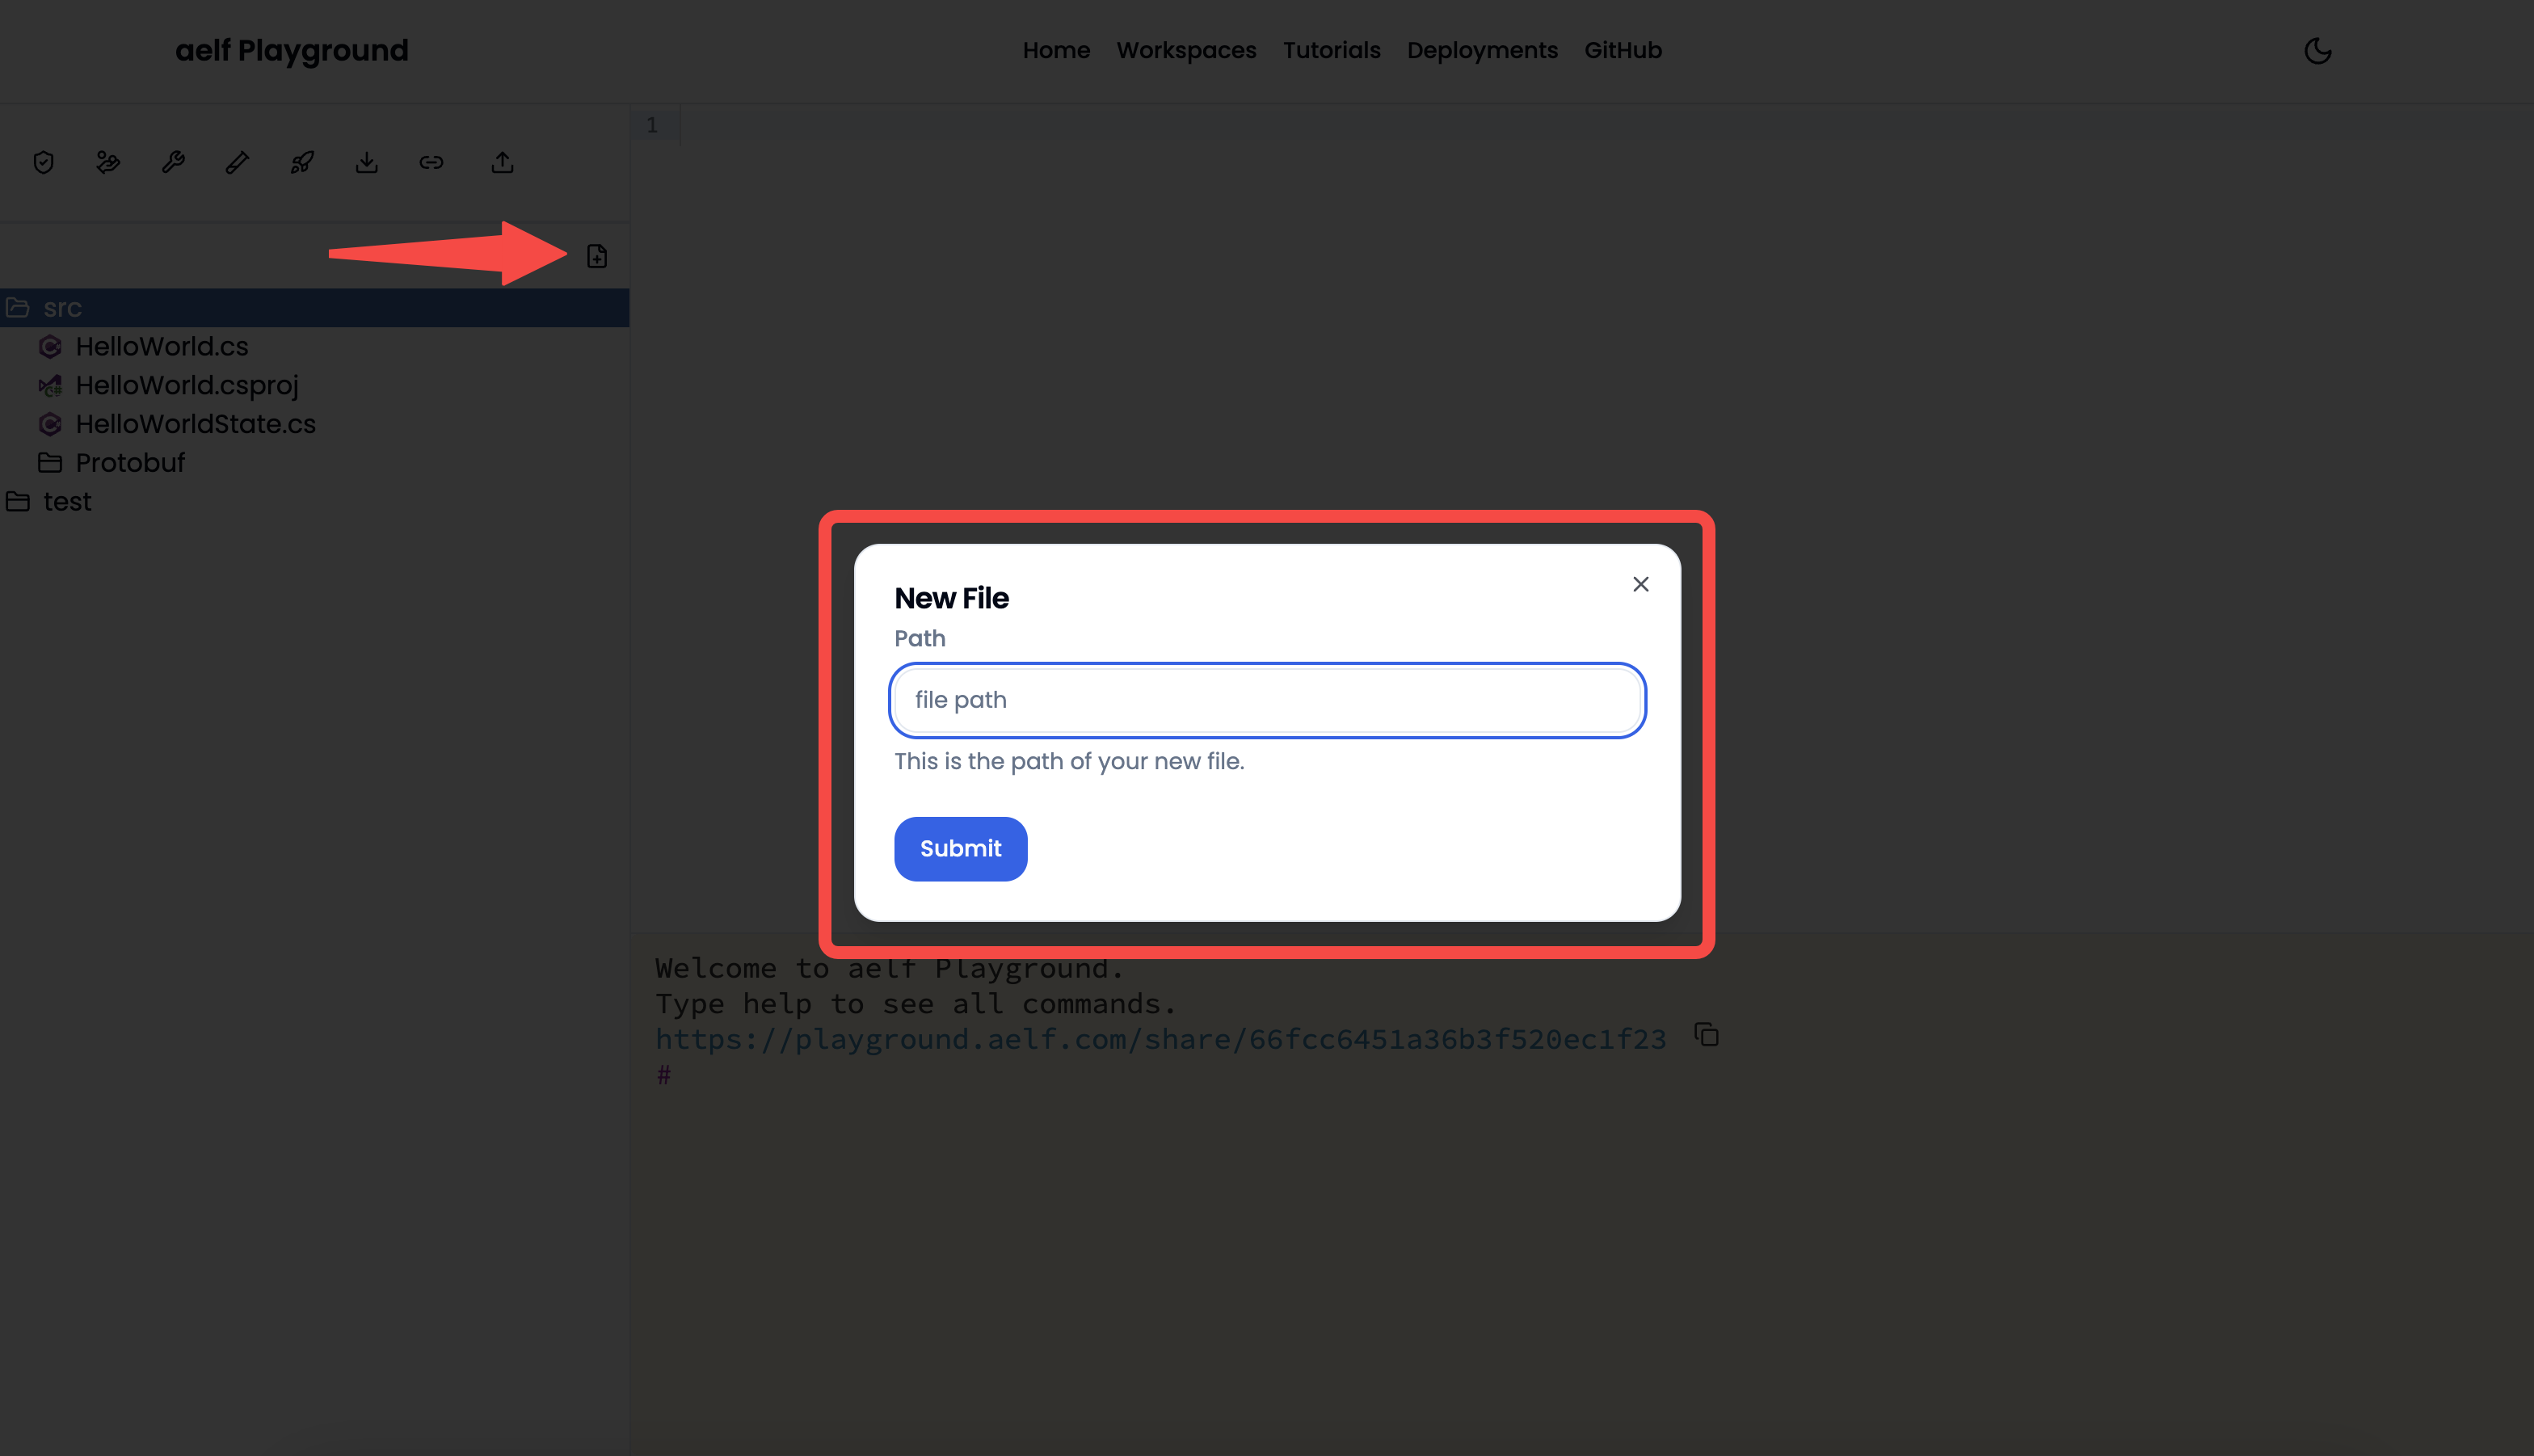
- Add a New File: Manually add a new file in the playground project structure. It will allow users to add a new file in the workspace project structure add smart contract code, new proto files, etc.
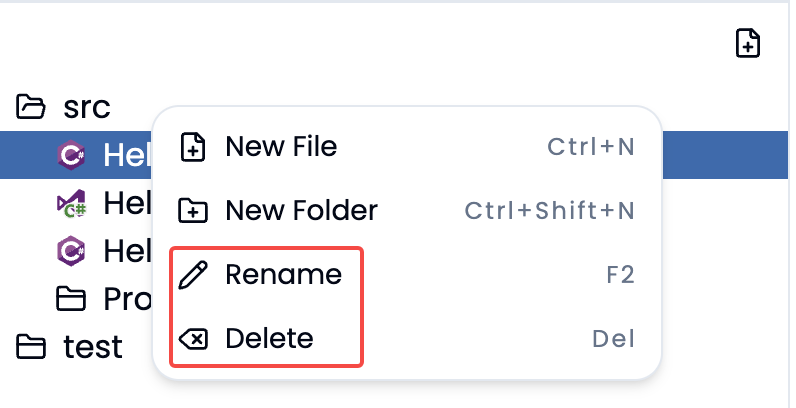
- Rename & Delete File:
Renames&Deletesthe chosen file or folders in the project directory structure.
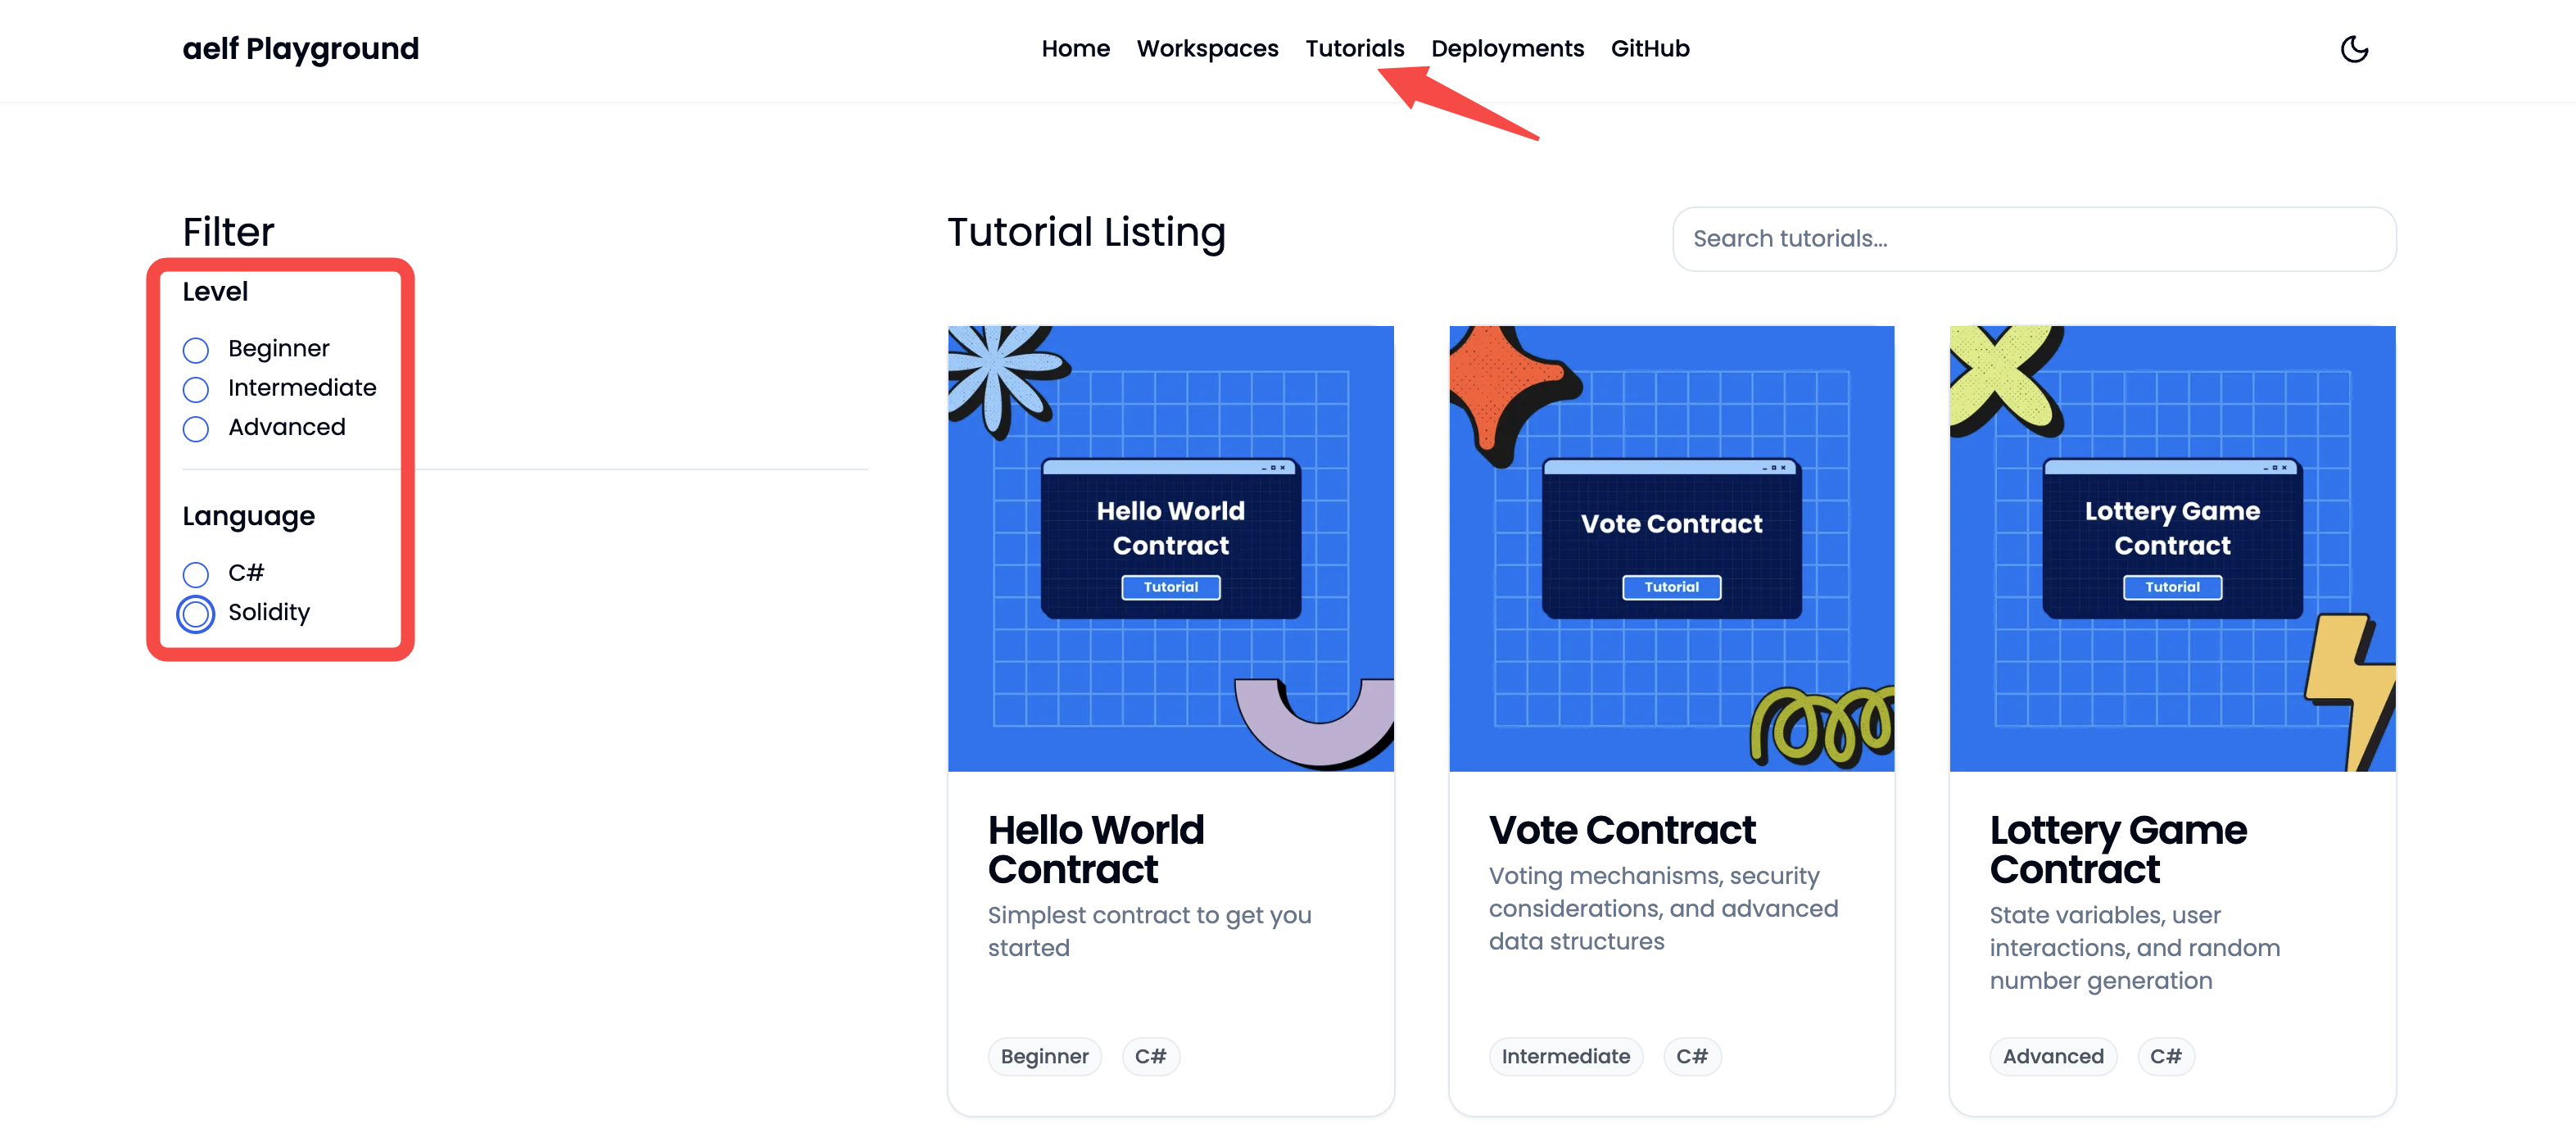
- Tutorials: Some pre-compiled tutorials are curated under
Tutorialssection of aelf-playground. It provides an option to filter the tutorials based on the difficulty level (Beginner,Intermediate&Advanced) and smart contracts languages (C# & Solidity).
- Deployments:
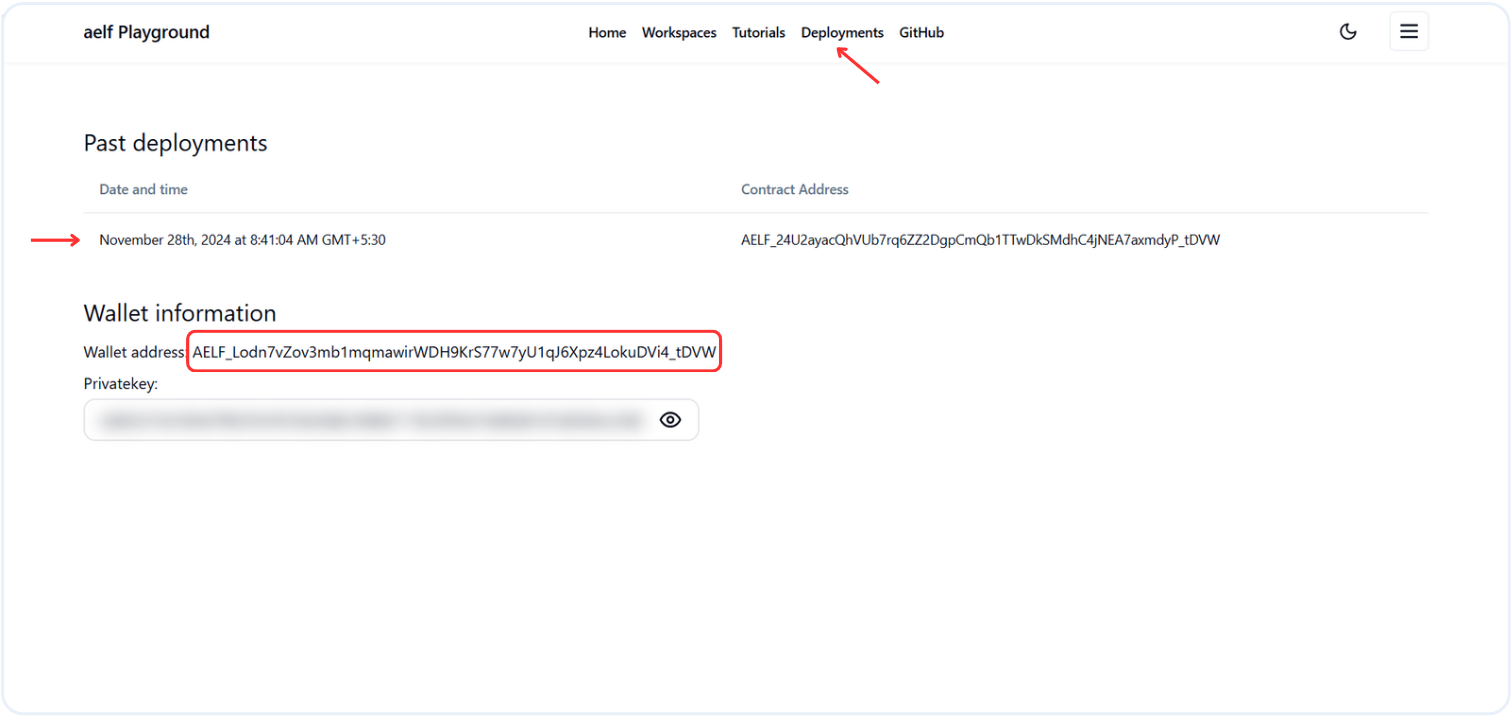
Deploymentssection provides a list of all deployed tutorials along with the wallet address used to deploy smart contracts on the aelf blockchain. You can click on the wallet address to view wallet details on the aelf explorer.
-
Privatekey: You can export your wallet's private key from the
Deploymentssection. Simply click the eye icon to reveal the private key, which you can then copy.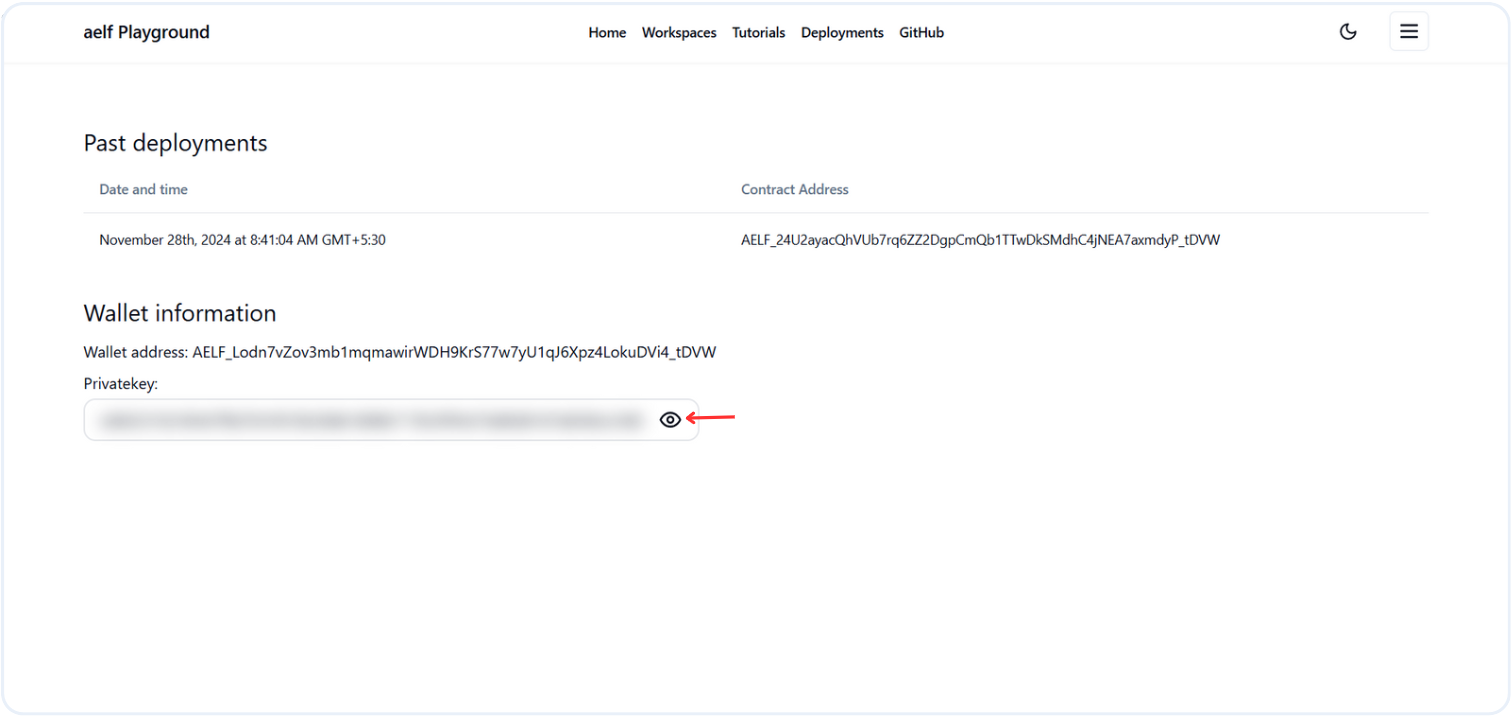
-
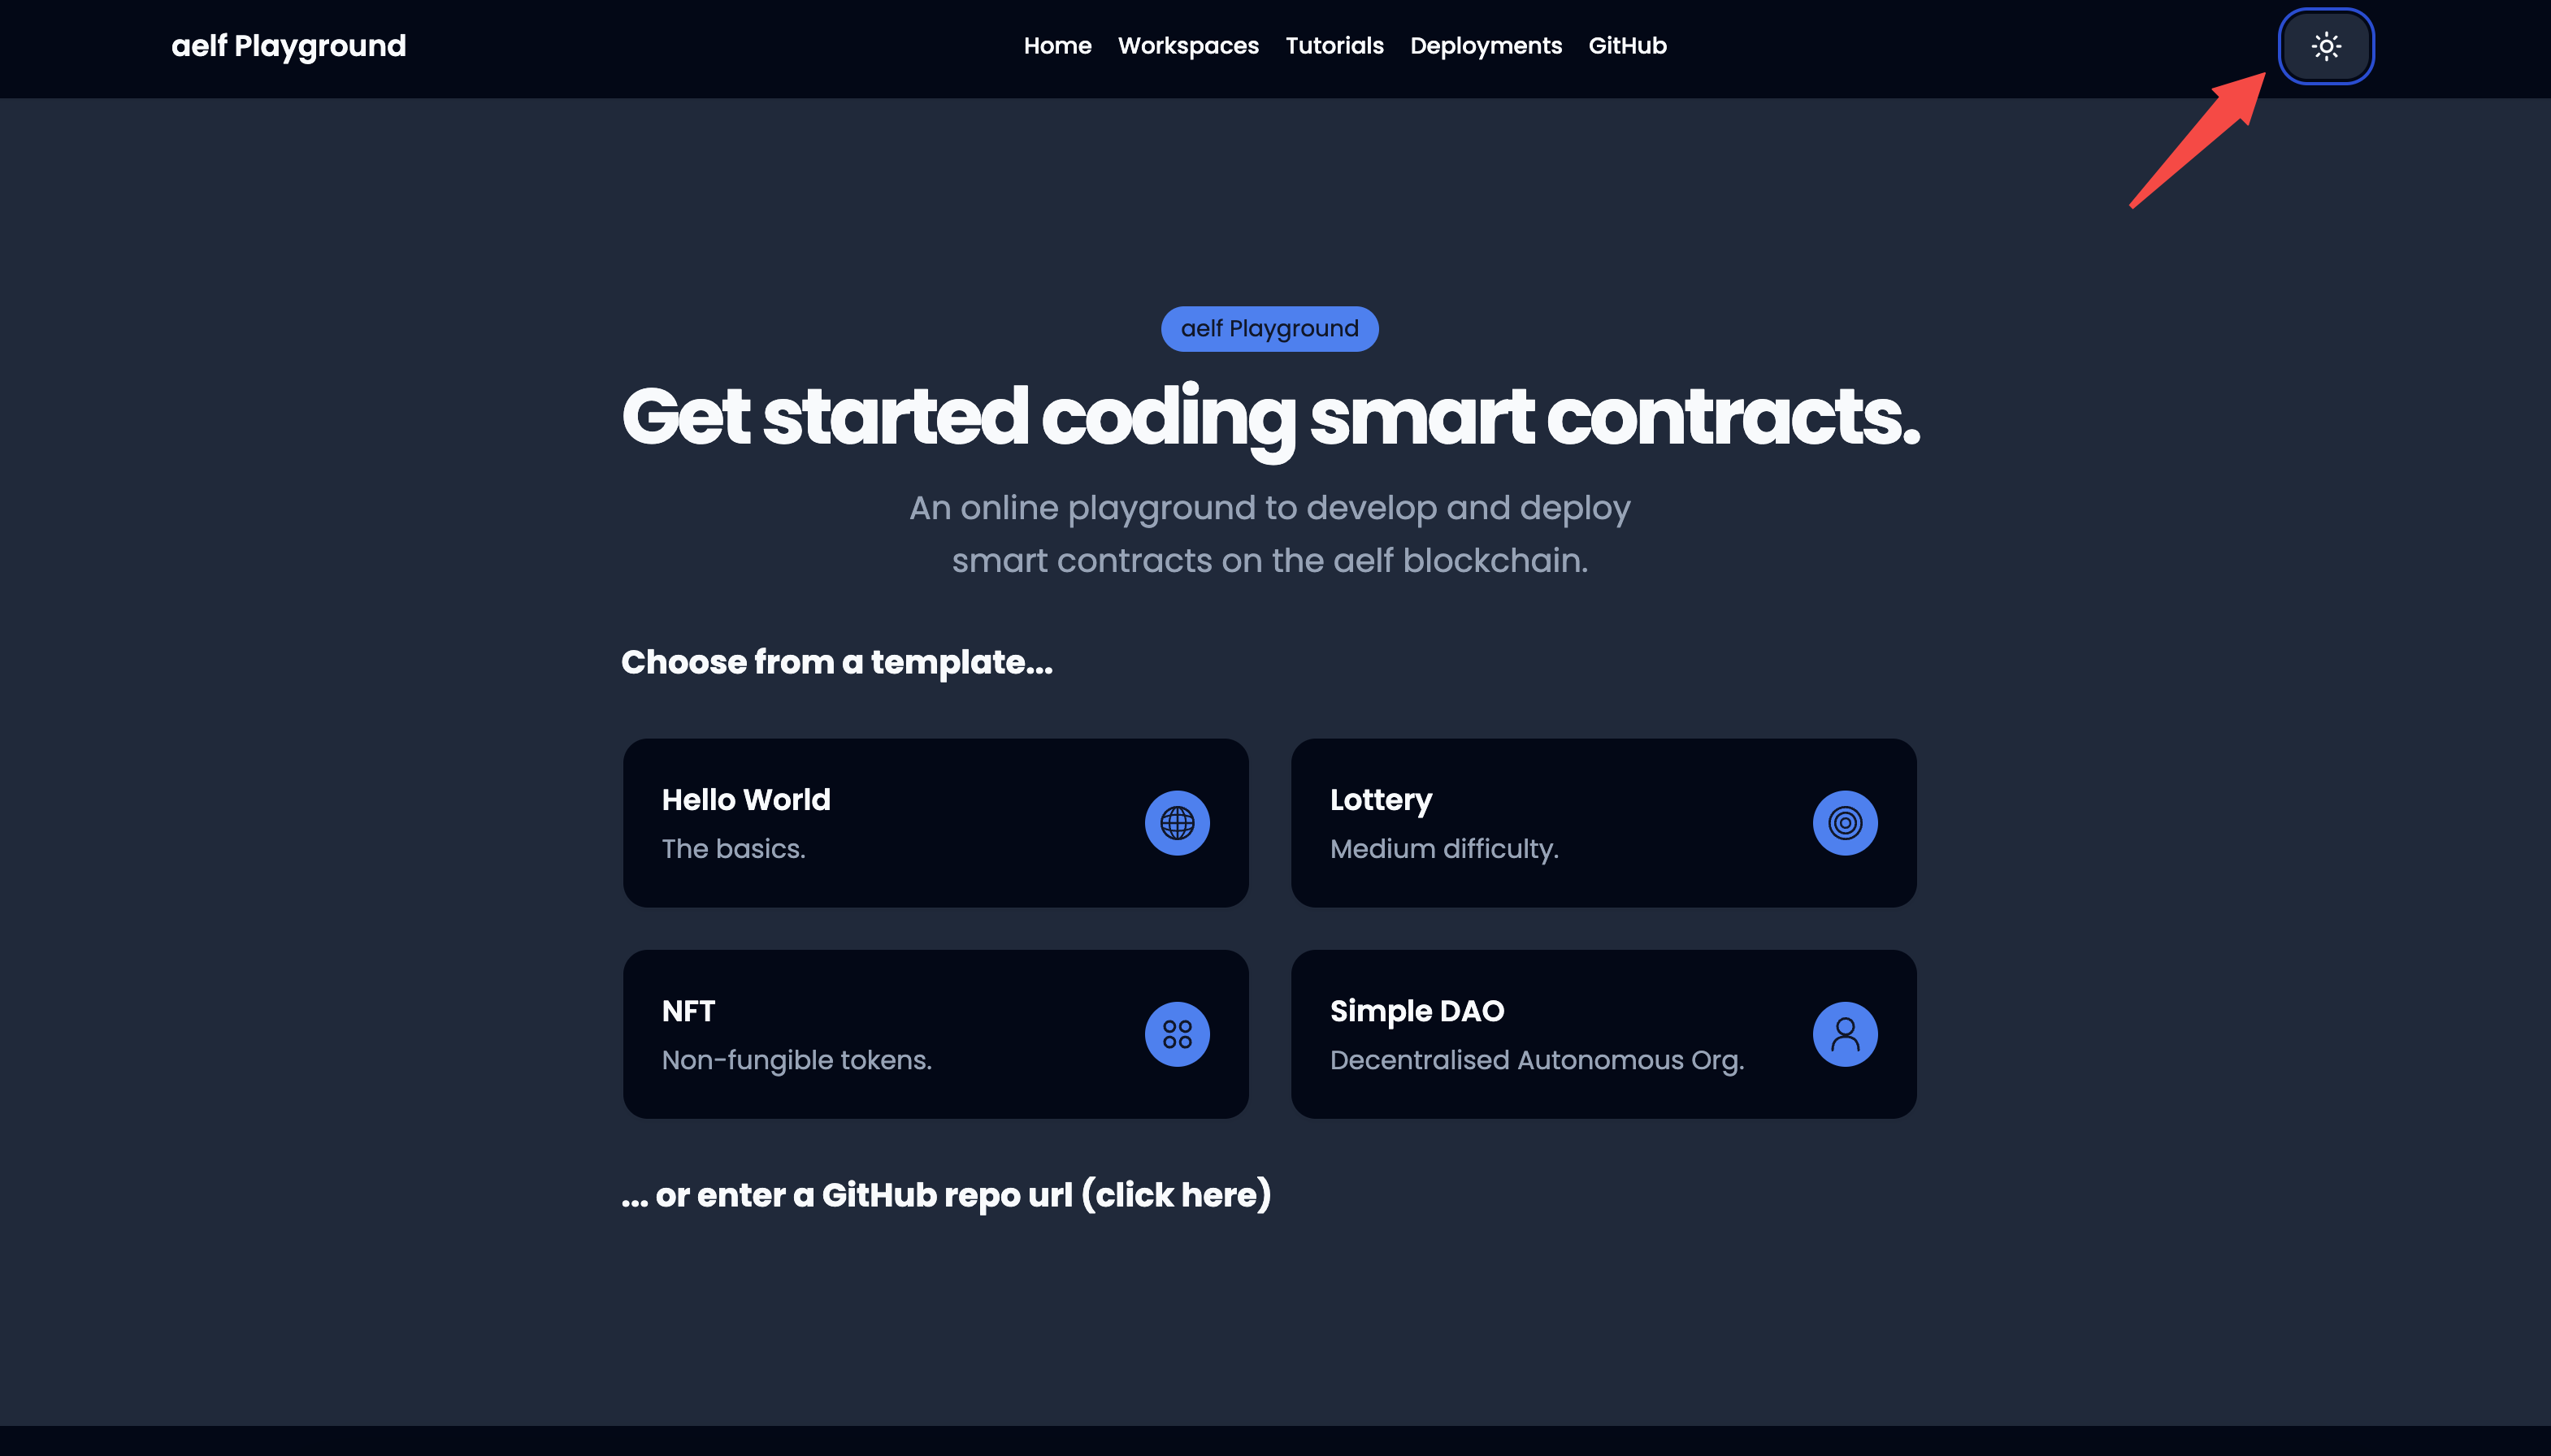
Themes: Users can also choose to toggle between
darkandlightthemes.
4. Example
Now it's time to creat a Todo-dApp using playground.
Setup Todo Smart Contract Project
-
Open aelf Playground in your browser.
-
Select the
Hello WorldTemplate.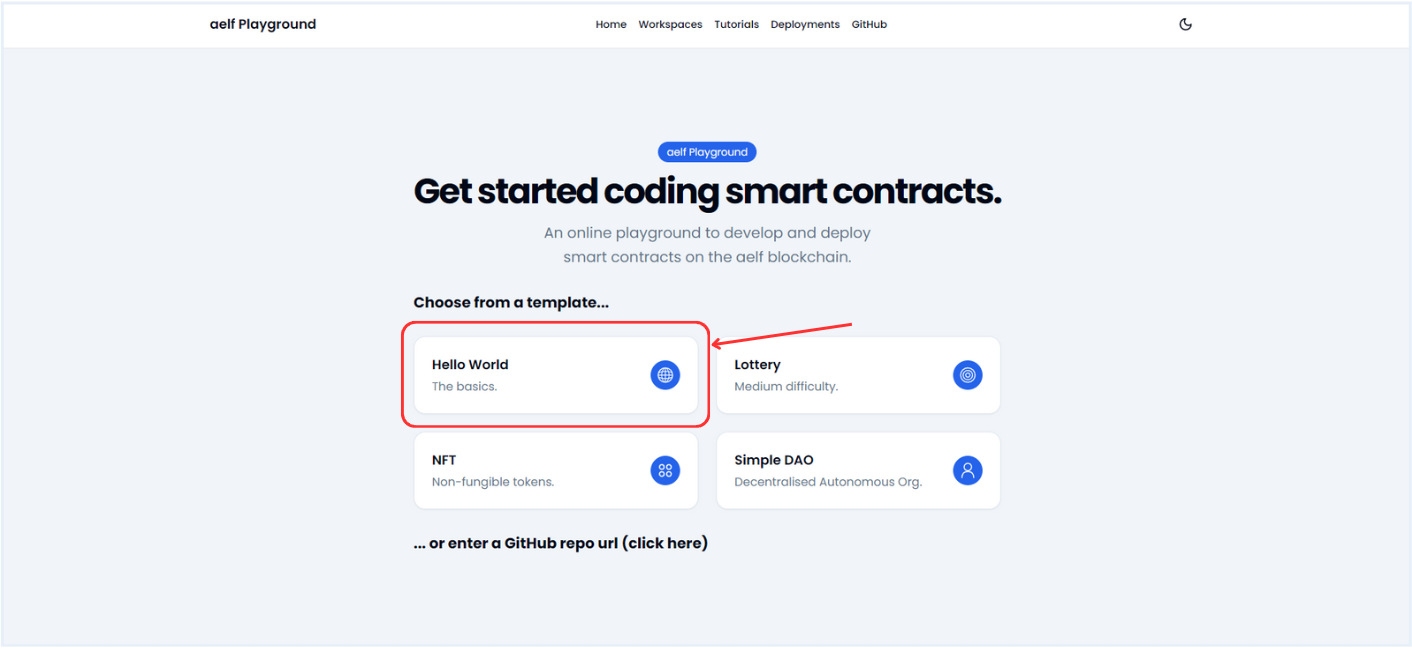
-
Enter the "todo-dapp" Name of a new workspace and Press the Submit button.
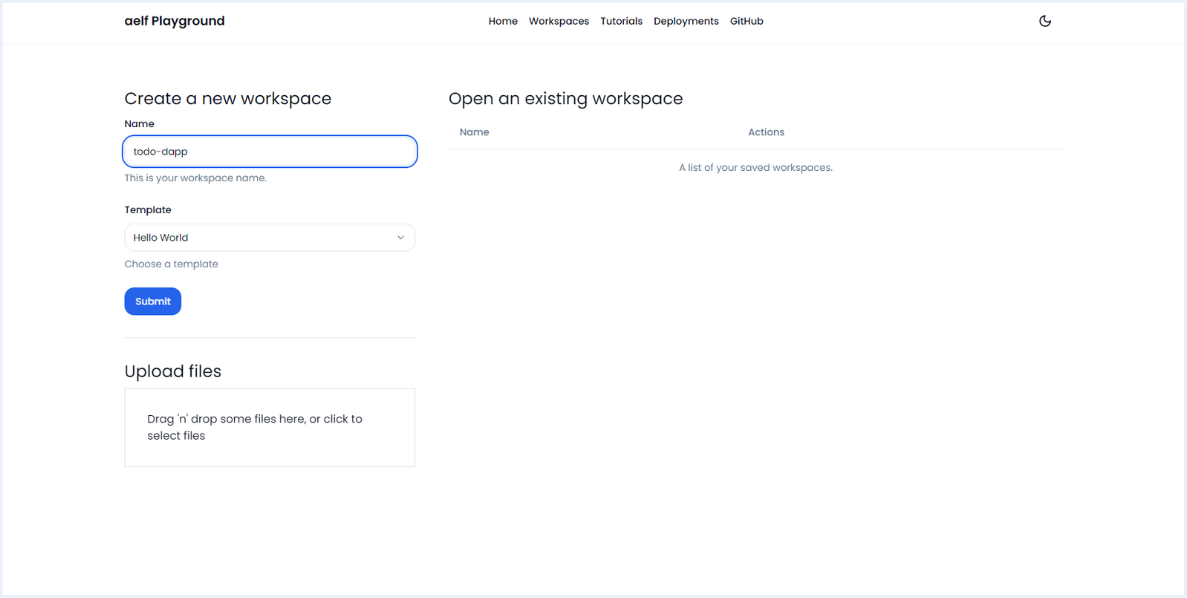
-
You will be redirect to workspace page with specific folders like
srcandtest.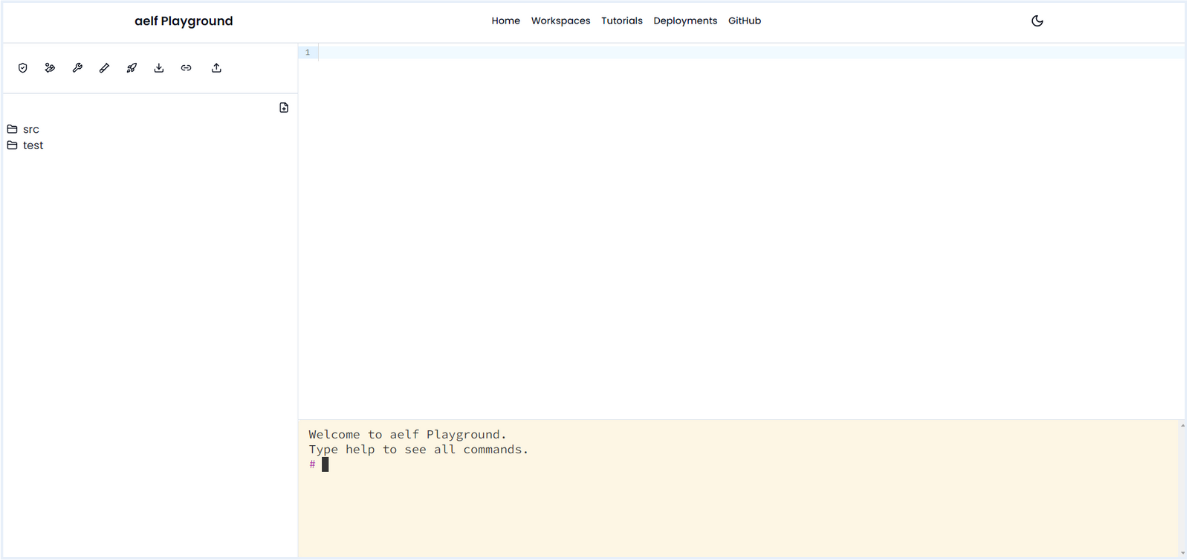
Rename File Name
-
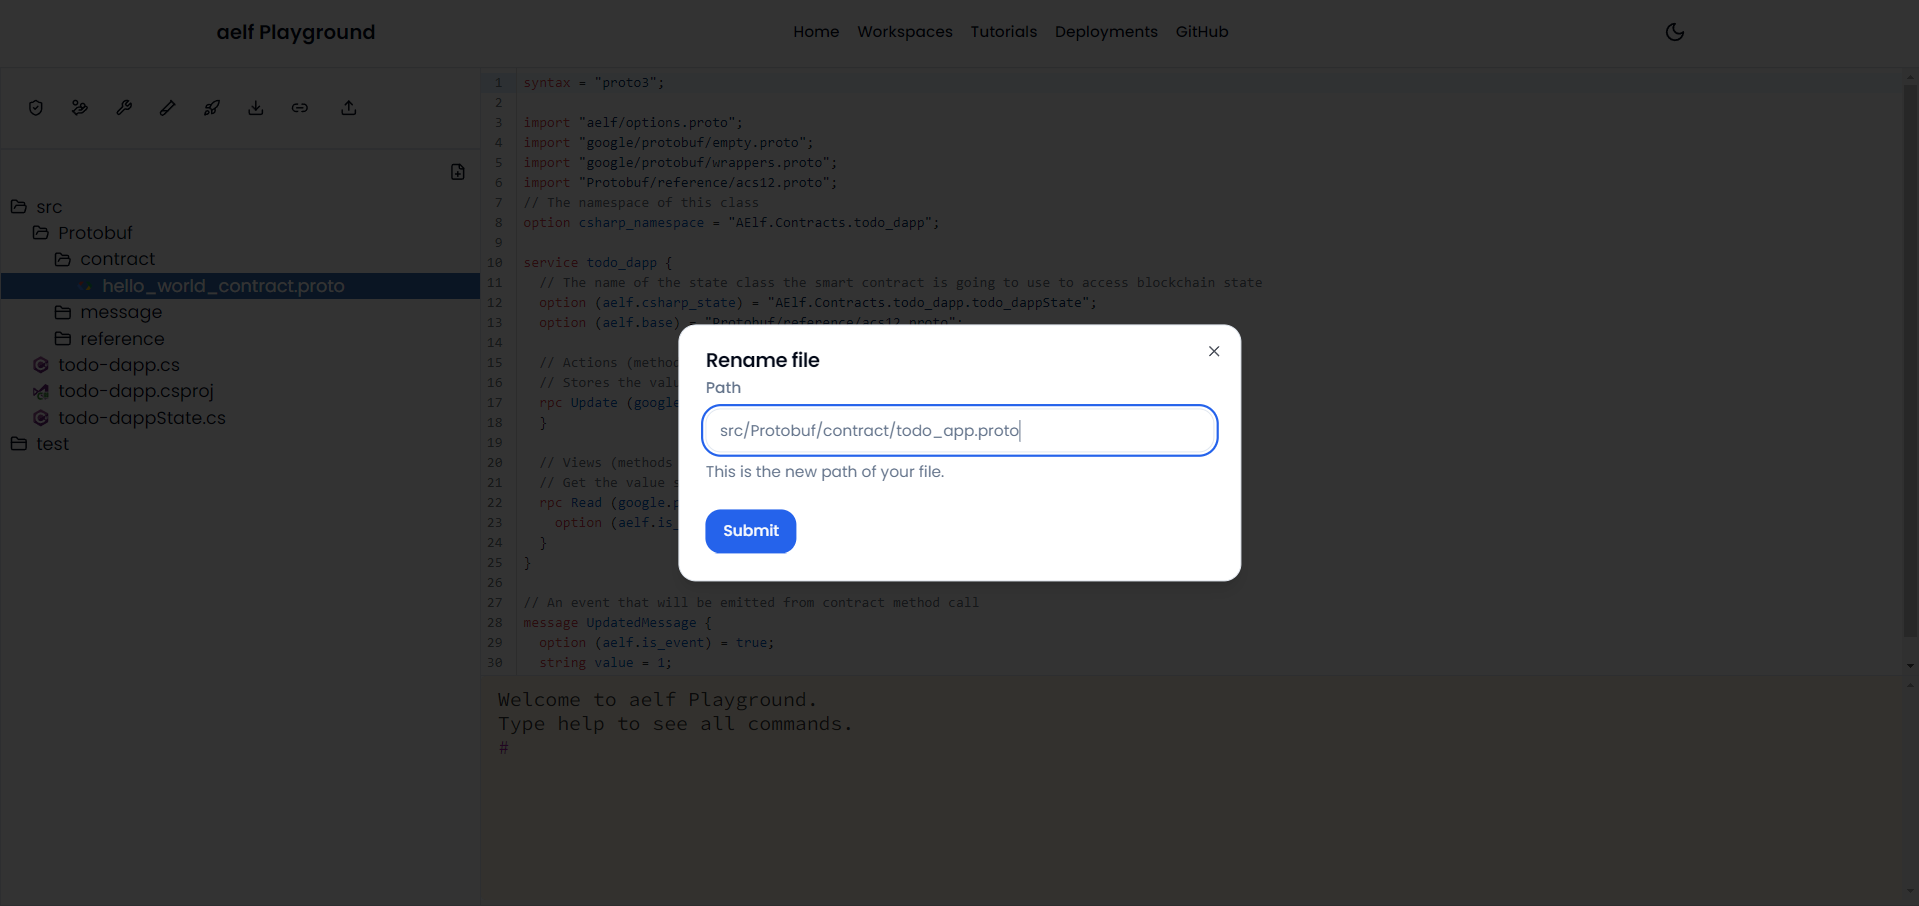
Rename the proto file name
hello_world_contract.protoinside foldersrc/Protobuf/contract/totodo_app.proto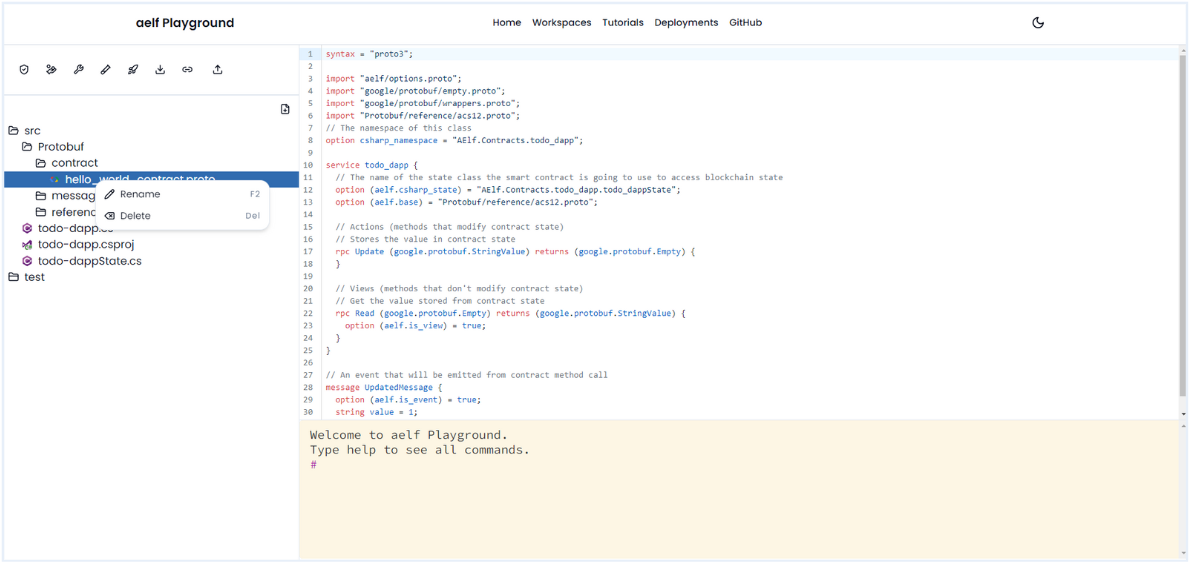
Prepare the Todo Functions
The implementation of todo_app.proto file inside folder src/Protobuf/contract/ is as follows:
syntax = "proto3";
import "aelf/options.proto";
import "google/protobuf/empty.proto";
import "google/protobuf/wrappers.proto";
import "Protobuf/reference/acs12.proto";
// The namespace of this class
option csharp_namespace = "AElf.Contracts.ToDo";
service ToDo {
  // The name of the state class the smart contract is going to use to access blockchain state
  option (aelf.csharp_state) = "AElf.Contracts.ToDo.ToDoState";
  option (aelf.base) = "Protobuf/reference/acs12.proto";
  rpc Initialize (google.protobuf.Empty) returns (google.protobuf.Empty) {
  }
  rpc CreateTask (TaskInput) returns (google.protobuf.StringValue) {
  }
  rpc UpdateTask (TaskUpdateInput) returns (google.protobuf.Empty) {
  }
  rpc DeleteTask (google.protobuf.StringValue) returns (google.protobuf.Empty) {
  }
  rpc ListTasks (google.protobuf.StringValue) returns (TaskList) {
    option (aelf.is_view) = true;
  }
  rpc GetTask (google.protobuf.StringValue) returns (Task) {
    option (aelf.is_view) = true;
  }
  rpc GetInitialStatus (google.protobuf.Empty) returns (google.protobuf.BoolValue) {
    option (aelf.is_view) = true;
  }
}
// A message to represent a task
message Task {
  string task_id = 1;
  string name = 2;
  string description = 3;
  string category = 4;
  string status = 5;
  string owner = 6;
  int64 created_at = 7;
  int64 updated_at = 8;
}
// Input for creating a task
message TaskInput {
  string name = 1;
  string description = 2;
  string category = 3;
}
// Input for updating a task
message TaskUpdateInput {
  string task_id = 1;
  string name = 2;
  string description = 3;
  string category = 4;
  string status = 5;
}
// List of tasks
message TaskList {
  repeated Task tasks = 1;
}
rpcmethods define the callable functions within the contract, allowing external systems to interact with the contract's logic.messagerepresent the structured data exchanged between the contract and external systems.
Define Contract States
The implementation of the ToDo app state inside file src/todo-dappState.cs is as follows:
using AElf.Sdk.CSharp.State;
using AElf.Types;

namespace AElf.Contracts.ToDo
{
    public class ToDoState : ContractState
    {
        public BoolState Initialized { get; set; }
        public SingletonState<Address> Owner { get; set; }
        public MappedState<string, Task> Tasks { get; set; } // Mapping of task ID to Task
        public MappedState<string, bool> TaskExistence { get; set; } // Mapping to track task existence
        public StringState TaskIds { get; set; } // Concatenated string of task IDs
        public Int32State TaskCounter { get; set; } // Counter for generating unique IDs
    }
}
- The
State.csfile in an aelf blockchain smart contract holds the variables that store the contract's data, making sure this data is saved and accessible whenever the contract needs it.
Implement ToDo Smart Contract
The implementation of the ToDo App smart contract inside file src/todo-dapp.cs is as follows:
using Google.Protobuf.WellKnownTypes;
using System.Collections.Generic;
namespace AElf.Contracts.ToDo
{
    public class ToDo : ToDoContainer.ToDoBase
    {
        public override Empty Initialize(Empty input)
        {
            if (State.Initialized.Value)
            {
                return new Empty();
            }
            State.Initialized.Value = true;
            State.Owner.Value = Context.Sender;
            State.TaskIds.Value = "";
            State.TaskCounter.Value = 0;
            return new Empty();
        }
        public override StringValue CreateTask(TaskInput input)
        {
            if (!State.Initialized.Value)
            {
                return new StringValue { Value = "Contract not initialized." };
            }
            var taskId = (State.TaskCounter.Value + 1).ToString();
            State.TaskCounter.Value++;
            var timestamp = Context.CurrentBlockTime.Seconds;
            // Create task dictionary entry directly in ToDo class
            State.Tasks[taskId] = new Task
            {
                TaskId = taskId,
                Name = input.Name,
                Description = input.Description,
                Category = input.Category,
                Status = "pending",
                CreatedAt = timestamp,
                UpdatedAt = timestamp,
                Owner = Context.Sender.ToString().Trim('"'),
            };
            State.TaskExistence[taskId] = true;
            // Append task ID to the list of IDs
            var existingTaskIds = State.TaskIds.Value;
            existingTaskIds += string.IsNullOrEmpty(existingTaskIds) ? taskId : $",{taskId}";
            State.TaskIds.Value = existingTaskIds;
            return new StringValue { Value = taskId };
        }
        public override Empty UpdateTask(TaskUpdateInput input)
        {
            var task = State.Tasks[input.TaskId];
            if (task == null)
            {
                return new Empty(); // Handle case if task doesn't exist
            }
            task.Name = input.Name ?? task.Name;
            task.Description = input.Description ?? task.Description;
            task.Category = input.Category ?? task.Category;
            task.Status = input.Status ?? task.Status;
            task.UpdatedAt = Context.CurrentBlockTime.Seconds;
            State.Tasks[input.TaskId] = task;
            return new Empty();
        }
        public override Empty DeleteTask(StringValue input)
        {
            State.Tasks.Remove(input.Value);
            State.TaskExistence.Remove(input.Value);
            // Remove task ID from the list of IDs
            var existingTaskIds = State.TaskIds.Value.Split(',');
            var newTaskIds = new List<string>(existingTaskIds.Length);
            foreach (var taskId in existingTaskIds)
            {
                if (taskId != input.Value)
                {
                    newTaskIds.Add(taskId);
                }
            }
            State.TaskIds.Value = string.Join(",", newTaskIds);
            return new Empty();
        }
        public override TaskList ListTasks(StringValue input)
        {
            var owner = input.Value; // Get the owner value from the input
            var taskList = new TaskList();
            var taskIds = State.TaskIds.Value.Split(',');
            foreach (var taskId in taskIds)
            {
                var task = State.Tasks[taskId];
                if (task != null && task.Owner == owner) // Filter tasks by owner
                {
                    taskList.Tasks.Add(task);
                }
            }
            return taskList;
        }
        public override Task GetTask(StringValue input)
        {
            var task = State.Tasks[input.Value];
            if (task == null)
            {
                return new Task { TaskId = input.Value, Name = "Task not found." };
            }
            return task;
        }
        public override BoolValue GetInitialStatus(Empty input)
        {
            return new BoolValue { Value = State.Initialized.Value };
        }
    }
}
Ai Audit Report
-
Click on AI Audit Icon to generate the AI Audit report.
-
The Report will be visible once the AI audit completes. It will provides suggestion for Todo functions as shown below so apply the suggetion and make your Todo smart contract more better.
Save Gas Fee
-
Click on Save Gas Fee Icon and It will suggest to make changes if contract need to be optimised otherwise it shows result like below.
Building Smart Contract
-
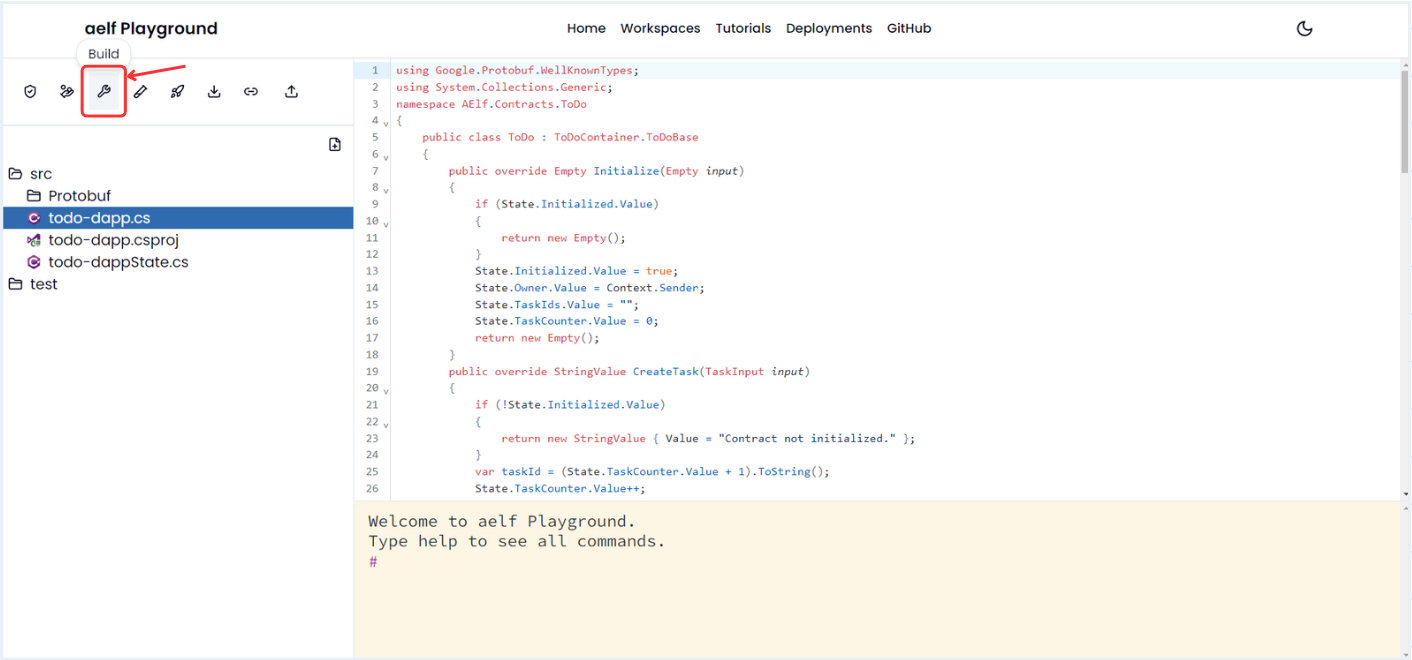
Click on Build Icon for generate the build.
-
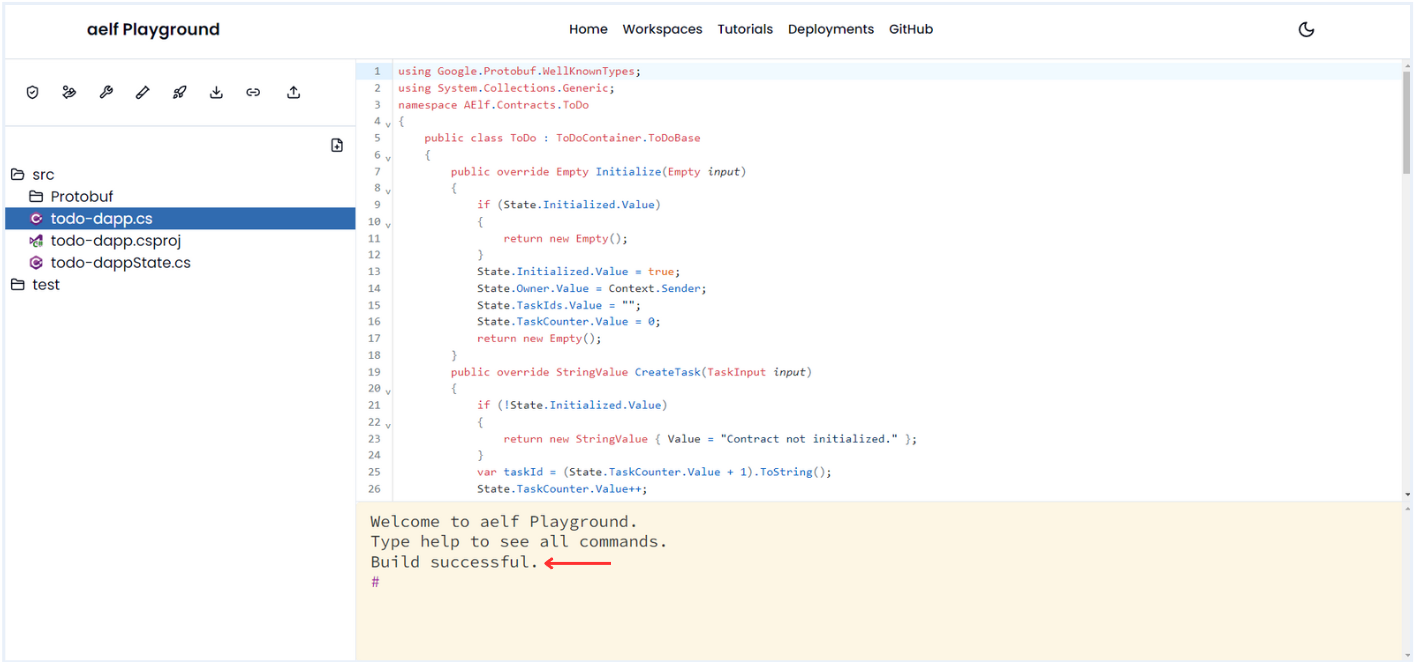
Once Build create successfully, You will get Build successful message in terminal.
Deploy Smart Contract
-
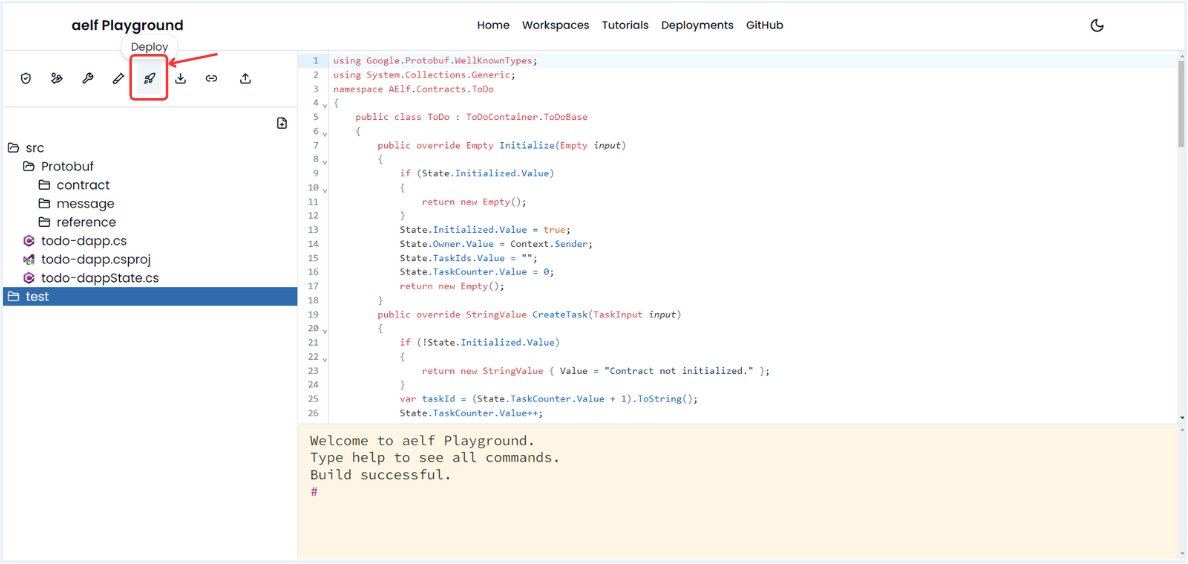
Click on Deploy Icon for deploy the smart contract.
-
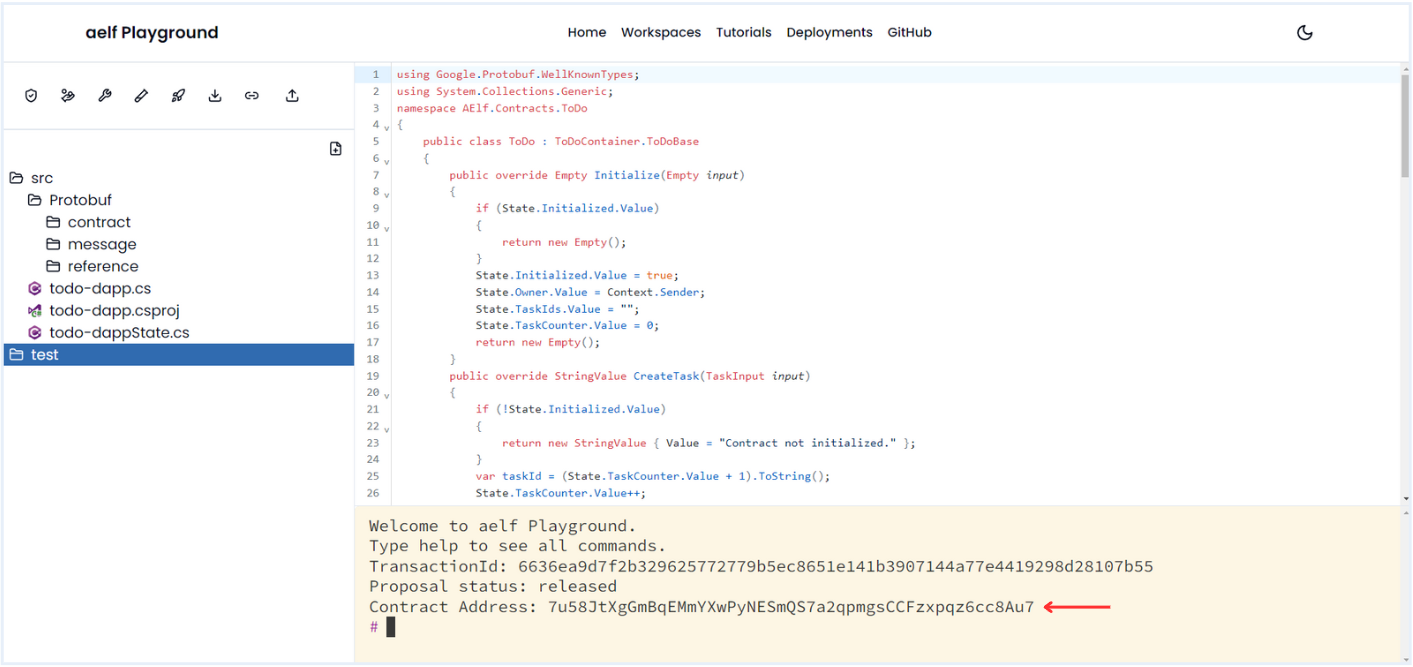
Once your smart contract deploy successfully, You will get Contract Address in terminal.
Contract Viewer
-
The Contract Viewer will appear once your contract is successfully deployed, allowing you to execute all functions directly within the Playground.

Export Smart Contract
-
Click on Export Icon for download the smart contract.
-
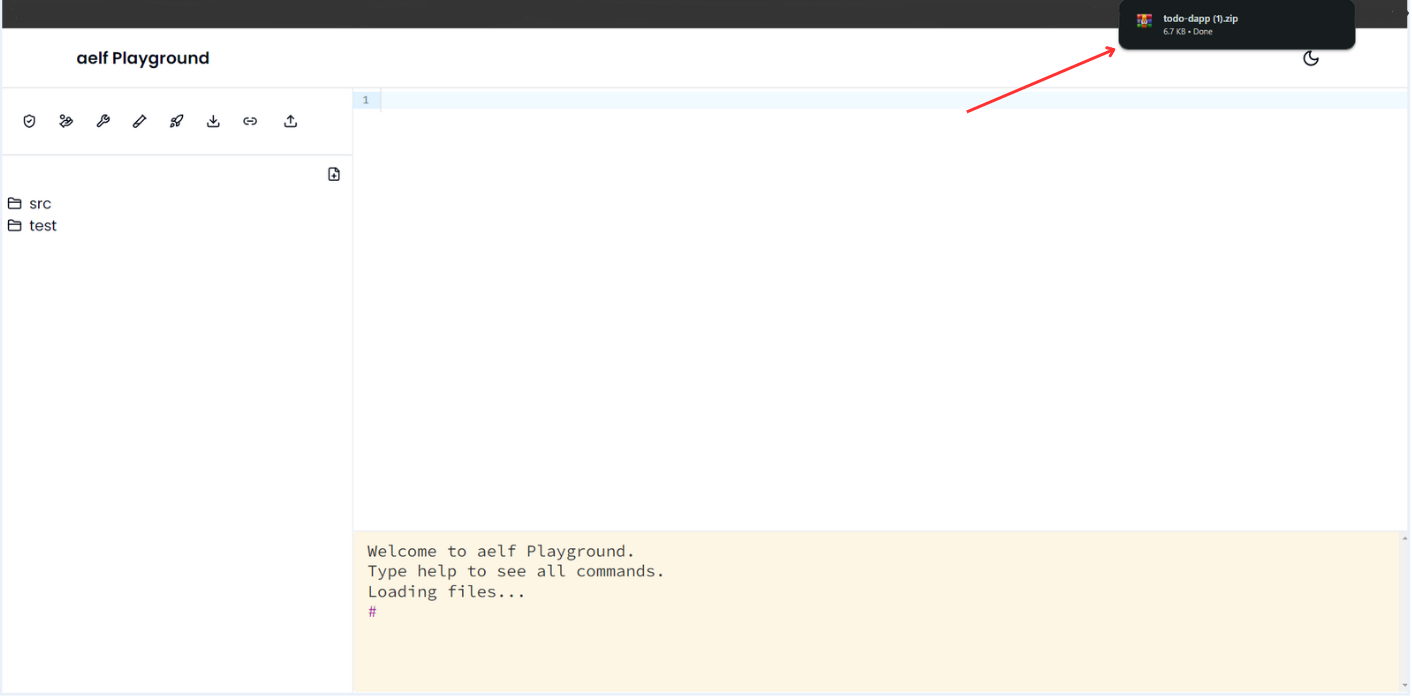
Once your smart contract exported successfully, You will get it in zip format like below.
Share Link
-
Click on Share Icon to generate the share link of the smart contract.
-
Share link will be generated and You will get it in terminal.
Deployment
-
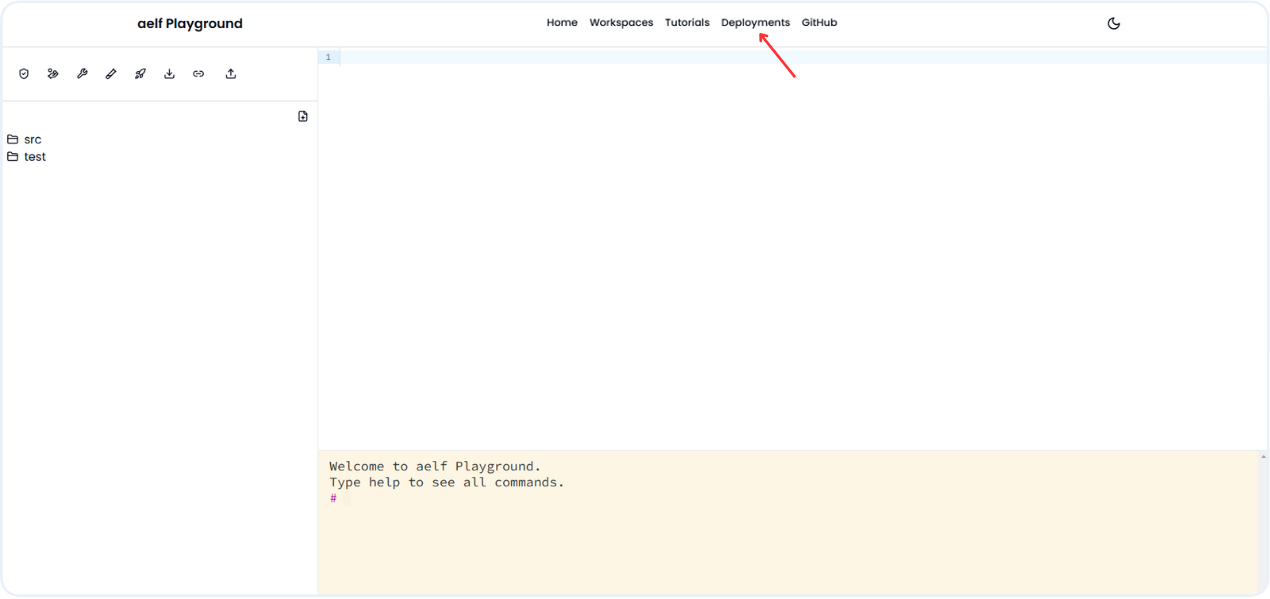
Click on Deployment link to get deployment data of our recent deployed smart contract.
-
You will receive data about the deployed contract and wallet address, and you can click on them to view more details related to the wallet and contract.
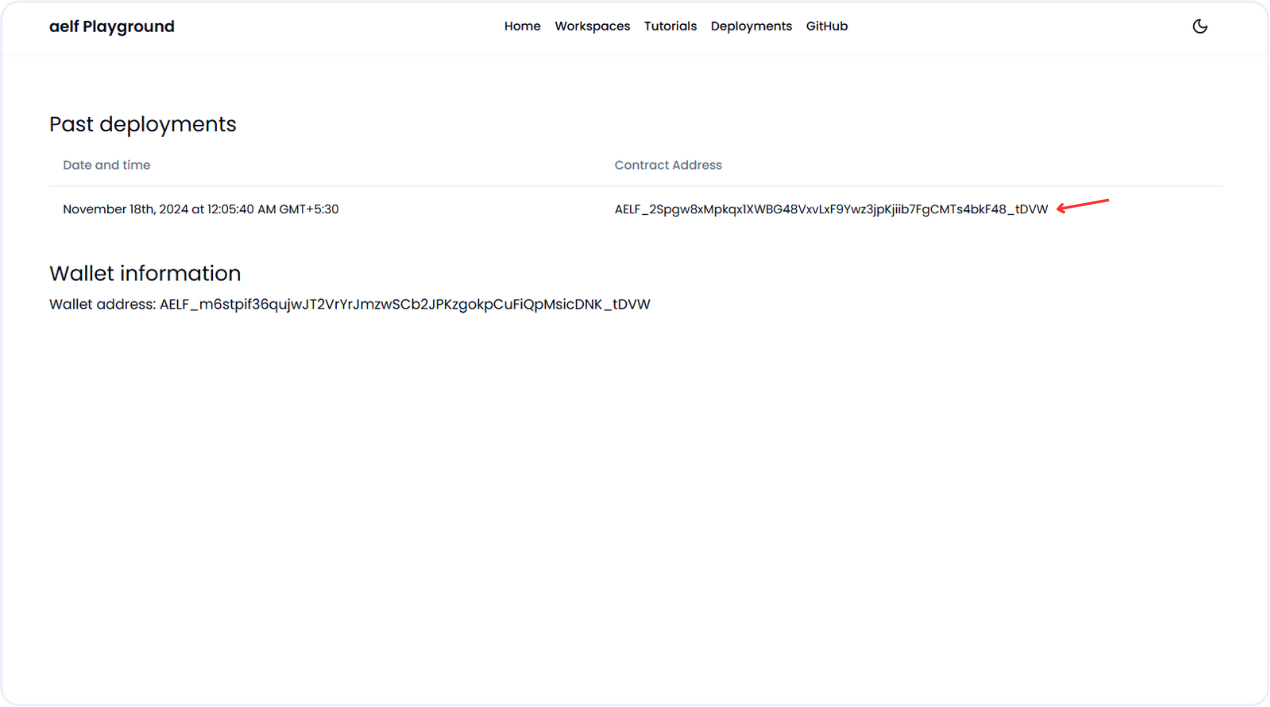
🎉 Congratulations, We got the contract address after successful deployment of todo-dapp smart contract using playground.
Conclusion
The aelf Playground offers a seamless and accessible platform for developers to build, test, and deploy smart contracts without the need for any local setup. With built-in features like AI audit, gas fee optimization, and GitHub integration, it simplifies the entire smart contract development process. Whether you're writing new code or modifying existing templates, the aelf Playground provides all the essential tools in one place, making it an ideal sandbox for both beginners and experienced developers.