DAO dApp
Description: This is the slightly more complex dApp in this guide. It covers mechanisms of a decentralized autonomous organization (DAO) dApp including creating a proposal, vote on a proposal, fetch all proposals, security considerations, and advanced data structures to ensure a fair and transparent DAO processes.
Purpose: To teach you about complex logic implementation, security best practices, and efficient data management in smart contracts.
Difficulty Level: Difficult
Step 1 - Setting up your development environment
- Local
- Codespaces
- Basic knowledge of terminal commands
- IDE - Install VS Code
Install Required Packages
- Install dotnet 6.0 SDK
- Install aelf contract templates
dotnet new --install AElf.ContractTemplates
AELF.ContractTemplates contains various predefined templates for the ease of developing smart contracts on the aelf blockchain.
- Install aelf deploy tool
dotnet tool install --global aelf.deploy
aelf.deploy is a utility tool for deploying smart contracts on the aelf blockchain. Please remember to export PATH after installing aelf.deploy.
Install Node.js and Yarn
Install aelf-command
- Linux and macOs
- Windows
sudo npm i -g aelf-command
npm i -g aelf-command
aelf-command is a CLI tool for interacting with the aelf blockchain, enabling tasks like creating wallets and managing transactions. Provide required permissions while installing aelf-command globally.
Install Git
As we will be using a ready made project, we will require git to clone from the project.
- Visit aelf-devcontainer-template.
- Click the
Use this templatebutton. ChooseCreate a new repository. - Enter a suitable repository name. Click
Create repository. - Within the GitHub interface of your new repository, click on
Code. SelectCodespaces. - Click on the
+sign to create a new Codespace. - After some time, your workspace will load with the contents of the repository. You can now continue your development using GitHub Codespaces.
Step 2 - Develop Smart Contract
Project Setup
- Open your
Terminal. - Enter the following command to create a new project folder:
mkdir capstone_aelf
cd capstone_aelf
- Enter this command to create the capstone project.
dotnet new aelf -n BuildersDAO
Adding Your Smart Contract Code
-
Open your project in your favorite IDE (like VSCode).
-
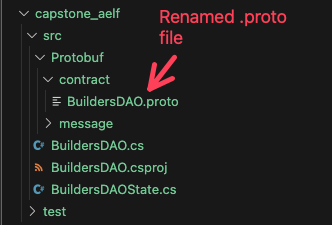
Rename the
src/Protobuf/contract/hello_world_contract.protofile toBuildersDAO.proto. -
After renaming the file, your working directory should look like this.
-
That's it! Your project is now set up and ready to go 🚀
Defining Methods and Messages
Let's add the RPC methods and message definitions to our Voting dApp.
- Open
src/Protobuf/contract/BuildersDAO.proto - Replace its contents with this code snippet.
syntax = "proto3";

import "aelf/core.proto";
import "aelf/options.proto";
import "google/protobuf/empty.proto";
import "Protobuf/reference/acs12.proto";

// The namespace of this class
option csharp_namespace = "AElf.Contracts.BuildersDAO";

service BuildersDAO {
  // The name of the state class the smart contract is going to use to access
  // blockchain state
  option (aelf.csharp_state) = "AElf.Contracts.BuildersDAO.BuildersDAOState";
  option (aelf.base) = "Protobuf/reference/acs12.proto";

  // Actions -> Methods that change state of smart contract
  // This method sets up the initial state of our StackUpDAO smart contract
  rpc Initialize(google.protobuf.Empty) returns (google.protobuf.Empty);

  // This method allows a user to become a member of the DAO by taking in their
  // address as an input parameter
  rpc JoinDAO(aelf.Address) returns (google.protobuf.Empty);

  // This method allows a user to create a proposal for other users to vote on.
  // The method takes in a "CreateProposalInput" message which comprises of an
  // address, a title, description and a vote threshold (i.e how many votes
  // required for the proposal to pass)
  rpc CreateProposal(CreateProposalInput) returns (Proposal);

  // This method allows a user to vote on proposals towards a specific proposal.
  // This method takes in a "VoteInput" message which takes in the address of
  // the voter, specific proposal and a boolean which represents their vote
  rpc VoteOnProposal(VoteInput) returns (Proposal);

  // Views -> Methods that does not change state of smart contract
  // This method allows a user to fetch a list of proposals that had been
  // created by members of the DAO
  rpc GetAllProposals(google.protobuf.Empty) returns (ProposalList) {
    option (aelf.is_view) = true;
  }

  // aelf requires explicit getter methods to access the state value,
  // so we provide these three getter methods for accessing the state
  // This method allows a user to fetch a proposal by proposalId
  rpc GetProposal (google.protobuf.StringValue) returns (Proposal) {
    option (aelf.is_view) = true;
  }

  // This method allows a user to fetch the member count that joined DAO
  rpc GetMemberCount (google.protobuf.Empty) returns (google.protobuf.Int32Value) {
    option (aelf.is_view) = true;
  }

  // This method allows a user to check whether this member is exist by address
  rpc GetMemberExist (aelf.Address) returns (google.protobuf.BoolValue) {
    option (aelf.is_view) = true;
  }
}

// Message definitions
message Member {
  aelf.Address address = 1;
}

message Proposal {
  string id = 1;
  string title = 2;
  string description = 3;
  repeated aelf.Address yesVotes = 4;
  repeated aelf.Address noVotes = 5;
  string status = 6;  // e.g., "IN PROGRESS", "PASSED", "DENIED"
  int32 voteThreshold = 7;
}

message CreateProposalInput {
  aelf.Address creator = 1;
  string title = 2;
  string description = 3;
  int32 voteThreshold = 4;
}

message VoteInput {
  aelf.Address voter = 1;
  string proposalId = 2;
  bool vote = 3;  // true for yes, false for no
}

message MemberList {
  repeated Member members = 1;
}

message ProposalList {
  repeated Proposal proposals = 1;
}
Understanding the Code
1. Define Syntax & Imports
proto3version.- Import necessary Protobuf definitions and libraries.
2. RPC Methods
Initialize: Set up initial stateJoinDAO: User joins DAO. User'saddressis the function parameter.CreateProposal: User creates a proposal. User'saddress,title,description,vote thresholdare the function parameter.VoteOnProposal: User votes on a proposal. User'saddress,proposalvoteis the function parameter.GetAllProposals: Fetch list of proposals
3. Getter Methods
GetProposal: Fetch proposal by IDGetMemberCount: Fetch member countGetMemberExist: Check if a member exists by address
4. Message Definitions
Member: DAO member (address)Proposal: Proposal (title, description, votes, status, vote threshold)CreateProposalInput: Fields for creating a proposal (title, description, vote threshold)VoteInput: Fields for voting on a proposal (proposal ID, vote)MemberList: List of DAO membersProposalList: List of proposals
Defining Contract State
- Open the
src/BuildersDAOState.csfile. - Replace its contents with this code snippet.
using System.Collections.Generic;
using System.Diagnostics.CodeAnalysis;
using AElf.Sdk.CSharp.State;
using AElf.Types;

namespace AElf.Contracts.BuildersDAO
{
    // The state class is access the blockchain state
    public class BuildersDAOState : ContractState
    {
        public BoolState Initialized { get; set; }
        public MappedState<Address, bool> Members { get; set; }
        public MappedState<string, Proposal> Proposals { get; set; }
        public Int32State MemberCount { get; set; }
        public Int32State NextProposalId { get; set; }
    }
}
Understanding the Code
3. State Variables
Members: Mapping each member to a boolean indicates if they joined the DAOProposals: Mapping each proposal to an ID for identification and retrievalMemberCountIdandNextProposalId: Track total number of members and proposals
Next Step
- Implement the logic of our voting smart contract.
Implement Voting Smart Contract Logic
Checking Smart Contract Logics
- Open
src/BuildersDAO.cs - Replace the existing content with this code snippet.
using System.Collections.Generic;
using System.Security.Principal;
using AElf.Sdk.CSharp;
using AElf.Sdk.CSharp.State;
using AElf.Types;
using Google.Protobuf.WellKnownTypes;

namespace AElf.Contracts.BuildersDAO
{
    public class BuildersDAO : BuildersDAOContainer.BuildersDAOBase
    {
        const string author = "REPLACE PLACEHOLDER HERE";

        // Implement Initialize Smart Contract Logic
        public override Empty Initialize(Empty input) { }

        // Implement Join DAO Logic
        public override Empty JoinDAO(Address input) { }

        // Implement Create Proposal Logic
        public override Proposal CreateProposal(CreateProposalInput input) { }

        // Implement Vote on Proposal Logic
        public override Proposal VoteOnProposal(VoteInput input) { }

        // Implement Get All Proposals Logic
        public override ProposalList GetAllProposals(Empty input) { }

        // Implement Get Proposal Logic
        public override Proposal GetProposal(StringValue input) { }

        // Implement Get Member Count Logic
        public override Int32Value GetMemberCount(Empty input) { }

        // Implement Get Member Exist Logic
        public override BoolValue GetMemberExist(Address input) { }
    }
}
Aelf dAppChain does not allow duplicate identical smart contracts. Hence, we will be using the author variable as the unique identifier for our voting smart contract in order to deploy the smart contract successfully.
Implementing Initialize Function
- Go to the comment
Implement Vote on Proposal Logic. - Check if the smart contract is already initialized; return if true.
- Define a hardcoded proposal with necessary parameters.
- Update the Proposals state variable with the hardcoded proposal and increment the proposalId.
// Implement Initialize Smart Contract Logic
public override Empty Initialize(Empty input)
{
    Assert(!State.Initialized.Value, "already initialized");
    var initialProposal = new Proposal
    {
        Id = "0",
        Title = "Proposal #1",
        Description = "This is the first proposal of the DAO",
        Status = "IN PROGRESS",
        VoteThreshold = 1,
    };
    State.Proposals[initialProposal.Id] = initialProposal;
    State.NextProposalId.Value = 1;
    State.MemberCount.Value = 0;

    State.Initialized.Value = true;

    return new Empty();
}
Implementing Join DAO Function
- Go to the comment
Implement Join DAO Logic - Check if the member already exists in the DAO using the
Membersstate variable. - If not found, update
Membersto include the user's address. - Increment
membersCountto reflect the new member added.
You'll implement this function. Once done, you can proceed to the next page to compare your code with the reference implementation.
// Implement Join DAO Logic
public override Empty JoinDAO(Address input)
{
    // Based on the address, determine whether the address has joined the DAO. If it has, throw an exception
    // If the address has not joined the DAO, then join and update the state's value to true
    // Read the value of MemberCount in the state, increment it by 1, and update it in the state
    // Using 'return null' to ensure the contract compiles successfully. Please update it to the correct return value when implementing
    return null;
}
Implementing Create Proposal Function
- Go to the comment
Implement Create Proposal Logic - Check if the user is a DAO member (required to create proposals).
- Create a new proposal object using fields from
CreateProposalInput. UpdateProposals with the new proposal, increment NextProposalId, and return the created proposal object.
Now, use the provided code snippet to fill in the CreateProposal function.
// Implement Create Proposal Logic
public override Proposal CreateProposal(CreateProposalInput input)
{
    Assert(State.Members[input.Creator], "Only DAO members can create proposals");
    var proposalId = State.NextProposalId.Value.ToString();
    var newProposal = new Proposal
    {
        Id = proposalId,
        Title = input.Title,
        Description = input.Description,
        Status = "IN PROGRESS",
        VoteThreshold = input.VoteThreshold,
        YesVotes = { }, // Initialize as empty
        NoVotes = { }, // Initialize as empty
    };
    State.Proposals[proposalId] = newProposal;
    State.NextProposalId.Value += 1;
    return newProposal; // Ensure return
}
Implementing Vote On Proposal Function
-
Go to the comment
Implement Vote on Logic -
Perform these checks:
- Verify if the member is a DAO member (required to vote).
- Confirm if the proposal exists; otherwise, display an error message.
- Check if the member has already voted on the proposal; members can vote only once.
-
If all checks pass, store the member’s vote and update the proposal state.
-
Update the proposal status based on vote thresholds:
- If
yesVotesreach the threshold, update status to "PASSED". - If
noVotesreach the threshold, update status to "DENIED".
- If
Now, use the provided code snippet to complete the VoteOnProposal function.
// Implement Vote on Proposal Logic
public override Proposal VoteOnProposal(VoteInput input)
{
    Assert(State.Members[input.Voter], "Only DAO members can vote");
    var proposal = State.Proposals[input.ProposalId]; // ?? new proposal
    Assert(proposal != null, "Proposal not found");
    Assert(
        !proposal.YesVotes.Contains(input.Voter) && !proposal.NoVotes.Contains(input.Voter),
        "Member already voted"
    );

    // Add the vote to the appropriate list
    if (input.Vote)
    {
        proposal.YesVotes.Add(input.Voter);
    }
    else
    {
        proposal.NoVotes.Add(input.Voter);
    }

    // Update the proposal in state
    State.Proposals[input.ProposalId] = proposal;

    // Check if the proposal has reached its vote threshold
    if (proposal.YesVotes.Count >= proposal.VoteThreshold)
    {
        proposal.Status = "PASSED";
    }
    else if (proposal.NoVotes.Count >= proposal.VoteThreshold)
    {
        proposal.Status = "DENIED";
    }

    return proposal;
}
Implementing Get All Proposals Function
-
Go to the comment
Implement Get All Proposals Logic -
Create a new
ProposalListobject from the message definition inBuildersDAO.proto. -
Fetch and iterate through
Proposals. -
Update
ProposalListwith proposal objects and return the list of proposals.- If
yesVotesreach the threshold, update status to "PASSED". - If
noVotesreach the threshold, update status to "DENIED".
- If
You'll implement this function. Once done, you can proceed to the next page to compare your code with the reference implementation.
// Implement Get All Proposals Logic
public override ProposalList GetAllProposals(Empty input)
{
    // Create a new list called ProposalList
    // Start iterating through Proposals from index 0 until the value of NextProposalId, read the corresponding proposal, add it to ProposalList, and finally return ProposalList
    // Using 'return null' to ensure the contract compiles successfully. Please update it to the correct return value when implementing
    return null;
}
Implementing Get Proposal / Get Member Count / Get Member Exist Functions
1. Get Proposal
- Navigate to
Implement Get Proposal Logic. - Retrieve a proposal by
proposalId. - Use
proposalIdas the key to queryState.Proposals. - Return the corresponding proposal value.
2. Get Member Count
- Navigate to
Implement Get Member Count Logic. - Retrieve the total member count.
- Return the value of
MemberCountfromState.
3. Get Member Exist
- Navigate to
Implement Get Member Exist Logic. - Check if a member exists by
address. - Use
addressas the key to queryState.Members. - Return the corresponding existence value.
Implement these methods to access different states effectively in your smart contract.
// Implement Get Proposal Logic
public override Proposal GetProposal(StringValue input)
{
    var proposal = State.Proposals[input.Value];
    return proposal;
}

// Implement Get Member Count Logic
public override Int32Value GetMemberCount(Empty input)
{
    var memberCount = new Int32Value {Value = State.MemberCount.Value};
    return memberCount;
}

// Implement Get Member Exist Logic
public override BoolValue GetMemberExist(Address input)
{
    var exist = new BoolValue {Value = State.Members[input]};
    return exist;
}
With that, we have implemented all the functionalities of our Voting dApp smart contract.
In the next step, we will compile our smart contract and deploy our written smart contract to the aelf dAppChain.
Complete Implementation
Implementing Join DAO Function
- Check Membership : See if the address has already joined the DAO by checking State.Members. Use the Assert method for this verification.
- Add New Member : If the address isn't a member yet, add it to State.Members and set its value to true.
- Update Member Count : Increase State.MemberCount by 1 and save the new value.
public override Empty JoinDAO(Address input)
{
    // Based on the address, determine whether the address has joined the DAO. If it has, throw an exception
    Assert(!State.Members[input], "Member is already in the DAO");
    // If the address has not joined the DAO, then join and update the state's value to true
    State.Members[input] = true;
    // Read the value of MemberCount in the state, increment it by 1, and update it in the state
    var currentCount = State.MemberCount.Value;
    State.MemberCount.Value = currentCount + 1;
    return new Empty();
}
Implementing Get All Proposals Function
- Create a list object called
ProposalList. - Loop from 0 to the value of
State.NextProposalId. - In each loop iteration, get the values from
State.Proposalsand add them toProposalList. - Return
ProposalList.
public override ProposalList GetAllProposals(Empty input)
{
    // Create a new list called ProposalList
    var proposals = new ProposalList();
    // Start iterating through Proposals from index 0 until the value of NextProposalId, read the corresponding proposal, add it to ProposalList, and finally return ProposalList
    for (var i = 0; i < State.NextProposalId.Value; i++)
    {
        var proposalCount = i.ToString();
        var proposal = State.Proposals[proposalCount];
        proposals.Proposals.Add(proposal);
    }
    return proposals;
}
Once you've implemented these two methods and run the unit tests again, you should see that all test cases pass.
Building Smart Contract
- Build the new code with the following commands inside
srcfolder:
dotnet build
You should see BuildersDAO.dll.patched in the directory src/bin/Debug/net.6.0
Step 3 - Deploy Smart Contract
Create A Wallet
To send transactions on the aelf blockchain, you must have a wallet.
- Run this command to create aelf wallet.
aelf-command create

- You will be prompted to save your account, please do save your account as shown below:
? Save account info into a file? (Y/n) Y
Make sure to choose Y to save your account information.
ℹ️ Note: If you do not save your account information (by selecting n or N), do not export the wallet password. Only proceed to the next step if you have saved your account information.
- Next, enter and confirm your password. Then export your wallet password as shown below:
- Linux and macOs
- Windows
export WALLET_PASSWORD="YOUR_WALLET_PASSWORD"
$env:WALLET_PASSWORD = "YOUR_WALLET_PASSWORD"
Acquire Testnet Tokens (Faucet) for Development
To deploy smart contracts or execute on-chain transactions on aelf, you'll require testnet ELF tokens.
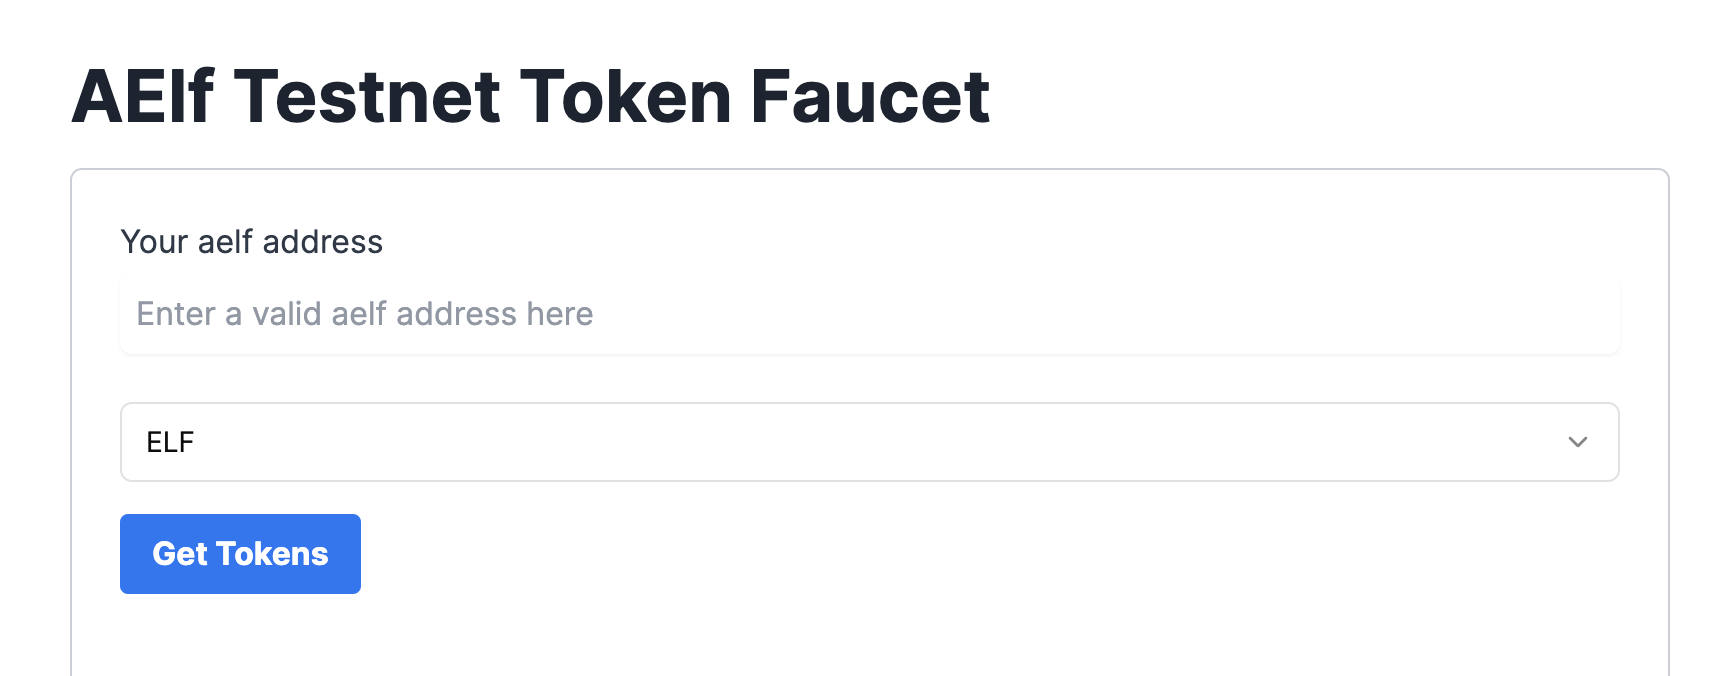
Get ELF Tokens
Go to https://faucet-ui.aelf.dev Enter your address and click Get Tokens.
Deploy Smart Contract:
The smart contract needs to be deployed on the chain before users can interact with it.
Run the following command to deploy a contract. Remember to export the path of BuildersDAO.dll.patched to CONTRACT_PATH.
- Linux and macOs
- Windows
export CONTRACT_PATH=$(find ~+ . -path "*patched*" | head -n 1)
aelf-deploy -a $WALLET_ADDRESS -p $WALLET_PASSWORD -c $CONTRACT_PATH -e https://tdvw-test-node.aelf.io/
$CONTRACT_PATH = Get-ChildItem -Recurse -Filter "*patched*" | Select-Object -First 1 -ExpandProperty FullName
$env:CONTRACT_PATH = $CONTRACT_PATH
aelf-deploy -a $env:WALLET_ADDRESS -p $env:WALLET_PASSWORD -c $env:CONTRACT_PATH -e https://tdvw-test-node.aelf.io/
-
Please wait for approximately 1 to 2 minutes. If the deployment is successful, it will provide you with the contract address.
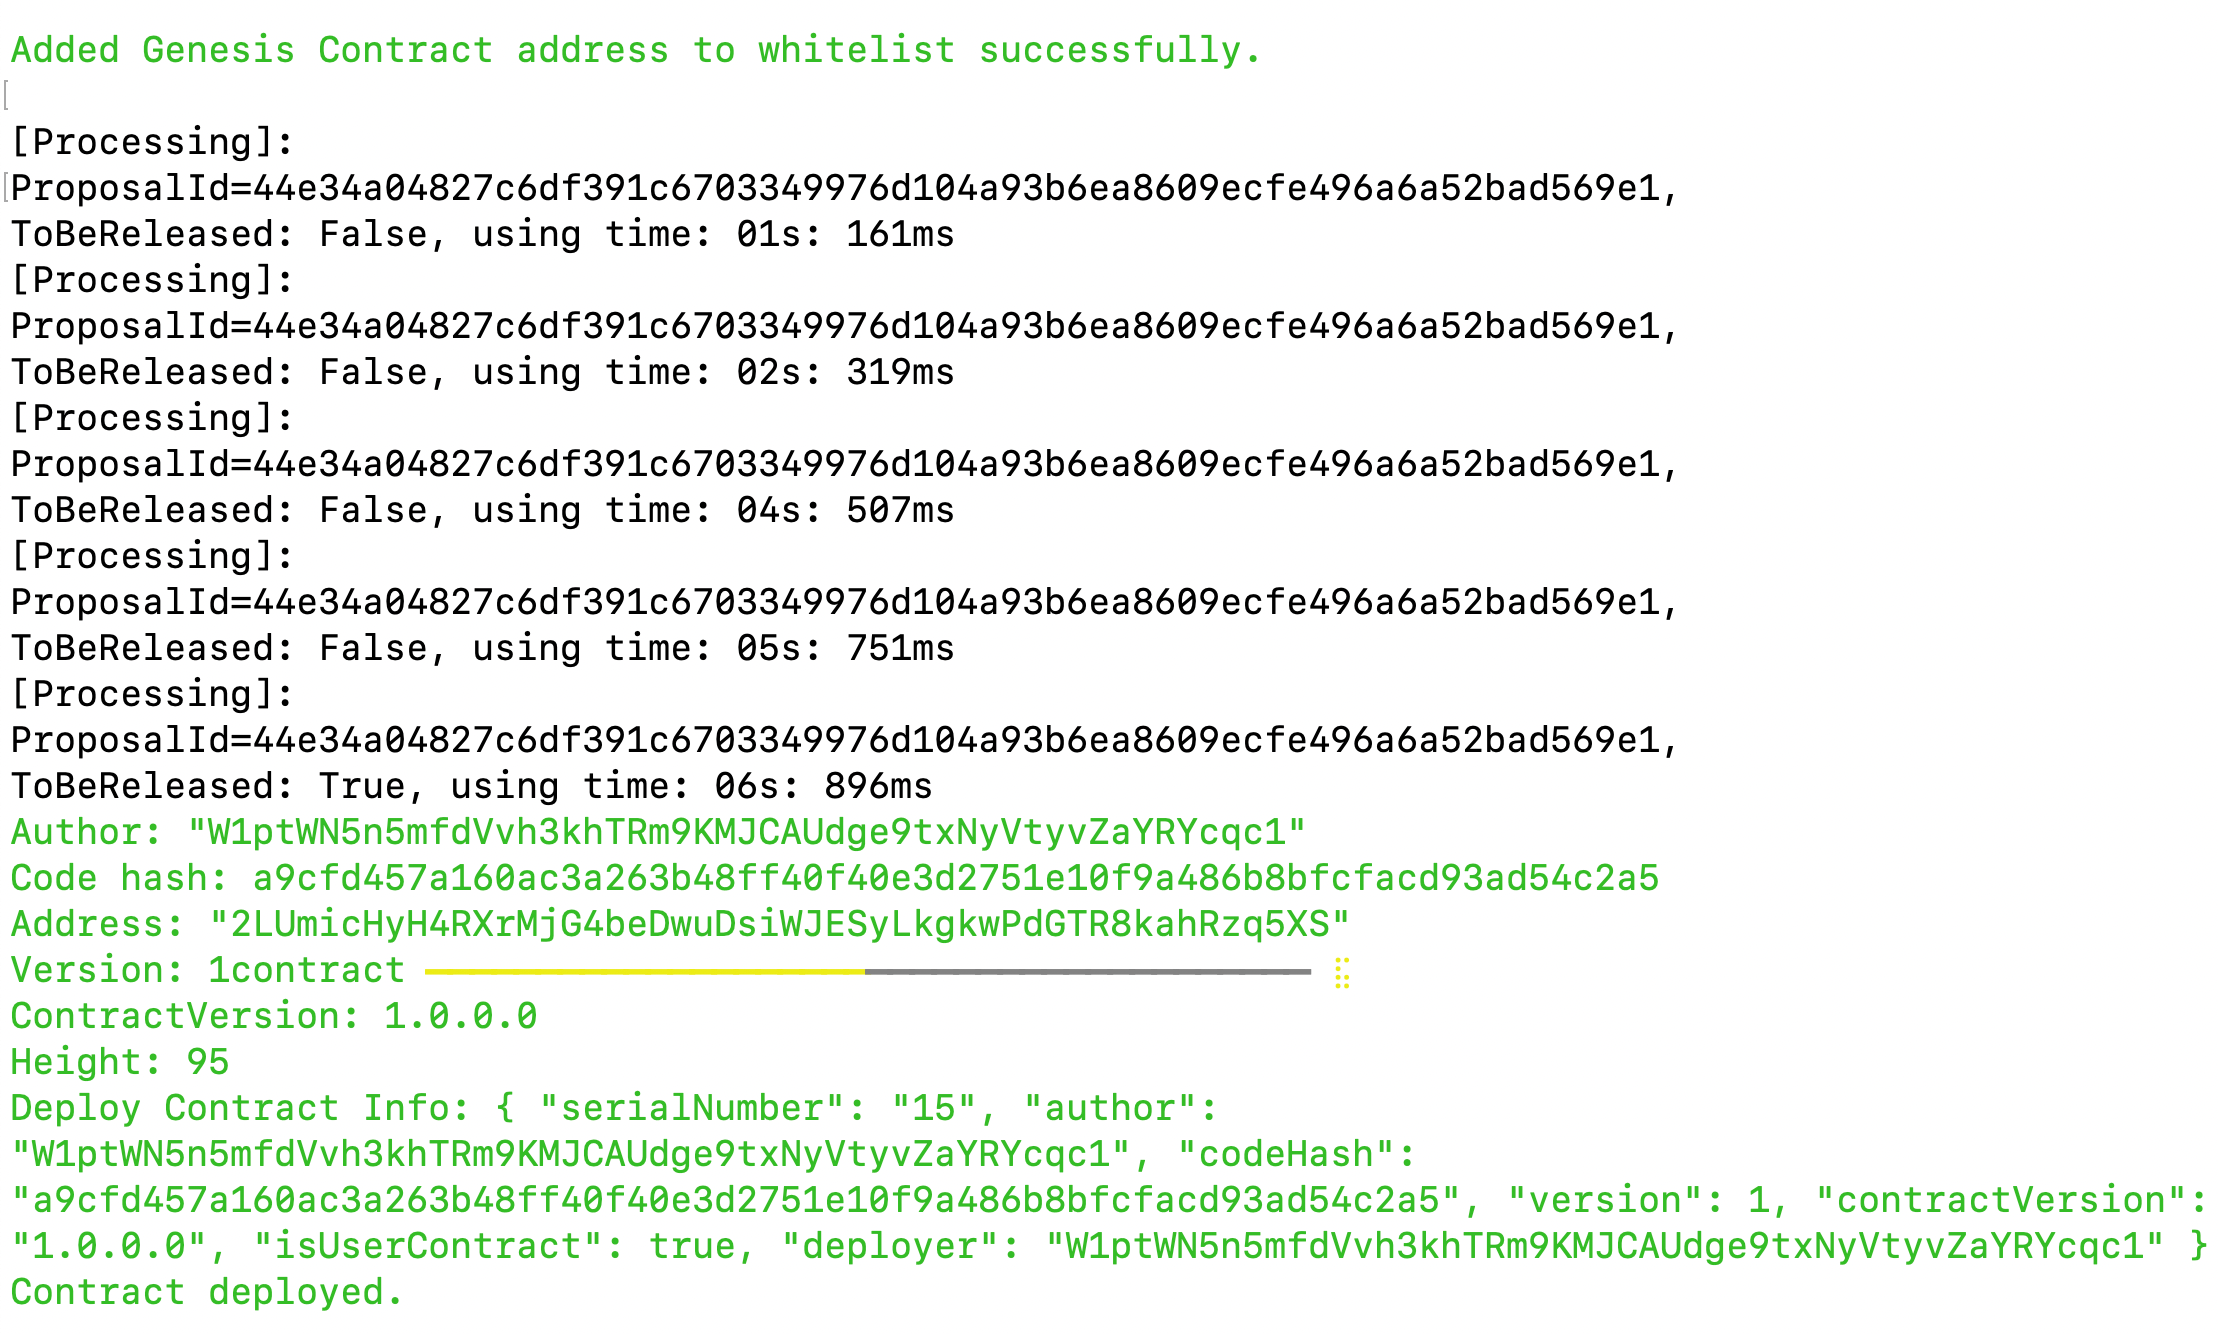
-
Copy the smart contract address from the
addressfield
-
Export your smart contract address:
- Linux and macOs
- Windows
export CONTRACT_ADDRESS="YOUR_SMART_CONTRACT_ADDRESS e.g. 2LUmicHyH4RXrMjG4beDwuDsiWJESyLkgkwPdGTR8kahRzq5XS"
$env:CONTRACT_ADDRESS="YOUR_SMART_CONTRACT_ADDRESS e.g. 2LUmicHyH4RXrMjG4beDwuDsiWJESyLkgkwPdGTR8kahRzq5XS"
ℹ️ Note: You are to copy the smart contract address as we will be referencing it in the next steps!
🎉 You have successfully deployed your dApp smart contract on the aelf testnet! In the next steps, we will be building the frontend components that allow us to interact with our deployed smart contract!
Step 4 - Interact with Your Deployed Smart Contract
Project Setup
Let's start by cloning the frontend project repository from GitHub.
- Run the following command in the
capstone_aelfdirectory:
git clone https://github.com/AElfProject/aelf-samples.git
- Next, navigate to the frontend project directory with this command:
cd aelf-samples/vote/2-dapp
- Once you're in the
2-dappdirectory, open the project with your preferred IDE (e.g., VSCode). You should see the project structure as shown below.
Install necessary libraries
- Run this command in the terminal:
npm install
We are now ready to build the frontend components of our Voting dApp.
Configure Portkey Provider & Write Connect Wallet Function
We'll set up our Portkey provider to let users connect their Portkey wallets to our app and interact with our voting smart contract.
-
Go to the
src/useDAOSmartContract.tsfile. -
In this file, we'll create a component that initializes the Portkey wallet provider and fetches our deployed voting smart contract. This will enable our frontend components to interact with the smart contract for actions like joining the DAO, creating proposals, and more.
-
Locate the comment
Step A - Setup Portkey Wallet Providerand replace the existing useEffect hook with the following code snippet:
//Step A - Setup Portkey Wallet Provider
useEffect(() => {
  (async () => {
    if (!provider) return null;

    try {
      // 1. get the aelf dAppChain using provider.getChain
      const chain = await provider?.getChain("tDVW");
      if (!chain) throw new Error("No chain");

      //Address of DAO Smart Contract
      //Replace with Address of Deployed Smart Contract
      const address = "2GkJoDicXLqo7cR9YhjCEnCXQt8KUFUTPfCkeJEaAxGFYQo2tb";

      // 2. get the DAO contract
      const daoContract = chain?.getContract(address);
      setSmartContract(daoContract);
    } catch (error) {
      console.log(error, "====error");
    }
  })();
}, [provider]);
ℹ️ Note: You are to replace the address placeholder with your deployed voting contract address from "Deploy Voting dApp Smart Contract"!
example: //Replace with Address of Deployed Smart Contract const address = "your_deployed_voting_contract_address";
- Next, go to the
src/HomeDAO.tsxfile.
The HomeDAO.tsx file is the landing page of our Voting dApp. It allows users to interact with the deployed smart contract, join the DAO, view proposals, and vote on them.
Before users can interact with the smart contract, we need to write the Connect Wallet function.
Find the comment Step B - Connect Portkey Wallet.
Replace the existing connect function with this code snippet:
const connect = async () => {
  //Step B - Connect Portkey Wallet
  const accounts = await provider?.request({
    method: MethodsBase.REQUEST_ACCOUNTS,
  });
  const account = accounts?.tDVW?.[0];
  setCurrentWalletAddress(account);
  setIsConnected(true);
  alert("Successfully connected");
};
In this code, we fetch the Portkey wallet account using the provider and update the wallet address state variable. An alert notifies the user that their wallet is successfully connected.
With the Connect Wallet function defined, we're ready to write the remaining functions in the next steps.
Write Initialize Smart Contract & Join DAO Functions
Let's write the Initialize and Join DAO functions.
-
Find the comment
Step C - Write Initialize Smart Contract and Join DAO Logic. -
Replace the existing
initializeAndJoinDAOfunction with this code snippet:
const initializeAndJoinDAO = async () => {
  //Step C - Write Initialize Smart Contract and Join DAO Logic
  try {
    const accounts = await provider?.request({
      method: MethodsBase.ACCOUNTS,
    });
    if (!accounts) throw new Error("No accounts");

    const account = accounts?.tDVW?.[0];
    if (!account) throw new Error("No account");

    if (!initialized) {
      await DAOContract?.callSendMethod("Initialize", account, {});
      setInitialized(true);
      alert("DAO Contract Successfully Initialized");
    }

    await DAOContract?.callSendMethod("JoinDAO", account, account);
    setJoinedDAO(true);
    alert("Successfully Joined DAO");
  } catch (error) {
    console.error(error, "====error");
  }
};
Here's what the function does:
-
Fetches your wallet account using the Portkey wallet provider.
-
Initializes the DAO smart contract if it hasn't been done already, updating the state and showing a success alert.
-
Calls the JoinDAO method with your wallet address, updating the state and showing a success alert.
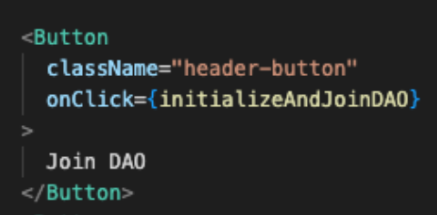
Now, wrap the initializeAndJoinDAO function in the "Join DAO" button to trigger both Initialize and JoinDAO when clicked.
Next, we'll write the Create Proposal function.
Write Create Proposal Function
Let's write the Create Proposal function.
-
Go to the
src/CreateProposal.tsxfile. This file is the "Create Proposal" page where users can enter details like the proposal title, description, and vote threshold. -
Find the comment
Step D - Configure Proposal Form. -
Replace the form variable with this code snippet:
//Step D - Configure Proposal Form
const form = useForm<z.infer<typeof formSchema>>({
  resolver: zodResolver(formSchema),
  defaultValues: {
    address: currentWalletAddress,
    title: "",
    description: "",
    voteThreshold: 0,
  },
});
ℹ️ Note: We set currentWalletAddress as the default value because the wallet address is passed from the HomeDAO.tsx page when the user clicks "Create Proposal" on the landing page.
Default value:
address: currentWalletAddress
Here's what the function does:
-
Initializes a new form variable with default values needed to create a proposal.
-
Fields include:
address,title,description, andvote threshold.
Now your form is ready for users to fill in the necessary details for their proposal.
Now, let's write the Create Proposal function for the form submission.
-
Scroll down to find the comment
Step E - Write Create Proposal Logic. -
Replace the onSubmit function with this code snippet:
// Step E - Write Create Proposal Logic
function onSubmit(values: z.infer<typeof formSchema>) {
  const proposalInput: IProposalInput = {
    creator: currentWalletAddress,
    title: values.title,
    description: values.description,
    voteThreshold: values.voteThreshold,
  };

  const createNewProposal = async () => {
    try {
      await DAOContract?.callSendMethod(
        "CreateProposal",
        currentWalletAddress,
        proposalInput
      );

      navigate("/");
      alert("Successfully created proposal");
    } catch (error) {
      console.error(error);
    }
  };

  createNewProposal();
}
Here's what the function does:
-
Creates a new
proposalInputvariable with form fields:title,description, andvote threshold. -
Invokes the
CreateProposalfunction of the deployed smart contract, using the current wallet address andproposalInput. -
If successful, navigates the user to the landing page and shows an alert that the proposal was created.
Next, we'll write the Vote and Fetch Proposal functions to complete the frontend components of our Voting dApp.
Write Vote & Fetch Proposals Function
In this step, we'll write the Vote and Fetch Proposals functions to complete our Voting dApp's frontend components.
-
Go to the
src/HomeDAO.tsxfile and scroll to theStep F - Write Vote Yes Logic comment. -
Replace the
voteYesfunction with this code snippet:
const voteYes = async (index: number) => {
  //Step F - Write Vote Yes Logic
  try {
    const accounts = await provider?.request({
      method: MethodsBase.ACCOUNTS,
    });

    if (!accounts) throw new Error("No accounts");

    const account = accounts?.tDVW?.[0];

    if (!account) throw new Error("No account");

    const createVoteInput: IVoteInput = {
      voter: account,
      proposalId: index,
      vote: true,
    };

    await DAOContract?.callSendMethod(
      "VoteOnProposal",
      account,
      createVoteInput
    );
    alert("Voted on Proposal");
    setHasVoted(true);
  } catch (error) {
    console.error(error, "=====error");
  }
};
Here's what the function does:
-
Takes an
indexparameter, representing the proposal ID to vote on. -
Fetches the wallet address using the Portkey provider.
-
Creates a
createVoteInputparameter with the voter's wallet address, proposal ID, and atruevalue for a Yes vote.. -
Calls the
VoteOnProposalfunction from the smart contract. -
Updates the state and shows an alert upon a successful vote.
The voteNo function works similarly but sets the vote to false.
- Scroll down to the
Step G - Use Effect to Fetch Proposalscomment and replace theuseEffecthook with this code snippet:
useEffect(() => {
  // Step G - Use Effect to Fetch Proposals
  const fetchProposals = async () => {
    try {
      const accounts = await provider?.request({
        method: MethodsBase.ACCOUNTS,
      });

      if (!accounts) throw new Error("No accounts");

      const account = accounts?.tDVW?.[0];

      if (!account) throw new Error("No account");

      if (!DAOContract) return;

      const proposalResponse = await (DAOContract?.callViewMethod)<IProposals>(
        "GetAllProposals",
        ""
      );

      setProposals(proposalResponse.data);
      alert("Fetched Proposals");
    } catch (error) {
      console.error(error);
    }
  };

  fetchProposals();
}, [DAOContract, hasVoted, isConnected, joinedDAO]);
Here's what the function does:
-
Defines the
fetchProposalsfunction that fetches the wallet address. -
Calls the
GetAllProposalsfunction from the smart contract, returning a list of proposals. -
Updates the state and shows an alert once the proposals are fetched.
Now that we've written all the necessary frontend functions and components, we're ready to run the Voting dApp application in the next step.
Run Application
In this step, we will run the Voting dApp application.
- To begin, run the following command on your terminal.
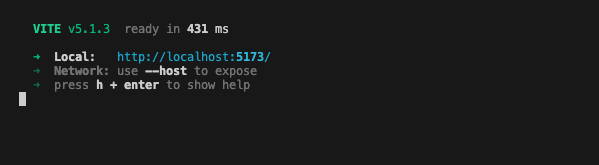
npm run dev
ℹ️ Note: Ensure that you are running this command under the vote/2-dapp folder.
-
You should observe the following as shown below.
-
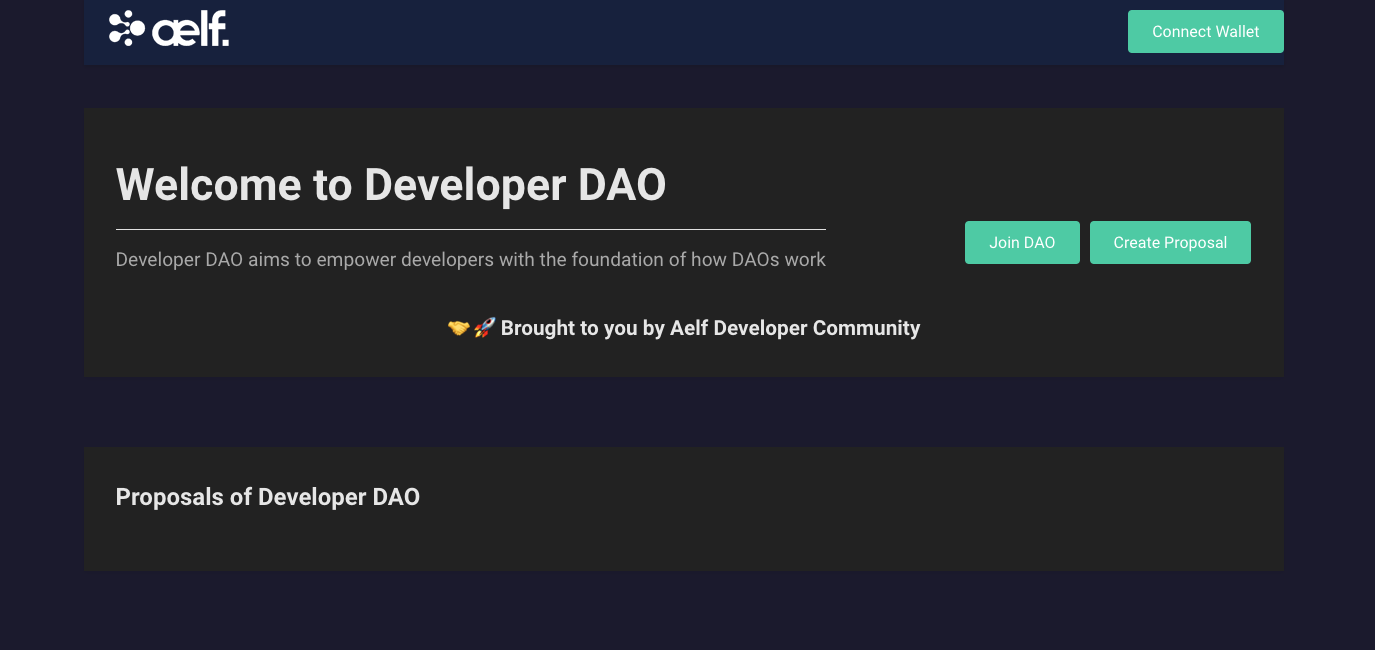
Upon clicking on the localhost URL, you should be directed to the StackUpDAO landing page as shown below.
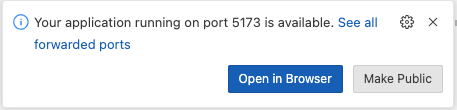
If you are developing and testing this with GitHub codespace, you can use Port Forward to test the web server that is running in codespace, here is the link on how to use Port forward for codespace https://docs.github.com/en/codespaces/developing-in-a-codespace/forwarding-ports-in-your-codespace
-
Usually codespace will automatically forward port, you should see a pop-up message at the bottom right of your codespace browser window as shown in the diagram below:
-
Click the link to open the Voting dApp in the browser.
Create Portkey Wallet
Portkey is the first AA wallet from aelf's ecosystem, migrating users, developers and projects from Web2 to Web3 with DID solution.
Users can swiftly log into Portkey via their Web2 social info with no private keys or mnemonics required. Underpinned by social recovery and decentralized guardian design, Portkey safeguards users' assets from centralized control and theft. Portkey has a unique payment delegation mechanism which enables interested parties to function as delegatees to pay for user activities on users' behalf. This means that users can create accounts for free and fees for other usages may also be covered in Portkey.
Portkey also provides crypto on/off-ramp services, allowing users to exchange fiat with crypto freely. It supports the storage and management of various digital assets such as tokens, NFTs, etc. The compatibility with multi-chains and seamless connection to all kinds of DApps makes Portkey a great way to enter the world of Web3.
With DID solution as its core, Portkey provides both Portkey Wallet and Portkey SDKs.
For more information, you may visit the official documentation for Portkey at https://doc.portkey.finance/.
- Download the Chrome extension for Portkey from https://chromewebstore.google.com/detail/portkey-wallet/iglbgmakmggfkoidiagnhknlndljlolb.
The Portkey extension supports Chrome browser only (for now). Please ensure that you are using Chrome browser. You may download Chrome from https://www.google.com/intl/en_sg/chrome/.
-
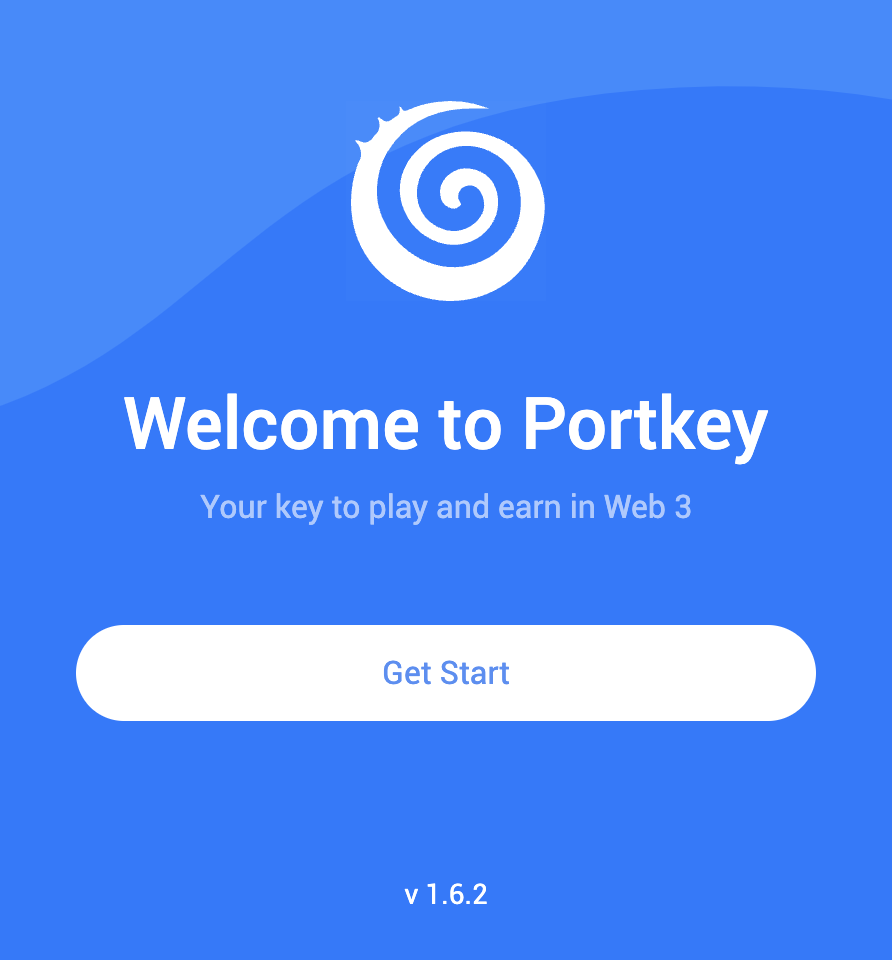
Once you have downloaded the extension, you should see the following on your browser as shown below.
-
Click on
Get Startand you should see the following interface as shown below.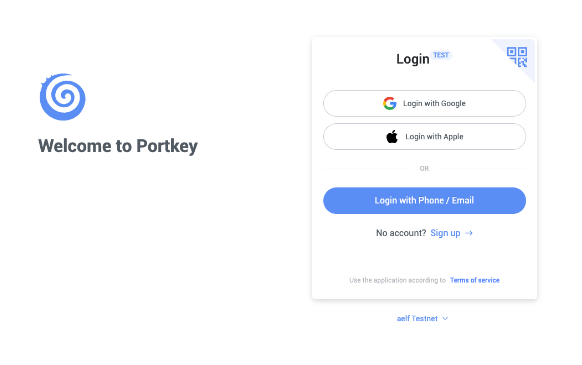
Sign up
-
Switch to aelf Testnet network by selecting it:
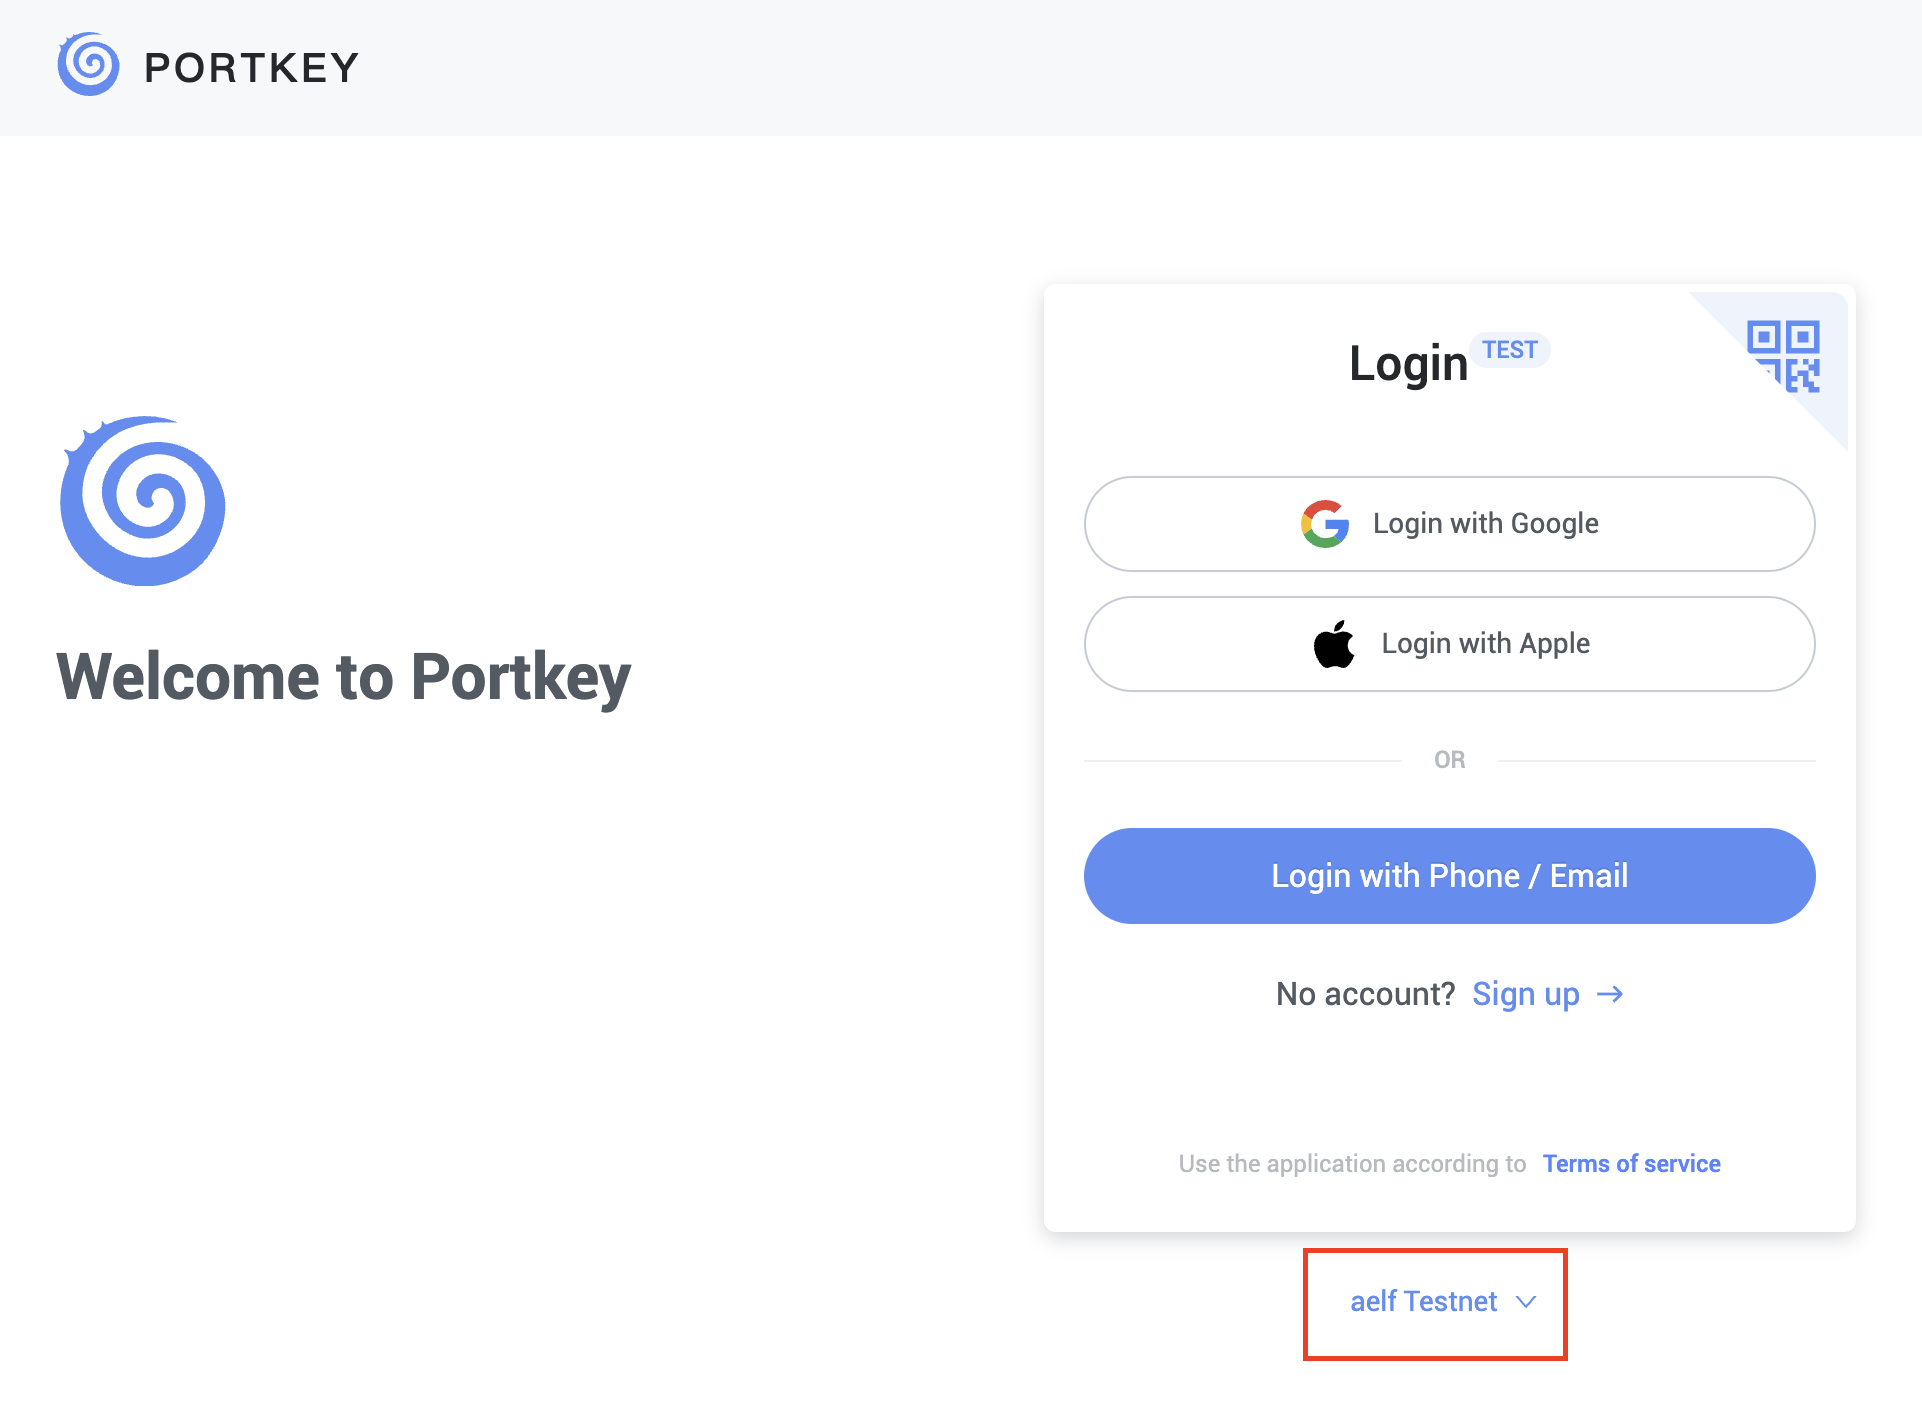
Please make sure you are using aelf Testnet in order to be able to receive your testnet tokens from the Faucet.
-
Proceed to sign up with a Google Account or your preferred login method and complete the necessary accounts creation prompts and you should observe the following interface once you have signed up.
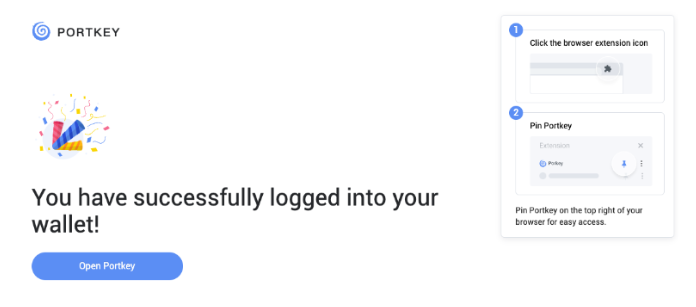
With that, you have successfully created your very first Portkey wallet within seconds. How easy was that?
It is highly recommended to pin the Portkey wallet extension for easier access and navigation to your Portkey wallet!
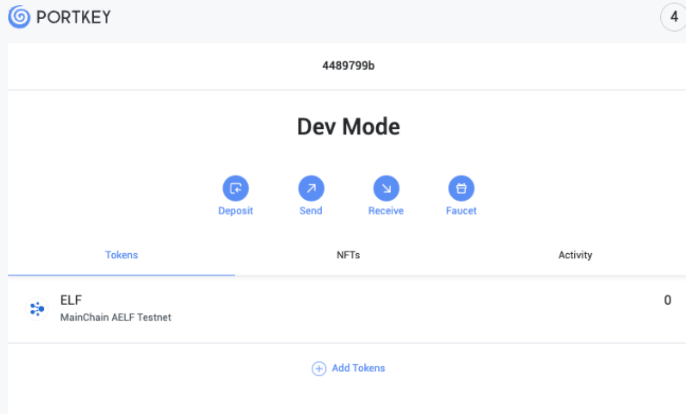
-
Next, click on ‘Open Portkey’ and you should now observe the following as shown below.
Connect Portkey Wallet
-
Click on "Connect Wallet" to connect your Portkey wallet. The button will change to "Connected" when the connection is successful.
-
Next, click on "Join DAO". You will be prompted to sign the "Initialize" and "Join DAO" methods, as shown below.
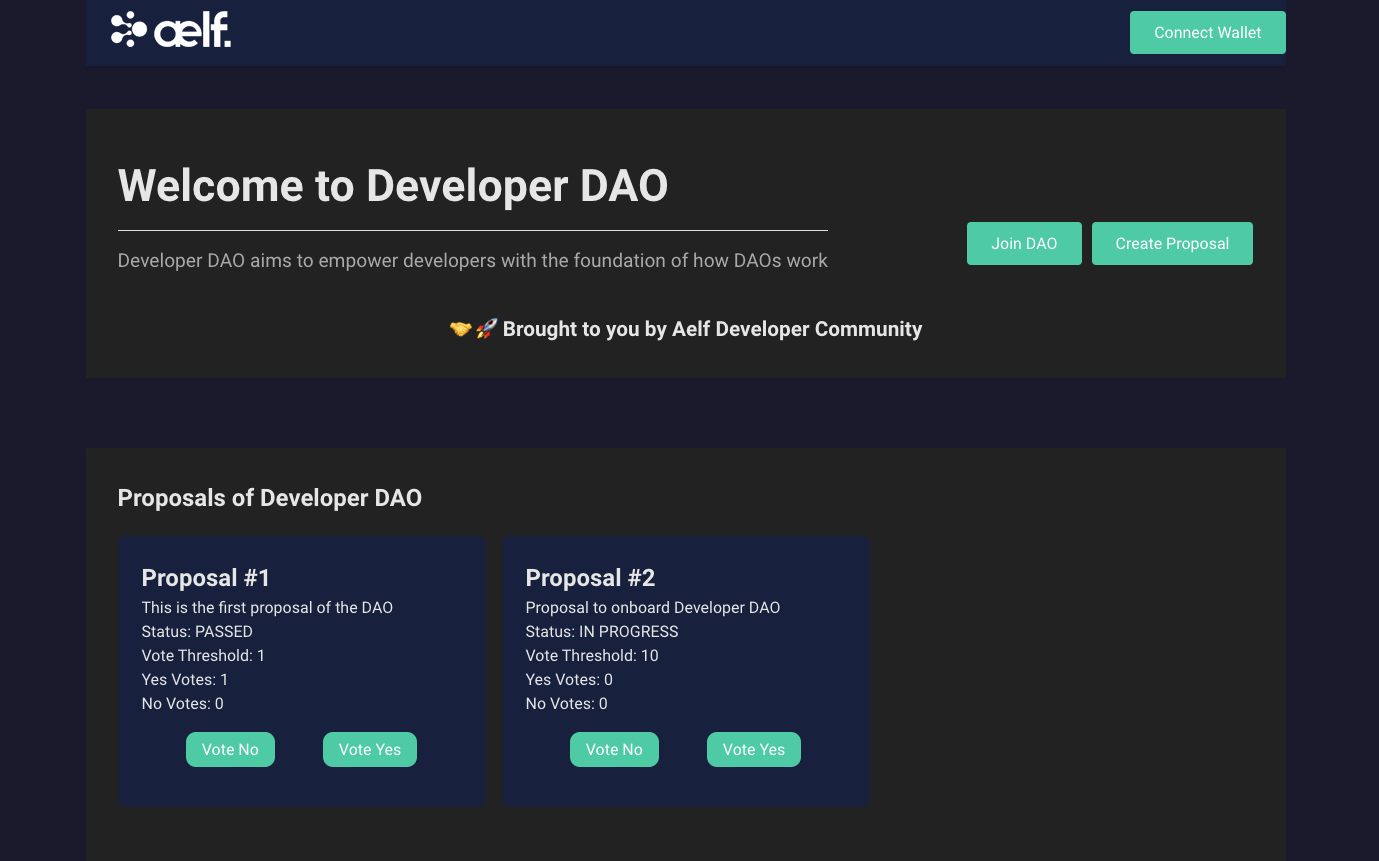
Once you have successfully joined the DAO, you should observe now that the landing page renders the proposal we have defined in our smart contract as shown below.
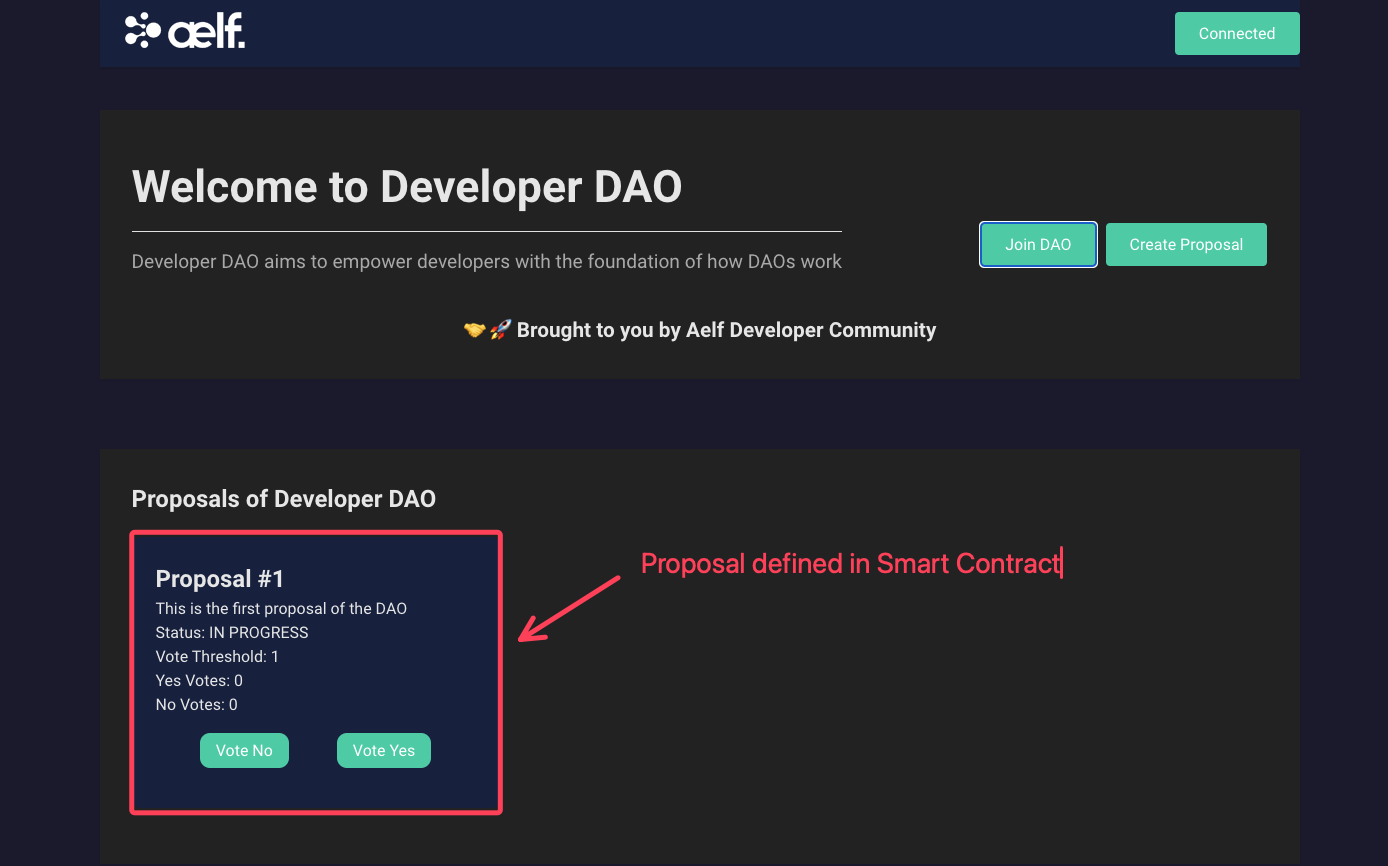
- Proposal #1 as defined in smart contract
⚠️ Reminder: This proposal has been hard coded within our smart contract to test our vote functionality and is meant for educational purposes! In actual production settings, proposals should not be hardcoded within your smart contract!
-
Let’s test our Vote functionality next.
-
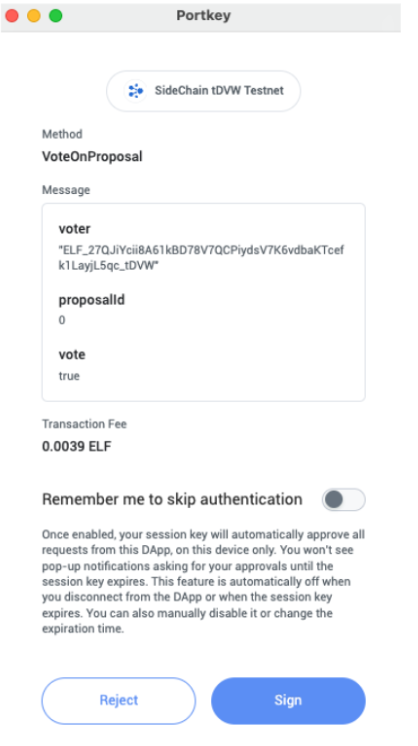
Proceed to click on "Vote Yes" and you should observe the following as shown below prompting you to sign the "Vote Yes" transaction.
-
Proceed to click on "Sign".
Upon a successful vote transaction, you should now observe that the proposal status has been updated to "PASSED" as shown below as the Yes vote count has reached the vote threshold.
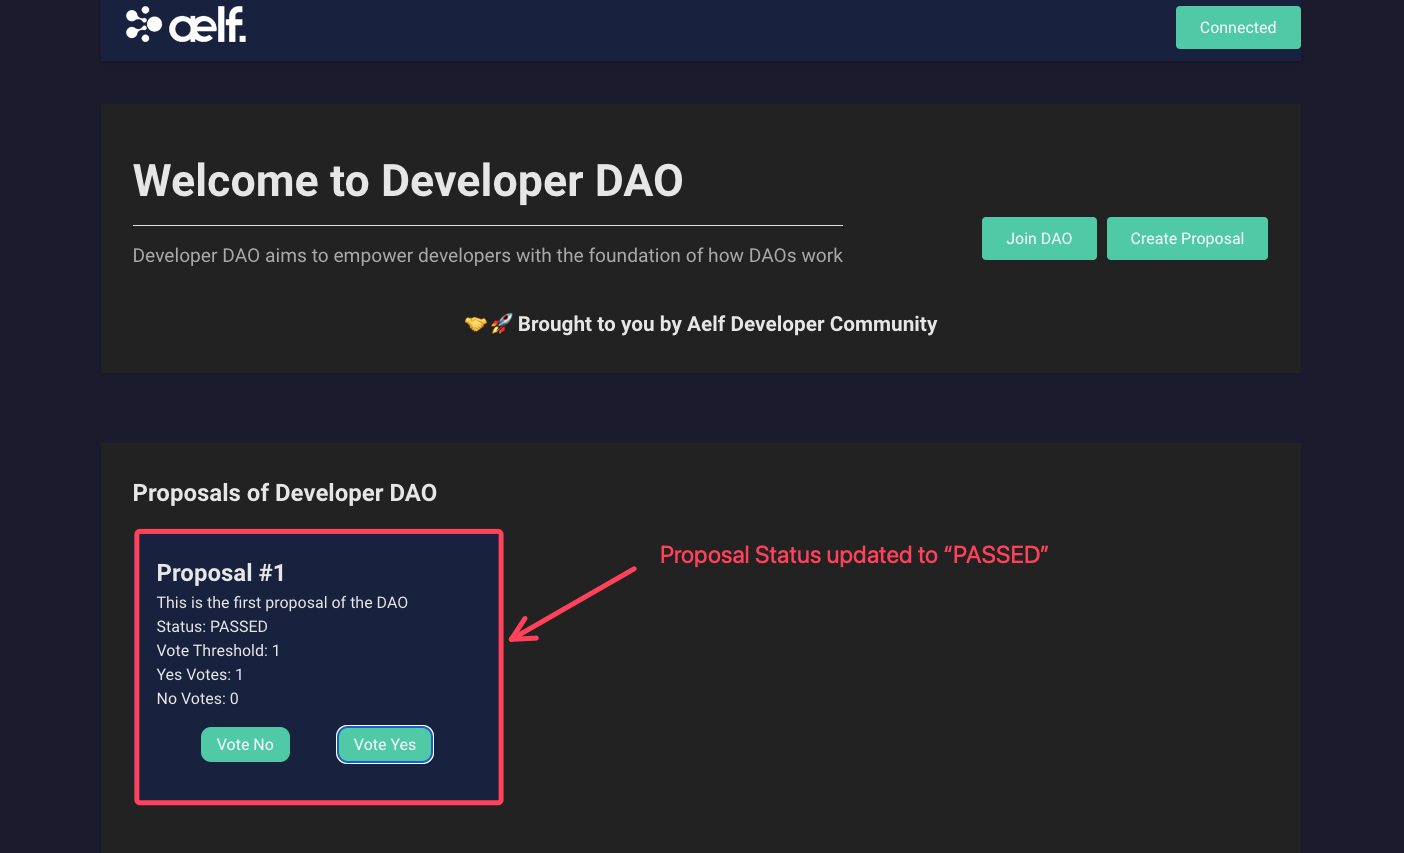
-
Proposal status updated to "PASSED" Lastly, we will be creating a proposal to wrap up our demonstration of our Voting dApp.
-
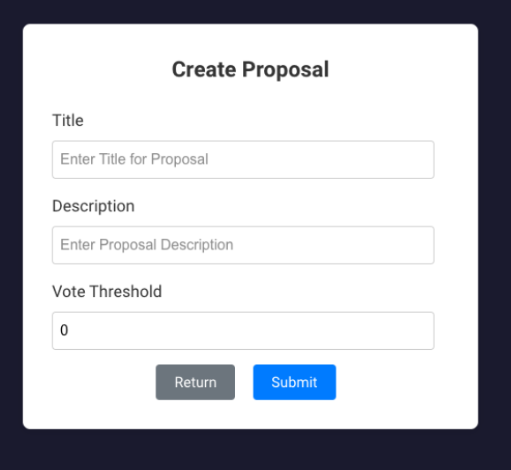
Click on "Create Proposal" for Proceed and you should be directed to the Create Proposal page as shown below.
-
Proceed to fill in the following fields under the Create Proposal form:
-
Title - Proposal #2
-
Description - Proposal to onboard Developer DAO
-
Vote Threshold - 10
-
-
click on "Submit" and you should observe the following as shown below.

-
Click on "Sign" to Proceed.
-
Upon a successful proposal creation, you should be directed back to the landing page with the newly created proposal rendered on the landing page as shown below.
🎉 Congratulations Learners! You have successfully built your Voting dApp and this is no mean feat!
🎯 Conclusion
🎊 Congratulations on completing the Voting Contract tutorial! 🎊 You've reached an important milestone in your journey through aelf blockchain development. 🌟
📚 What You've Learned
Throughout this tutorial, you've gained expertise in:
- 🛠️ Setting up your development environment for aelf blockchain development.
- 💻 Implementing complex smart contract logic for secure and transparent voting mechanisms.
- 🚀 Deploying and interacting with your Voting Smart Contract on the aelf testnet, and integrating it into a frontend application. You've learned how to connect user interfaces with blockchain smart contracts, enabling users to participate in DAOs, create proposals, vote, and track outcomes in real-time.
🔍 Final Output
By now, you should have:
- 📜 Successfully deployed your Voting Smart Contract on the aelf blockchain.
- 🎉 Interacted with the contract to join the DAO, create proposals, and participate in voting processes. Seeing your proposals progress based on votes is a testament to your understanding of decentralized decision-making! 🏆
➡️ What's Next?
Now that you've mastered the intricacies of voting contracts, it's time to explore more advanced topics or consider enhancing your knowledge in specialized areas of blockchain development. Dive into topics like:
- 📊 Implementing governance mechanisms for DAOs.
- 🔒 Enhancing security protocols for smart contracts.
- 🌐 Exploring cross-chain interoperability with aelf.
Keep pushing the boundaries of blockchain technology with aelf. Your journey doesn't end here – it's just the beginning of even more exciting possibilities in decentralized applications and smart contracts. 🚀
Happy coding and innovating with aelf! 😊